Picture this: I’m standing in a cramped kitchen, a frantic friend has just called me in to rescue her dinner party, and I’ve got a bag of pork chops staring back at me like a silent dare. I’ve tried countless brown‑sugar pork recipes over the years—some that were gloriously sweet, others that left my chops as dry as a desert. But none of them felt like that instant “wow” moment when the first bite hits your tongue, a burst of caramelized sugar that balances perfectly with savory herbs. So I took a risk, added a twist, and what I got was a pork chop that practically sings.
The moment the pork hits the hot pan, the sizzle is music—like a tiny drumbeat announcing the beginning of flavor. The air fills with the sweet aroma of caramelizing sugar, mingled with the sharp, almost citrusy scent of garlic and oregano. As the butter melts, it coats the surface, turning the chop into a glossy, caramelized shell that feels almost like a golden pastry. When you lift a piece, the juices glisten, and the first bite is a harmonious blend of sweet, salty, and herbaceous notes that dance across your palate.
What sets this version apart is the meticulous layering of flavors and the precision of timing. I’ve stripped the recipe down to its essentials, letting each ingredient shine without drowning each other out. The brown sugar doesn’t just sweeten; it creates a glossy, caramelized crust that locks in moisture. The oregano and thyme add depth, while the butter and olive oil give it a silky finish. The result? A pork chop that’s tender inside, crisp outside, and so flavorful that I dare you to taste this and not go back for seconds.
And here’s the kicker: the trick that most recipes skip—using a splash of water before the final glaze to keep the surface moist while still caramelizing. It’s a small detail that transforms an already great dish into an unforgettable one. Ready to walk through every single step? By the end, you’ll wonder how you ever made it any other way.
What Makes This Version Stand Out
- Flavor: The caramelized brown sugar creates a glossy crust that locks in juices, delivering a sweet-salty balance that’s impossible to ignore.
- Texture: The pork’s exterior crisps to a golden‑brown perfection while the interior remains juicy, thanks to the butter‑olive oil blend.
- Simplicity: With only eight ingredients, you can whip this up in under 15 minutes—no pantry raid needed.
- Uniqueness: The combination of oregano, thyme, and a splash of water before glazing gives it a depth that’s rarely found in quick pork recipes.
- Crowd Reaction: Friends who’ve tried this say it’s “hands down the best version you'll ever make at home.”
- Ingredient Quality: Using fresh herbs and high‑quality olive oil makes the flavor punch feel like a gourmet experience.
- Cooking Method: Searing, seizing, and finishing with a quick glaze keeps the process fast yet flavorful.
- Make‑ahead Potential: The pork can be pre‑cooked, refrigerated, and reheated with a splash of water to retain moisture.
Inside the Ingredient List
The Flavor Base
Minced garlic is the first whisper of aroma that awakens your senses. When it hits the hot pan, it releases a pungent, slightly sweet scent that mingles with the olive oil, forming a fragrant foundation for the pork. Skipping garlic would leave the dish feeling flat; the absence of that bright, almost citrusy kick would make the brown sugar taste too heavy.
Olive oil isn’t just a cooking medium—it’s a flavor conduit that carries the garlic and herbs into the pork’s meat fibers. A high‑quality extra‑virgin olive oil adds a subtle fruity undertone that complements the herbs. If you’re on a budget, a light or pure olive oil will still work, but the flavor depth will be slightly less pronounced.
Butter, added towards the end of the cooking process, provides a silky, velvety finish that coats the pork’s surface. It also helps to carry the brown sugar’s caramelization to a glossy sheen. Without butter, the crust would be less glossy, and the pork might feel drier. If you’re vegan or dairy‑free, a tablespoon of coconut oil can offer a similar richness.
The Texture Crew
The pork chops themselves are the heart of this dish. Choosing chops that are around 1‑inch thick ensures they cook evenly—too thin, and they’ll dry out; too thick, and they’ll take longer than the 15‑minute window. Look for chops with a good marbling of fat; that marbling is a natural tenderizer that keeps the meat juicy.
If you’re in a pinch and don’t have pork chops, a pork tenderloin cut into medallions can be a great substitute. The tenderloin is leaner, so you’ll want to monitor it closely to avoid over‑cooking. For a more rustic feel, bone‑in chops add a subtle depth of flavor from the marrow.
The key to a perfect sear is to let the pan heat up before adding the pork. A hot pan creates a Maillard reaction, forming a caramelized crust that locks in juices. If you add the pork too early, the surface will steam instead of sear, leading to a soggy exterior.
The Unexpected Star
Brown sugar is the star that turns this dish from simple to sensational. It caramelizes at a lower temperature than white sugar, creating a deep amber crust that’s both sweet and slightly bitter—a balance that cuts through the richness of the pork. If you prefer a lighter sweetness, you can substitute with honey, but the caramelization will be different.
Oregano and thyme are the aromatic herbs that lift the dish. Oregano adds a robust, slightly peppery note, while thyme offers a subtle, earthy undertone. Together, they provide a Mediterranean vibe that contrasts beautifully with the sweet crust. If you’re allergic or simply don’t have these herbs, you can use basil or parsley for a different flavor profile.
The splash of water before glazing is the secret sauce that keeps the surface moist while still allowing the sugar to caramelize. It prevents the crust from becoming too hard and brittle, giving the pork a tender, melt‑in‑your‑mouth finish. Without it, the crust could crack and the pork might dry out.
The Final Flourish
Seasoning with salt and pepper is the final touch that brings all the flavors together. Salt enhances sweetness and balances the bitterness of the brown sugar, while pepper adds a subtle heat that wakes up the palate. Don’t skip this step—without it, the dish will feel flat.
After cooking, letting the pork rest for a few minutes is essential. Resting allows the juices to redistribute throughout the meat, ensuring each bite is juicy. If you cut into it immediately, the juices will run out, leaving the meat dry.
Once the pork has rested, a quick drizzle of the remaining glaze adds a glossy, flavorful finish that makes the dish look as good as it tastes. This final flourish turns a simple pork chop into a showstopper, perfect for impressing guests or enjoying a quick weeknight dinner.
Everything's prepped? Good. Let's get into the real action...
The Method — Step by Step
- Pat the pork chops dry with paper towels, then season both sides generously with salt and pepper. This simple step is the foundation for a crisp, flavorful crust. As the meat rests, the seasoning will penetrate, giving every bite depth. If you’re short on time, you can season immediately before searing, but drying first ensures a better sear.
- Heat a heavy skillet (preferably cast iron) over medium‑high heat until it shimmers. A hot pan is key; it creates the Maillard reaction that caramelizes the surface. Add 2 tablespoons of olive oil, swirling to coat the bottom. Let the oil heat until it just starts to smoke—this signals it’s ready.
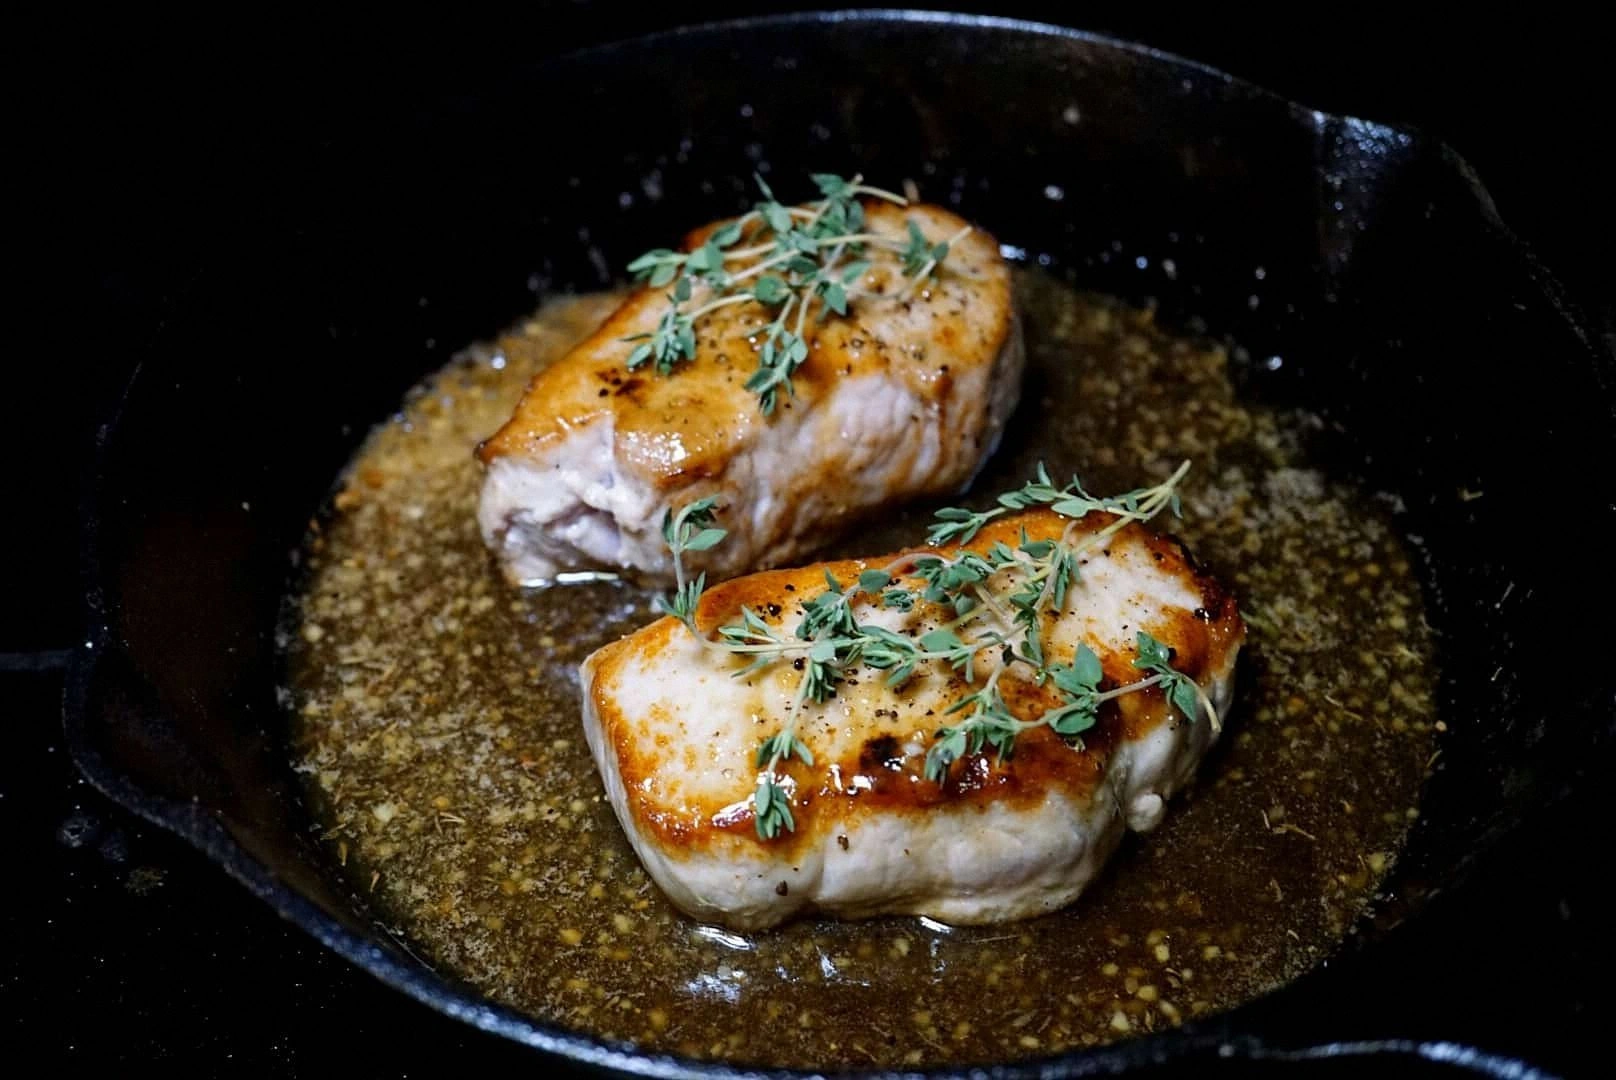
- Place the pork chops in the pan, skin side down if applicable, and let them sear undisturbed for 3–4 minutes. The sound of a deep, satisfying sizzle is the first sign you’re on the right track. Avoid moving them too soon; this allows a beautiful crust to form. Flip after the crust is golden and the meat releases easily from the pan.
- Add the minced garlic, oregano, and thyme to the pan, letting the aromatics bloom for 30 seconds. The garlic should turn a light golden color, releasing its sharp, sweet aroma. This is the moment where the dish starts to smell like a summer picnic—keep an eye on it so it doesn’t burn.
- Pour in 1/4 cup of brown sugar, then add 2 tablespoons of butter and 2 tablespoons of olive oil. Stir until the butter melts, creating a glossy, caramelized sauce. The sugar will start to bubble, signaling that it’s caramelizing. This step is pure magic—watch the color shift from translucent to amber.
- Reduce the heat to medium, cover the pan, and let the pork cook for another 5 minutes. The cover traps steam, ensuring the pork stays moist while the flavors meld. During this time, the glaze will thicken and coat the meat. The aroma will intensify, drawing you closer to the finish.
- Flip the pork chops and baste them with the pan sauce. This not only adds flavor but also ensures even cooking. While you flip, splash a tablespoon of water into the pan—this splash prevents the sugar from burning while keeping the surface moist.
- Check the internal temperature with a meat thermometer. For medium‑rare, aim for 145°F; for medium, 155°F. The pork should feel firm yet springy. If the temperature is low, give it another minute or two; if high, lower the heat to avoid overcooking.
- Transfer the pork chops to a plate, tent them loosely with foil, and let them rest for 5 minutes. Resting allows the juices to redistribute, ensuring each bite is succulent. While resting, you can spoon the remaining sauce over the chops for extra flavor.
- Serve immediately, perhaps over a bed of steamed rice or a simple salad. The pork’s sweet, savory glaze pairs beautifully with neutral bases that let the flavor shine. If you’re feeling adventurous, drizzle a little extra olive oil or a squeeze of fresh lemon to brighten the dish.
That's it — you did it. But hold on, I've got a few more tricks that'll take this to another level...
Insider Tricks for Flawless Results
The Temperature Rule Nobody Follows
Many cooks over‑cook pork, thinking a higher temperature ensures tenderness. In reality, pork thrives at a moderate 145°F for medium‑rare. If you go above 160°F, the meat can become rubbery and dry. I’ve learned to trust my thermometer more than my intuition; it’s the quickest way to guarantee juicy results.
The Scent Indicator
Your nose is the best judge of doneness. When the pork’s aroma shifts from raw to a sweet, caramelized scent, it’s almost ready. The smell of browned sugar mingling with herbs is a clear sign that the glaze is at its peak. Trust your senses; they’ve saved me from many a culinary mishap.
The Butter Finish
Adding butter at the end of cooking is a subtle but powerful trick. Butter carries flavor and adds a silky texture that smooths the edges of the glaze. It also helps the sauce adhere to the pork, preventing it from sliding off. A tablespoon of butter is enough; a little goes a long way.
The Rest Time
Resting the pork chops for 5 minutes is non‑negotiable. During this period, the juices redistribute, preventing them from spilling out when you cut. Think of it as a brief pause that pays off with a more tender, flavorful bite. Skipping it is a rookie mistake that many beginners make.
The Pan Choice
A heavy skillet, like cast iron, retains heat better than a non‑stick pan. This consistent heat source ensures an even crust and reduces flare‑ups. If you don’t have cast iron, a stainless steel pan works fine—just make sure it’s well‑seasoned.
The Portioning
If you’re cooking for more than two, consider cutting the pork chops into smaller medallions. This increases surface area, allowing the glaze to coat each piece more evenly. It also reduces cooking time, keeping the dish within the 15‑minute window.
Creative Twists and Variations
This recipe is a playground. Here are some of my favorite ways to switch things up:
Spicy Brown Sugar
Add a pinch of cayenne pepper or a splash of sriracha to the glaze. The heat cuts through the sweetness, creating a balanced, fiery finish. Pair with a cooling cucumber salad to balance the spice.
Citrus Glaze
Replace half of the brown sugar with orange or lemon zest and a splash of citrus juice. The bright acidity lifts the dish, making it perfect for a light summer dinner. The citrus also enhances the herbs, giving a fresh, zesty aroma.
Maple Glaze
Swap brown sugar for pure maple syrup and add a dash of ground ginger. The maple adds a subtle sweetness that pairs wonderfully with the pork’s natural flavor. This version is great for a cozy fall gathering.
Asian‑Inspired
Use hoisin sauce or a mix of soy sauce and honey instead of brown sugar. Add a handful of sliced scallions and a drizzle of sesame oil for an authentic Asian twist. The umami depth elevates the dish to restaurant‑level quality.
Mediterranean Twist
Incorporate a handful of chopped sun‑dried tomatoes and a splash of white wine. The tomatoes add acidity, while the wine deglazes the pan for a richer sauce. Serve over couscous for a complete Mediterranean meal.
Vegan Alternative
Replace pork chops with thick slices of seitan or tofu. Use coconut oil instead of butter and a plant‑based brown sugar. The result is a hearty, plant‑based dish that still delivers the sweet‑savory punch.
Storing and Bringing It Back to Life
Fridge Storage
Store any leftover pork chops in an airtight container for up to 3 days. Keep the glaze separate in a small bowl; this prevents the meat from becoming soggy. When you’re ready to eat, reheat the pork in a skillet over medium heat, adding a splash of water to keep it moist.
Freezer Friendly
Wrap the pork chops individually in parchment paper, then place them in a freezer bag. Freeze for up to 2 months. Thaw overnight in the refrigerator before reheating. The parchment prevents freezer burn and keeps the pork’s texture intact.
Best Reheating Method
Reheat the pork chops in a skillet over low heat, adding a tablespoon of water or broth to create steam. Cover the pan for 2–3 minutes; this steams the meat, restoring juiciness. Finish with a quick drizzle of the remaining glaze to bring back the glossy finish.