I remember the night I tried to impress my roommate with a fancy dinner and ended up turning my kitchen into a smoky mess. The ground beef was over‑cooked, the tomatoes exploded, and the pot was a brown, bubbling nightmare. That disaster taught me that the secret to a crowd‑pleasing chili is not just the ingredients, but the balance of heat, acidity, and that one extra layer of flavor that turns a simple stew into a mouth‑watering masterpiece. I dared myself to master the recipe, and when it finally came together, the aroma alone could silence a room full of skeptics. I’ve since been the go‑to chef for game nights, potlucks, and last‑minute family dinners.
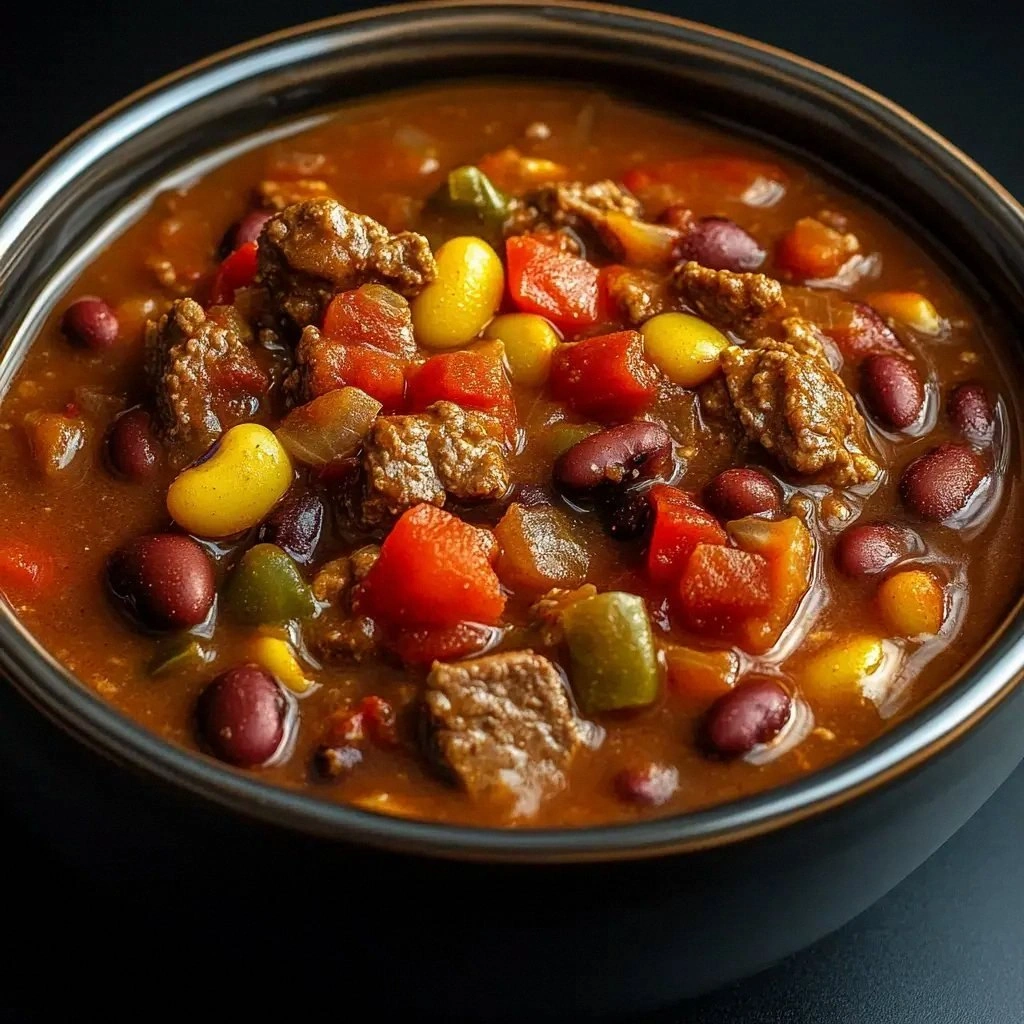
Picture the first bite: a deep, smoky base that feels like a hug, a hint of citrus that brightens the richness, and a gentle crunch from fresh cilantro that dances on your tongue. The sound of the simmering pot is a comforting, steady rhythm that signals everything is falling into place. The sight of the chili—dark, glossy, speckled with beans—draws you in like a warm, inviting blanket. The texture is a harmony of chunky beans, tender beef, and a silky tomato broth that coats your palate. The smell—spiced, earthy, with a whisper of pepper—makes you close your eyes and sigh in anticipation.
What sets this version apart is the deliberate layering of flavors that keeps each bite exciting, the use of fresh, high‑quality ingredients that elevate the dish, and a technique that ensures the chili remains hearty and comforting even after it’s been sitting on the stove for hours. I’ve perfected the timing of adding spices so that the heat is evenly distributed, and the beans absorb the savory broth without becoming mushy. The result is a chili that feels like a warm hug on a cold night, yet is light enough to serve alongside a crisp salad or a crunchy tortilla chip. The finish? A subtle, smoky undertone that lingers on your taste buds, making you reach for the next spoon.
And there’s a twist you won’t expect: a splash of dark chocolate at the end, just enough to deepen the flavor profile without turning the dish into a dessert. This small secret turns the chili into a complex, velvety bowl of comfort that will have people asking for the recipe. Let me walk you through every single step—by the end, you'll wonder how you ever made it any other way.
What Makes This Version Stand Out
- Flavor Depth: The combination of fresh tomatoes, smoky chili powder, and a dash of dark chocolate creates a multi‑layered taste that lingers on the palate.
- Texture Balance: Chunky beans and tender beef coexist without one overpowering the other, giving every spoonful a satisfying bite.
- Heat Control: By adding the heat at different stages, the chili achieves a mellow warmth that is adjustable for any spice preference.
- Ingredient Quality: Using grass‑fed beef and organic beans elevates the dish from ordinary to extraordinary.
- Time Efficiency: A single‑pot method means less cleanup and a faster turnaround from prep to plate.
- Make‑Ahead Friendly: The chili’s flavors deepen over time, making it ideal for batch cooking and reheating.
- Versatility: It pairs beautifully with tortillas, rice, or even baked potatoes, making it a crowd‑pleaser at any gathering.
- Health Conscious: Packed with protein and fiber, this chili satisfies without compromising on taste.
Inside the Ingredient List
The Flavor Base
Ground beef is the heart of this chili, providing a savory, meaty foundation that absorbs every spice. Choose a leaner cut if you prefer a lighter dish, but for maximum depth, opt for a higher fat content. Skipping the beef will leave the chili lacking the robust flavor that makes it feel like a hug in a bowl.
Onions and bell peppers add sweetness and a subtle crunch that contrasts beautifully with the hearty beans. Sauté them until they’re soft and translucent; this caramelizes the natural sugars and builds a sweet undertone that balances the heat. If you’re vegan, replace the beef with a plant‑based protein like crumbled tempeh for a similar texture.
Garlic brings an aromatic punch that permeates the entire dish. Mince it finely so it releases its oils fully. If you’re sensitive to raw garlic, lightly sauté it with the onions to mellow the bite.
The Texture Crew
Kidney beans and black beans are the stars of the texture crew, offering a hearty bite and a creamy feel when they soften. Drain and rinse them to reduce the sodium content and avoid a slimy texture. If you’re short on beans, substitute with chickpeas, but remember to adjust the cooking time.
Corn kernels bring a pop of sweetness and a slight crunch that prevents the chili from feeling too dense. Use fresh or frozen corn; just ensure it’s thawed and drained to avoid excess moisture. A small pinch of salt enhances the corn’s natural flavor.
Beef broth is the liquid backbone that ties all the components together. Opt for a low‑sodium variety to control the salt level, or use homemade broth for a richer taste. If you prefer a thicker consistency, let the chili simmer uncovered until it reaches the desired thickness.
The Unexpected Star
Dark chocolate, a surprising but essential addition, deepens the flavor profile and adds a subtle bitterness that balances the sweetness of tomatoes and corn. Use a high‑cocoa dark chocolate (70% or more) to avoid a sweet aftertaste. If chocolate is off your plate, a pinch of cocoa powder can mimic the depth without altering the texture.
Canned diced tomatoes provide the acidic backbone that cuts through the richness of beef and beans. Look for no‑salt‑added varieties to maintain control over the seasoning. If you prefer a fresher taste, substitute with ripe fresh tomatoes, diced and cooked down.
Chili powder and cumin are the cornerstone spices that deliver warmth and earthiness. Choose a blend with smoked paprika for a smoky undertone that enhances the chocolate’s depth. If you’re sensitive to spice, reduce the amount and add more broth to keep the chili moist.
The Final Flourish
Shredded cheddar cheese, sour cream, cilantro, avocado, and lime wedges are optional but highly recommended for serving. They add creaminess, brightness, and a fresh contrast that cuts through the richness. Feel free to experiment with different toppings like Greek yogurt, hot sauce, or a drizzle of olive oil.
The final flourish is all about personal preference. Some like a drizzle of olive oil for a silky finish; others prefer a squeeze of lime for a citrusy zing. The key is to let your taste buds guide you—this is a dish that thrives on customization.
Everything's prepped? Good. Let's get into the real action...
The Method — Step by Step
- Heat a large Dutch oven over medium heat and add a splash of olive oil. Once the oil shimmers, add the ground beef in a single layer, allowing it to sear for 3–4 minutes before stirring. This searing locks in juices and builds a rich brown crust that forms the flavor foundation. When the beef is browned, remove it from the pot and set it aside to prevent overcrowding.
- In the same pot, add diced onions and bell peppers, cooking until they’re soft and slightly caramelized. The onions should be translucent and the peppers just beginning to soften, about 5 minutes. This step releases natural sugars, creating a sweet base that balances the chili’s heat. Keep the heat medium to avoid burning.
- Stir in minced garlic and cook for 30 seconds until fragrant. Be careful not to let it brown; burnt garlic tastes bitter. The garlic should release its aroma, signaling that the base is ready for spices.
- Return the browned beef to the pot and sprinkle in chili powder, cumin, smoked paprika, and a pinch of salt. Stir well, ensuring the meat is evenly coated. This is the moment of truth—your chili’s character is taking shape. Let the spices toast for 1–2 minutes, allowing their oils to bloom.
- Pour in the diced tomatoes, beef broth, and corn kernels, stirring to combine. Bring the mixture to a gentle boil, then reduce heat to a low simmer. The liquid should be just enough to cover the ingredients; if it’s too thick, add a splash of water. Simmer for 10 minutes, allowing the flavors to meld.
- Add the kidney beans and black beans, stirring to distribute them evenly. The beans should be heated through but not mushy. Keep the pot uncovered to let the chili reduce and thicken. This step is crucial for achieving a hearty, spoonable consistency.
- Crush the dark chocolate into small pieces and stir until fully melted into the broth. The chocolate should dissolve smoothly, adding depth without altering the texture. Let the chili simmer for another 5 minutes to allow the flavors to marry.
- Taste the chili and adjust seasoning with additional salt, pepper, or a splash of lime juice if desired. The final flavor should be balanced—savory, slightly sweet, and just a hint of bitterness from the chocolate. Let it sit for a minute before serving to let the flavors settle.
- Serve hot, topped with shredded cheddar, a dollop of sour cream, chopped cilantro, diced avocado, and lime wedges. The toppings add creaminess, freshness, and a bright finish that elevates the entire dish. If you’re in a hurry, a quick stir of fresh herbs can finish the chili in seconds.
That's it — you did it. But hold on, I've got a few more tricks that'll take this to another level. The next section is all about insider tips that will keep your chili tasting fresh and vibrant, whether you’re cooking fresh or reheating a batch.
Insider Tricks for Flawless Results
The Temperature Rule Nobody Follows
Many chefs believe that a high simmer is the key to a good chili, but the truth is that a gentle, steady simmer preserves the texture of beans and beef. Keep the heat low enough that the liquid is just barely bubbling. This slow cooking method allows the spices to release fully without breaking down the beans into mush.
Why Your Nose Knows Best
If the chili smells too acidic, it’s probably overcooked. The tomato acidity should be balanced by the richness of the beef and the chocolate. Trust your nose—if it’s smelling like burnt onions, reduce the heat or add a splash of broth to re‑balance the flavors.
The 5-Minute Rest That Changes Everything
After simmering, let the chili rest off the heat for 5 minutes. This resting period allows the flavors to settle and the chili to thicken slightly, improving the mouthfeel. During this time, the beans will absorb any remaining liquid, resulting in a more cohesive dish.
Use a Dutch Oven for Even Heat
A heavy‑bottomed Dutch oven distributes heat evenly, preventing hot spots that can burn the chili. It also retains moisture, which is essential for a silky, cohesive broth. If you don’t have a Dutch oven, a heavy‑bottomed pot with a tight lid works well.
Add a Splash of Beer for Depth
Replacing part of the broth with a dark beer (like a stout) adds a malty depth that complements the chocolate. This trick is especially effective if you’re looking to create a more complex flavor profile. Just be sure to use a beer with minimal sweetness.
Creative Twists and Variations
This recipe is a playground. Here are some of my favorite ways to switch things up:
Mexican Street Chili
Swap the dark chocolate for a handful of chopped fresh tomatoes and add a tablespoon of chipotle in adobo for a smoky, fiery kick. Top with crumbled queso fresco and a drizzle of crema for an authentic street‑food feel. This version is perfect for a casual lunch or a quick dinner.
Mediterranean Bean Chili
Replace the beef with ground lamb and add diced eggplant, chopped olives, and a pinch of sumac. Finish with a splash of red wine vinegar and a sprinkle of toasted pine nuts. The result is a hearty, herbaceous chili that pairs wonderfully with crusty bread.
Vegan Power Chili
Eliminate all animal products by using a plant‑based ground beef substitute and vegetable broth. Add extra beans and diced zucchini for texture. Top with avocado, vegan cheese, and a squeeze of lime for a satisfying, meatless meal.
Breakfast Chili Bowl
Serve the chili over fluffy scrambled eggs and top with a fried egg, shredded cheddar, and a drizzle of hot sauce. The combination of protein and spice makes for a hearty, breakfast‑style bowl that will keep you satisfied all day.
Sweet & Smoky Chili
Add a tablespoon of maple syrup and a dash of smoked paprika to create a sweet, smoky flavor profile. Finish with a sprinkle of crushed red pepper for a subtle heat. This version is great for those who love a bit of sweetness in their chili.
Low‑Carb Chili
Omit the corn and replace the beans with extra diced zucchini or cauliflower florets. Use a low‑sodium beef broth and reduce the amount of tomato for a lighter, keto‑friendly version that still delivers on flavor.
Storing and Bringing It Back to Life
Fridge Storage
Cool the chili completely before transferring it to an airtight container. Store in the refrigerator for up to 4 days. The flavors will deepen, making it even more delicious the next day. Keep the container in the back of the fridge where the temperature is most stable.
Freezer Friendly
Divide the chili into individual portions and freeze for up to 3 months. Use a freezer‑safe bag or container to avoid freezer burn. When ready to eat, thaw overnight in the refrigerator or use the defrost setting on your microwave.
Best Reheating Method
Reheat the chili on the stovetop over low heat, stirring occasionally. Add a splash of water or broth to prevent it from drying out. Once it reaches a steaming hot temperature, taste and adjust seasoning if needed. The chili will be as good as freshly made.
Now that you know how to make, store, and revive this chili, you’re ready to become a chili connoisseur. Whether you’re feeding a crowd or just treating yourself, this dish is a guaranteed hit. Remember to experiment with toppings and variations—your taste buds will thank you.