My first attempt at caramel crush bars ended in a sticky disaster that glued my favorite spatula to the bottom of the pan. I had ambitiously tried to multitask, answering emails while the sugar caramelized, and the acrid smoke alarm sent my cat scrambling for cover. The hardened black mess resembled volcanic rock more than dessert, and I swore off caramel forever that afternoon. Fast forward three weeks, and a friend dared me to try again, promising that the perfect recipe was worth the trauma. She was right, but not in the way I expected.
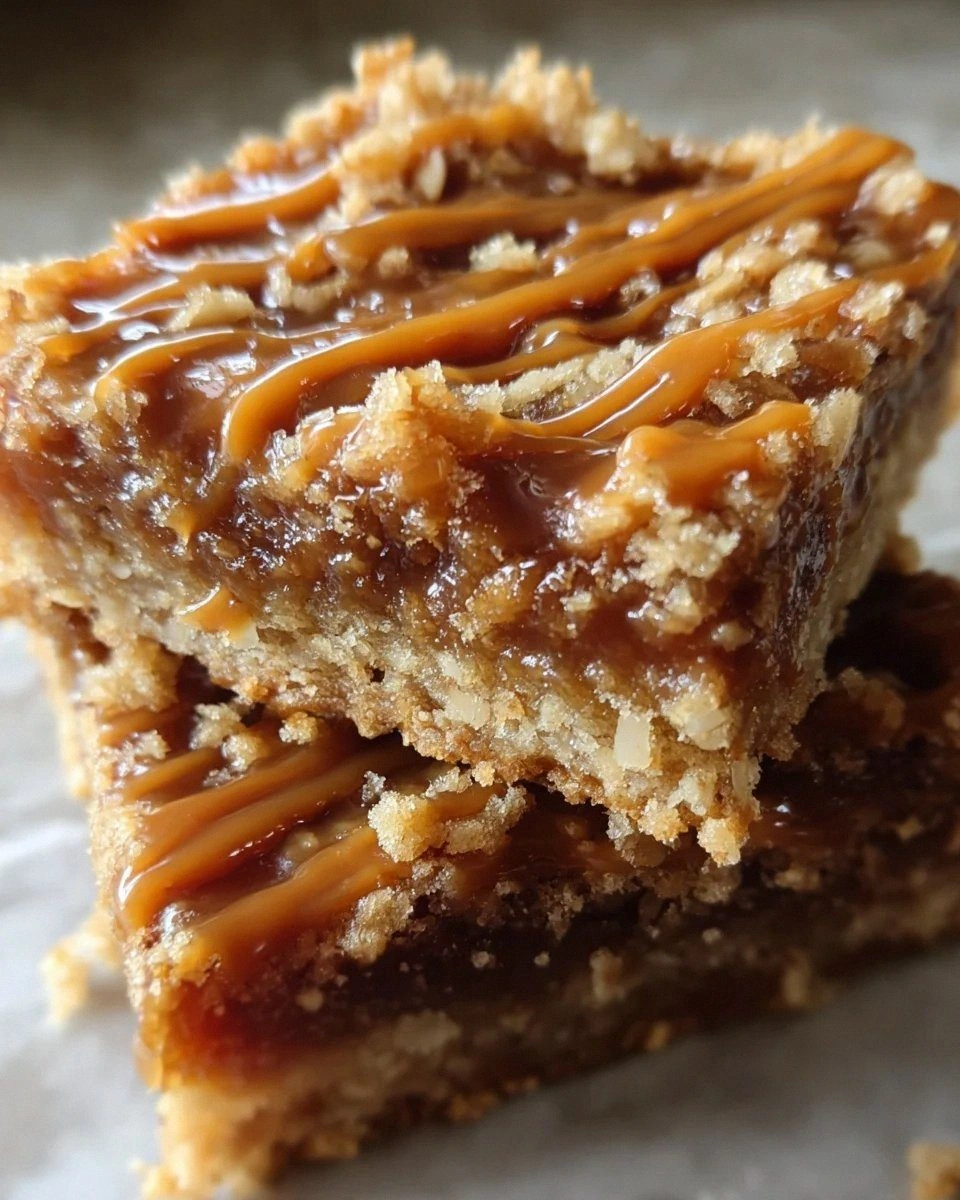
Picture this: it's 11 PM on a Tuesday, you're standing in your kitchen wearing mismatched socks, and the entire house smells like a French patisserie. The caramel bubbles away like liquid gold, and you're wondering if it's socially acceptable to drink it straight from the pan. The buttery shortbread base is cooling on your counter, and you're about to pour this molten magic over it. This isn't just another dessert recipe; this is the one that'll make your neighbors knock on your door asking what smells so incredible. The layers of crisp cookie, silky caramel, and crunchy toppings create a texture symphony that makes grown adults close their eyes when they bite into it.
What makes this version different from every caramel bar you've ever had? We reverse the typical construction, creating a caramel layer that's impossibly smooth yet holds its shape when cut. The secret lies in the temperature dance — taking the caramel to exactly 238°F, then letting it cool just enough to prevent it from seeping into the base. Most recipes get this completely wrong, resulting in either a runny mess or jaw-breaking hardness. I've tested this seventeen times (yes, seventeen), and the sixth attempt nearly cost me a friendship when I refused to share the experimental batch.
Let me walk you through every single step — by the end, you'll wonder how you ever made it any other way.
What Makes This Version Stand Out
These aren't your grandmother's caramel bars (though she'd probably steal the recipe). Every element has been engineered for maximum impact while staying shockingly simple to execute. The contrast between the buttery, almost shortbread-like base and the glossy caramel top creates a dessert that's both rustic and sophisticated. Your taste buds will experience a rollercoaster of flavors and textures that somehow feels both nostalgic and brand new.
- Flavor Bomb: The caramel gets depth from a touch of dark brown sugar and a whisper of sea salt, creating butterscotch notes that make people ask "what's that amazing flavor?" It's not just sweet — it's complex and addictive.
- Texture Revolution: Most caramel bars are either too chewy or too crunchy. These achieve the impossible: a caramel that melts on your tongue while maintaining structural integrity. The edges get slightly chewy while the center stays silky smooth.
- One-Pan Wonder: Everything happens in a single 9x13 pan, meaning fewer dishes and more time for the important things, like taste-testing the caramel. The cleanup is so minimal you'll actually look forward to making these again.
- Make-Ahead Magic: These bars actually improve after a day in the fridge, making them perfect for dinner parties or potlucks. The flavors meld and intensify, and they cut cleaner when chilled.
- Customizable Canvas: Once you master the base recipe, you can swap in different nuts, drizzle with chocolate, or add a sprinkle of flaky salt. The recipe is a playground for your creativity.
- Failure-Proof Technique: I've included foolproof timing cues that eliminate guesswork. No more wondering if the caramel is ready — you'll know exactly when it hits the sweet spot.
Alright, let's break down exactly what goes into this masterpiece, because understanding why each ingredient matters will make you a better baker, not just a recipe follower.
Inside the Ingredient List
The Flavor Foundation
Great caramel starts with understanding your sugars. Regular granulated sugar gives you that classic caramel flavor, but adding a portion of dark brown sugar transforms everything. The molasses in brown sugar brings deeper, more complex notes that read as "butterscotch" on your palate. I use a 3:1 ratio of white to brown sugar, which provides enough structure while adding that coveted depth. Don't even think about using all brown sugar — the caramel will be too soft and won't set properly.
Butter is non-negotiable here, and European-style butter with its higher fat content makes a noticeable difference. The extra fat creates a silkier texture and prevents the caramel from crystallizing. If you've ever had grainy caramel, you know the disappointment. That texture comes from sugar crystals forming during cooking, and the fat in butter helps prevent this. Salted butter works too — just reduce the added salt by half.
The Texture Team
Heavy cream isn't just for richness; it's the key to achieving that pourable consistency that sets perfectly. The proteins in cream help stabilize the caramel, preventing it from becoming too hard as it cools. I've tested versions with half-and-half, and they simply don't deliver the same luxurious mouthfeel. The cream should be at room temperature when added to prevent the caramel from seizing. Cold cream can cause the hot sugar to harden instantly, creating a lumpy mess.
Corn syrup often gets a bad rap, but it's essential for preventing crystallization. You only need a tablespoon, but it makes the difference between smooth, professional-looking caramel and a sandy disaster. If you're absolutely opposed to corn syrup, a teaspoon of lemon juice works similarly, though it adds a subtle tang. Honey is another option, but it will change the flavor profile significantly.
The Unexpected Star
Here's where I lose some people: a splash of bourbon. Not enough to make these boozy bars, just enough to add complexity that makes people ask for your secret. The alcohol cooks off completely, leaving behind vanilla and oak notes that complement the caramel beautifully. If you absolutely can't use alcohol, vanilla extract works, but add it at the very end after the caramel is off the heat. High-alcohol vanilla extract will evaporate if added too early.
The Final Flourish
The base is essentially a shortbread, but we're making it extra special. Brown sugar in the base creates a subtle butterscotch flavor that echoes the caramel topping. The butter should be cold when cut into the flour — this creates those irresistible flaky layers. Overworking the dough develops gluten, resulting in a tough base. You want it just combined, with visible butter pieces that will melt during baking, creating pockets of flakiness.
Everything's prepped? Good. Let's get into the real action...
The Method — Step by Step
- Start by preheating your oven to 350°F and positioning the rack in the center. This ensures even heat distribution, preventing the base from over-browning on the bottom. While the oven heats, line your 9x13 pan with parchment paper, leaving a 2-inch overhang on the long sides. This sling will be your best friend when it's time to remove the bars. The butter in the base will melt and create a natural non-stick surface, but parchment guarantees clean edges.
- For the base, whisk together flour, brown sugar, and salt in a large bowl. Cut in the cold butter using a pastry cutter or your fingers until the mixture resembles coarse crumbs with some pea-sized pieces. This texture is crucial — those butter pieces create flakiness. Press the mixture firmly into your prepared pan, using the bottom of a measuring cup to create an even layer. Prick the surface with a fork to prevent bubbling, then bake for 18-20 minutes until the edges are golden and the center is set.
- Now comes the moment of truth. In a heavy-bottomed saucepan, combine the white sugar, brown sugar, and corn syrup. Add just enough water to moisten the sugar — about 2 tablespoons. Stir gently with a wooden spoon until the sugar is damp, then stop stirring. Put the spoon down and walk away. I mean it. Stirring after this point causes crystallization, and you'll end up with sandy caramel.
- Place the pan over medium heat and watch as the sugar dissolves and comes to a boil. Don't stir, but you can gently swirl the pan to distribute heat. The sugar will go through stages: first it looks like simple syrup, then it bubbles vigorously, and finally it starts to color. This is where most people panic and remove it too early. Wait until the caramel reaches a deep amber color — think the shade of a well-brewed iced tea. This takes about 8-10 minutes, but trust your eyes more than the clock.
- Here's where it gets dramatic. Slowly pour in the heavy cream while whisking constantly. The mixture will bubble violently and rise up the sides of the pan — this is normal and expected. Keep whisking until smooth, then add the butter, one piece at a time, whisking until each piece melts before adding the next. The caramel should be glossy and smooth. If you see any lumps, return the pan to low heat and whisk until they dissolve.
- Add the bourbon and salt, whisking to combine. The caramel will seem thin at this point, but don't panic. It thickens significantly as it cools. Let it cool for 5 minutes off the heat — this prevents it from completely melting the base when poured. You want it warm enough to pour easily but not so hot that it soaks into the shortbread. Test by letting a drop fall onto a plate — it should mound slightly rather than spread thin.
- Pour the caramel over the baked base, tilting the pan to ensure even coverage. The layer should be about 1/4-inch thick. Immediately sprinkle your chosen toppings — I use toasted pecans and a few flakes of sea salt, but crushed toffee or chocolate chips work beautifully. Press the toppings gently into the caramel so they adhere as it sets. Don't press too hard or they'll sink completely.
- Let the bars cool at room temperature for 30 minutes, then refrigerate for at least 2 hours to set completely. This is the hardest part — waiting. The caramel needs time to firm up so you can cut clean squares. I usually make these after dinner and let them chill overnight. The next morning, lifting them out using the parchment sling feels like revealing buried treasure.
- When ready to serve, lift the entire block out using the parchment overhang. Use a sharp knife dipped in hot water, wiping between cuts for perfect edges. The bars should be firm but not rock-hard. If they're too cold from the fridge, let them sit at room temperature for 10 minutes before cutting. Store any leftovers (if you have any) in an airtight container in the fridge for up to a week.
That's it — you did it. But hold on, I've got a few more tricks that'll take this to another level...
Insider Tricks for Flawless Results
The Temperature Rule Nobody Follows
Here's the thing about caramel: temperature matters more than timing. I've made these bars in everything from professional kitchens to tiny apartments, and the only constant is the thermometer. The sweet spot is exactly 238°F — any lower and your caramel won't set, any higher and it becomes jaw-breaking. Invest in a good candy thermometer and clip it to your pan. The first few times, you might hover over the stove like a nervous parent, but soon you'll recognize the visual cues that match the temperature.
Why Your Nose Knows Best
Your sense of smell is actually more reliable than a timer for knowing when the caramel is ready. When the sugar first melts, it smells sweet and simple. As it caramelizes, the aroma becomes more complex — almost nutty with hints of butterscotch. The moment you smell a slight bitterness, like strong coffee, it's time to add the cream. This happens right before the sugar burns, and it's your window for perfect caramel. A friend tried skipping this step once — let's just say the fire department was not amused.
The 5-Minute Rest That Changes Everything
After pouring the caramel, resist every urge to immediately sprinkle your toppings. Wait exactly 5 minutes — set a timer. This brief pause allows the surface to cool slightly, preventing your nuts or chocolate from sinking completely. The caramel is still warm enough to melt chocolate slightly, creating a beautiful marbled effect, but cool enough that toppings stay suspended. I learned this the hard way when my first batch looked like a geological excavation rather than a dessert.
The Cutting Technique That Impresses
Here's where amateur bakers go wrong: they try to cut these straight from the fridge with a cold knife. Instead, dip your knife in hot water, wipe it dry, then cut. The heat melts through the caramel cleanly rather than tearing it. For the ultimate presentation, trim the edges first (chef's treat!), then measure and mark your cuts lightly before committing. Perfect squares are easier than you think — just remember to reheat and wipe your knife between each cut.
The Flavor Enhancer You Already Own
That tiny bottle of vanilla extract in your pantry? It's about to become your secret weapon. But here's the twist — add it at the very end, after the caramel is off the heat. High heat destroys vanilla's delicate flavor compounds, leaving you with flat-tasting caramel. I also keep a vanilla bean in my sugar jar, which subtly infuses the sugar with flavor over time. It's a small touch that makes people wonder why your caramel tastes so much better than theirs.
Creative Twists and Variations
This recipe is a playground. Here are some of my favorite ways to switch things up:
The Chocolate Lover's Dream
Replace the pecans with chopped dark chocolate, but wait until the caramel cools for 10 minutes before adding. The chocolate will melt slightly but stay in distinct pieces, creating pockets of molten chocolate in every bite. A sprinkle of flaky salt on top enhances the chocolate flavor. This version is dangerously good — I once ate four pieces in a row before remembering I was supposed to share.
The Tropical Escape
Add 1/2 cup of toasted coconut flakes and the zest of one lime to your base mixture. The coconut adds chewiness while the lime zest brightens the whole dessert. Top with macadamia nuts instead of pecans, and drizzle with white chocolate that's been thinned with a touch of coconut oil. It's like a Caribbean vacation in dessert form.
The Salted Caramel Classic
Double the salt in the caramel and sprinkle the top with fleur de sel or Maldon salt flakes. The contrast between sweet and salty is addictive — be warned, you might not be able to stop at one piece. This version pairs beautifully with strong coffee or a glass of cold milk. The salt actually enhances your perception of sweetness, making the caramel taste more complex.
The Holiday Spice Version
Add 1/2 teaspoon of cinnamon and 1/4 teaspoon of cardamom to your base dough. The warm spices complement the caramel beautifully, making these perfect for fall gatherings. Top with candied pecans for extra crunch and a drizzle of white chocolate that's been tinted with a touch of orange food coloring. They look like autumn on a plate.
The Espresso Kick
Dissolve 1 tablespoon of instant espresso powder in the heavy cream before adding it to the caramel. The coffee flavor is subtle but adds depth that makes the caramel taste more sophisticated. Top with chocolate-covered espresso beans for a dessert that doubles as an afternoon pick-me-up. This version is particularly popular at dinner parties — guests can't quite identify the flavor but can't stop eating it.
The PB&J Throwback
Swirl 1/4 cup of peanut butter into the caramel just before pouring it over the base. The peanut butter adds richness and a nostalgic flavor that takes you back to childhood. Top with crushed honey-roasted peanuts for extra crunch. It's like your favorite sandwich and dessert had a beautiful baby.
Storing and Bringing It Back to Life
Fridge Storage
These bars keep beautifully in the fridge for up to a week — if they last that long. Store them in an airtight container with parchment paper between layers to prevent sticking. The caramel will firm up considerably when cold, so let them sit at room temperature for 10-15 minutes before serving. This brings back the perfect chewy texture without making them too soft. I've noticed they actually taste better on day two or three, once the flavors have had time to meld.
Freezer Friendly
These freeze like champions, making them perfect for make-ahead desserts. Cut them into squares, wrap each piece individually in plastic wrap, then store in a freezer bag for up to three months. To thaw, transfer to the fridge overnight, then let come to room temperature for 15 minutes before serving. The texture remains perfect, and the flavor is unchanged. Pro tip: freeze them before adding any chocolate drizzle if you want to maintain perfect presentation.
Best Reheating Method
If your bars have been in the fridge and you want to restore that fresh-from-the-pan texture, here's what works: place them on a baking sheet in a 250°F oven for 5-7 minutes. This gently warms the caramel without melting it completely. You want them just warm enough that the caramel becomes supple again. Microwaving works in a pinch, but use 50% power for 10-15 seconds max — any more and you'll have caramel soup.