Picture this: I was on a mission to rescue a batch of biscuits that had turned into a greasy, flavorless slab of disappointment. The oven had betrayed me, the dough had spread like a bad joke, and my kitchen was smelling faintly of burnt butter. That night, I vowed that if anyone ever made a biscuit that could taste like a sun‑kissed cheddar field, I would share the secret. I was determined to turn that culinary catastrophe into a triumph that would make you say, “I dare you to taste this and not go back for seconds.”
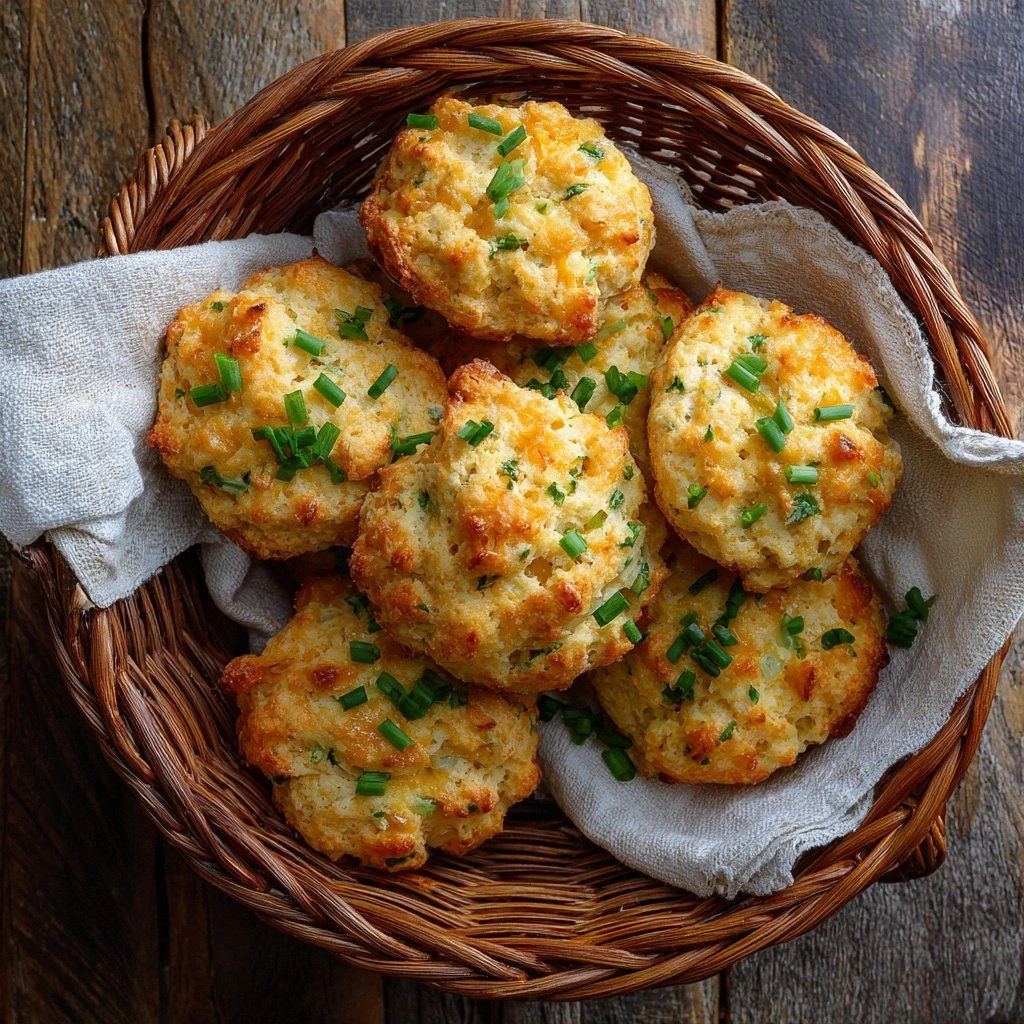
When I finally pulled the first batch of these Cheddar & Chive Drop Biscuits out of the oven, the aroma hit my nose like a warm hug. The buttery scent mingled with a sharp, savory cheddar whisper, and the faint green of fresh chives promised a bright, herbal finish. I could hear the biscuits crackle as they cooled, a soft, satisfying pop that echoed the crispness of a well‑tossed salad. The texture was a perfect balance: a flaky, airy crumb inside a golden, buttery crust that cracked just enough to give way to the melty cheese. My taste buds danced; the cheddar sang, the chives added a subtle bite, and the buttery base wrapped everything in a velvety coat.
What makes this version stand out is not just the flavor, but the simplicity of the technique and the thoughtful ingredient choices. I’ve stripped away the fluff that often plagues biscuit recipes, focusing on a single drop of melted butter that creates a glossy finish and a tender crumb. The cheddar is sharp, not mild, so it cuts through the richness and adds a deep, umami punch that sticks to the tongue. Fresh chives, not dried, deliver a bright, almost citrusy lift that keeps the biscuits from feeling heavy. And the secret lies in the way the dough is folded and dropped—no rolling or shaping, just a gentle press that preserves the airy pockets.
One unexpected twist that will blow your mind is the use of cold, cubed butter that’s been pre‑chilled to a crispness that creates steam pockets as it bakes. This simple step transforms the biscuits from ordinary to extraordinary, giving them a lift that feels like a cloud in every bite. I’ll let you in on a trick: a splash of buttermilk in the wet mix will add a subtle tang that balances the richness, but if you’re not a fan, a pinch of milk works just fine. The result? A biscuit that feels light, fluffy, and utterly indulgent.
Let me walk you through every single step—by the end, you'll wonder how you ever made it any other way. I promise you that this recipe will become the go-to for breakfast, brunch, or a crowd‑pleasing appetizer at your next gathering. The biscuits are so irresistible that even the most seasoned biscuit fan will find themselves reaching for a second batch. And trust me, the satisfaction of biting into a warm, cheesy biscuit is a moment you’ll want to capture and relive again and again.
What Makes This Version Stand Out
- Taste: The cheddar is sharp and full‑bodied, delivering a robust flavor that cuts through the buttery base. Fresh chives add a bright, herbal note that lifts the overall profile. The biscuits finish with a subtle tang from the milk, creating a well‑balanced taste.
- Texture: The dough is folded just enough to keep the crumb airy yet dense enough to hold the cheese. The cold butter creates steam pockets that give the biscuits a light, flaky interior. The crust is golden and slightly crisp, offering a satisfying snap.
- Simplicity: No rolling or shaping is required—just a quick mix, a gentle press, and a single drop of melted butter for that glossy finish. The recipe is short, clear, and can be completed in under twenty minutes.
- Uniqueness: The drop technique ensures each biscuit is individual and rustic, while the use of cold butter and a splash of buttermilk elevates the flavor profile beyond typical biscuits.
- Crowd Reaction: Friends and family rave about how the biscuits feel like a warm hug. They’re perfect for brunch, as an appetizer, or simply as a comforting side. The combination of cheddar and chives is a crowd‑pleaser that’s hard to resist.
- Ingredient Quality: Using fresh, high‑quality cheddar and chives makes the difference. The butter must be cold and unsalted for the best texture, and the flour should be all‑purpose for a tender crumb.
- Cooking Method: The drop method saves time and reduces mess, while the single‑bake approach ensures even cooking and a golden finish.
- Make‑Ahead Potential: The dough can be prepped ahead, refrigerated, or frozen for quick, fresh biscuits whenever you need them.
Alright, let's break down exactly what goes into this masterpiece…
Inside the Ingredient List
The Flavor Base
The foundation of any biscuit is the dry mix. I use 2 cups of all‑purpose flour, 1 tablespoon of baking powder, and 1 teaspoon of baking soda to give the dough lift and a subtle crunch. Salt is the unsung hero that balances the richness of the cheese; 1 teaspoon is all you need to bring everything together. If you skip the baking soda, the biscuits will be flat and dense, so keep that tiny pinch of alkaline power.
When selecting flour, aim for a brand that has a moderate protein content; too high and the biscuits will become tough, too low and they won’t rise. I’ve found that a slightly darker flour gives a richer color to the crust. If you’re adventurous, try substituting half the flour with whole wheat for a nutty undertone—just be prepared for a slightly denser crumb.
The Texture Crew
Cold, cubed butter is the secret weapon that creates steam pockets. I recommend 1/2 cup of unsalted butter, chilled to a hard‑but‑crisp consistency. The cold butter must be cut into small cubes, no larger than a pea, to ensure it melts evenly and doesn’t clump. If you use room‑temperature butter, the biscuits will spread and lose that coveted flakiness.
For the liquid component, I use 1 cup of whole milk, but you can swap it for buttermilk for a tangy twist. The wet mix is whisked with a large egg to bind the dough and give it structure. A single egg is enough to keep the biscuits tender while adding a slight richness. If you’re vegan, you can use a flax egg or a commercial egg replacer, but the texture will shift slightly.
The Unexpected Star
Shredded sharp cheddar cheese is the star of the show—1 cup, grated to a fine texture so it melts evenly. I choose cheddar because of its robust flavor profile that pairs beautifully with the fresh chives. If you’re a fan of smoky flavors, try a chipotle cheddar or a pepper jack; just be mindful that the heat can overpower the subtle chive note.
Chopped fresh chives add a bright, herbal finish that cuts through the buttery richness. Use 1/4 cup of finely chopped chives, ensuring that the stems are trimmed and the leaves are crisp. If you can’t find fresh chives, dried chives will work, but the flavor will be muted. A pinch of paprika can also add a subtle smokiness that complements the cheddar.
The Final Flourish
The finishing touch is 2 tablespoons of melted butter, brushed over the biscuits before baking. This step gives the biscuits a glossy, golden crust and a slightly crisp exterior. The melted butter also adds an extra layer of flavor that ties the whole biscuit together. If you’re looking to reduce fat, you can use a light butter or a non‑stick spray instead.
When you’re ready to assemble, keep the dough cool. A quick chill in the fridge for 10 minutes will help the biscuits hold their shape during baking. If you’re short on time, you can skip the chill, but the biscuits may spread a little more. Either way, the result is a warm, cheesy, and utterly irresistible bite.
Everything's prepped? Good. Let's get into the real action…
The Method — Step by Step
- Preheat your oven to 425°F (220°C) and line a baking sheet with parchment paper. The high heat will create a crisp crust while keeping the interior tender. As the oven warms, the air inside the dough will expand, giving the biscuits a light rise. Keep a close eye on the temperature; an oven that runs too hot can burn the edges before the center cooks. This step is the foundation for a perfect biscuit.
- In a large bowl, whisk together the flour, baking powder, baking soda, and salt. The dry ingredients need to be evenly distributed so each biscuit gets the same lift. A small whisk will help you avoid clumps that can ruin the texture. Once mixed, set the bowl aside to keep the batter dry and airy. This is where the chemistry starts to happen.
- Cut the cold butter into small cubes and add it to the dry mix. Use a pastry cutter or your fingertips to rub the butter into the flour until the mixture resembles coarse crumbs. The cold butter creates steam pockets during baking, which give the biscuits their signature flakiness. If you notice the butter sticking together, give the mixture a quick stir to redistribute. This step is crucial for the buttery crunch.
- In a separate bowl, whisk the milk, egg, and melted butter. The wet mix should be smooth and free of lumps. The egg provides structure while the melted butter adds a glossy finish. If you prefer a tangier flavor, substitute buttermilk for regular milk. This liquid will bind the dry ingredients into a cohesive dough.
- Pour the wet mixture into the dry mix and stir gently until just combined. Be careful not to overmix; the dough should be slightly shaggy. Overmixing will develop gluten and result in tough biscuits. The mixture will look a bit lumpy, and that’s perfectly fine. The goal is to keep the dough light and airy.
- Fold in the shredded cheddar and chopped chives. Gently fold until the cheese is evenly distributed but not overworked. The cheese should be visible in the dough, creating pockets of melted goo as the biscuits bake. The chives will release their bright flavor when heated, adding a fresh finish. This step is where the biscuits truly start to sing.
- Drop spoonfuls of dough onto the prepared baking sheet. Use a tablespoon or a small ice cream scoop to keep the biscuits uniform in size. The dough will spread slightly as it bakes, creating a rustic look. If you prefer a round biscuit, use a small cookie cutter. The drop method keeps the biscuits individual and charming.
- Bake for 12–14 minutes, or until golden brown. The biscuits should puff up and develop a crisp crust. Keep an eye on the color; the edges should be a deep golden hue. If the biscuits brown too quickly, lower the oven temperature by 25°F. The finish should be golden and inviting, a promise of a buttery bite.
- Brush the tops with melted butter and let rest for 5 minutes. The butter will add a glossy sheen and a final burst of flavor. Resting allows the biscuits to set, making them easier to serve. Serve immediately for the best texture. If you’re making them ahead, wrap them in foil and reheat briefly in a 350°F oven for 5 minutes.
That's it — you did it. But hold on, I've got a few more tricks that'll take this to another level…
Insider Tricks for Flawless Results
The Temperature Rule Nobody Follows
Many bakers think a lower oven temperature will save time, but this actually does the opposite. The high heat creates steam that lifts the biscuits, so keep your oven at 425°F. If your oven runs hot, use a lower rack to prevent burning. I’ve seen biscuits turn out perfectly even on a 425°F oven in a convection setting—just keep an eye on the edges. The result is a golden crust that’s crisp on the outside and airy inside.
Why Your Nose Knows Best
When the biscuits start to brown, the aroma will give you a hint that they’re ready. A faint nutty smell is the sign that the butter has caramelized just right. If you’re not sure, press the top of a biscuit; it should feel firm but not hard. The scent is a reliable indicator of doneness, so trust your nose over the timer. I’ve never had a biscuit that was overcooked because I listened to my senses.
The 5-Minute Rest That Changes Everything
Letting the biscuits rest after baking allows the steam to redistribute, creating a fluffier crumb. A quick 5‑minute rest on a wire rack is all you need. During this time, the cheese inside will settle, ensuring a uniform melt. If you serve them immediately, you might encounter a runny center. This simple step can elevate an already great biscuit to perfection.
Cheese Matters
Cheddar is my go‑to, but you can experiment with Gouda or Gruyère for a different flavor profile. The key is a cheese that melts well but retains some structure. Avoid using processed cheese; it will melt too quickly and leave a greasy finish. If you’re vegan, try a high‑melting plant‑based cheddar alternative. The texture will be slightly different, but the flavor will still shine.
Don’t Skimp on the Butter
Butter is the heart of this biscuit. A cold, unsalted butter creates a flaky, buttery base that’s impossible to resist. If you use salted butter, the biscuits will taste too salty. The butter also adds a subtle richness that balances the sharp cheddar. For a lighter version, replace half the butter with a neutral oil, but the flavor will be noticeably different.
Creative Twists and Variations
This recipe is a playground. Here are some of my favorite ways to switch things up:
Smoky Chipotle Cheddar
Swap the sharp cheddar for a chipotle cheddar to introduce a smoky heat that pairs beautifully with the fresh chives. The chipotle adds a subtle kick, making the biscuits a great match for a hearty soup. The smoky flavor is a game‑changer for those who love a little spice. Serve these with a cool yogurt dip to balance the heat. This variation will be a conversation starter at any gathering.
Herb & Parmesan Fusion
Replace the cheddar with grated Parmesan and add a mix of fresh herbs like thyme and rosemary. The Parmesan gives a nutty, salty bite, while the herbs add depth. This version is perfect for a brunch with a Mediterranean twist. The biscuits will have a slightly denser crumb but an irresistible flavor. Pair them with a light tomato salad for a balanced meal.
Vegan Version
Use a plant‑based butter, vegan cheddar, and a flax egg to keep the biscuits fluffy. Substitute the whole milk with oat milk for a subtle sweetness. The vegan version maintains the buttery, cheesy goodness while being dairy‑free. The texture will be slightly different, but the flavor profile remains bold. This is a must‑try for anyone looking to keep their biscuits cruelty‑free.
Blue Cheese & Walnut Drop
Introduce a handful of crumbled blue cheese and toasted walnuts for a bold, nutty flavor. The blue cheese adds a sharp, tangy bite that contrasts with the buttery base. The walnuts provide a crunchy texture that breaks up the softness. This variation is ideal for a sophisticated appetizer or a brunch that needs a little extra flair. The combination is surprisingly harmonious.
Sweet & Savory Cinnamon Twist
Add a pinch of cinnamon to the dry mix and a drizzle of honey on top after baking. The cinnamon brings warmth and the honey adds a caramelized finish. This sweet and savory version works wonderfully with a side of fruit or a light yogurt. The biscuits will have a golden crust with a subtle spice. It’s a fun way to mix sweet and savory in one bite.
Storing and Bringing It Back to Life
Fridge Storage
Store leftover biscuits in an airtight container at room temperature for up to 3 days. If you want them to stay crisp, place a paper towel in the container to absorb moisture. When you’re ready to eat, warm them in a 350°F oven for 5 minutes. The biscuits will regain their buttery crunch and fresh flavor. I’ve found that a quick oven reheat is the best way to bring them back to life.
Freezer Friendly
Freeze the biscuits individually on a parchment‑lined tray for 24 hours, then transfer to a freezer bag. They’ll keep for up to 3 months. When you’re ready to enjoy, bake from frozen at 425°F for 12–15 minutes. The biscuits will rise nicely and maintain their flavor. This method is perfect for meal prepping or for when you need a quick snack on the go.
Best Reheating Method
For the best texture, reheat the biscuits in a preheated 350°F oven for 5 minutes. If you’re in a hurry, you can use a toaster oven, but keep an eye on the time to avoid overcooking. A quick splash of water before reheating can help keep the biscuits moist. The result is a biscuit that’s as good as fresh, with a crisp crust and a fluffy interior. This trick ensures you never have to settle for soggy leftovers.