Picture this: I was halfway through a midnight bake, the kitchen lights flickering, and I realized I’d forgotten the key ingredient that would make or break the entire dessert. I stared at the jar of lime juice, the batter was a pale, bland cloud, and my heart sank. That moment of culinary panic turned into a dare: “I dare you to taste this and not go back for seconds.” I grabbed a handful of fresh key limes, the citrus scent cutting through the stale air, and the panic dissolved into excitement.
The aroma that followed was electric—sharp citrus, buttery crumb, and a faint hint of vanilla that danced in the air like a mischievous sprite. I could hear the gentle sizzle of butter melting in the pan, the soft hiss of cream as it heated, and the rhythmic clack of the spoon against the mixing bowl. My eyes followed the swirl of ingredients, each color a promise of the final bite: the bright green of key lime zest, the ivory of cream cheese, the golden crust of graham crackers. The texture felt silky in the bowl, smooth like a velvet curtain, and I could already taste the tang that would cut through the sweetness. The moment the first spoonful hit my tongue, it was a burst of sunshine on a cloudy day—zesty, creamy, and utterly unforgettable.
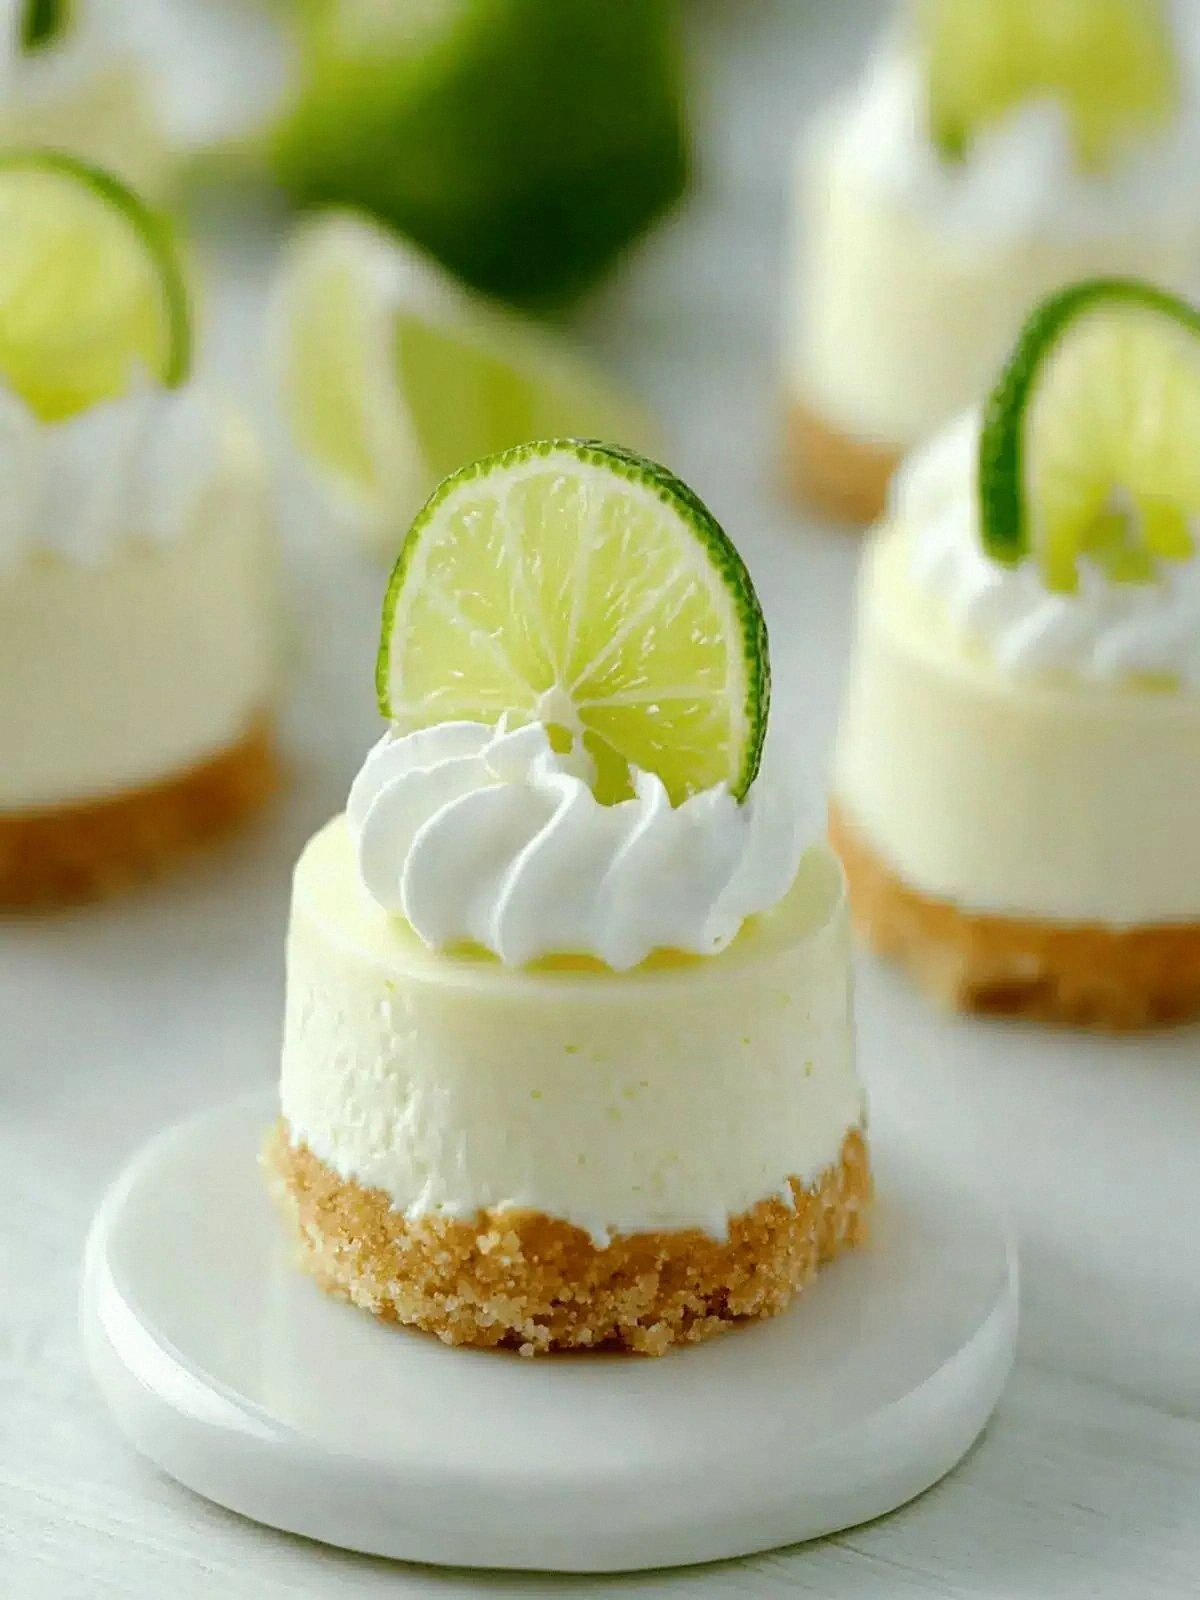
This version of mini key lime pie is a revelation because it balances the classic tang with an airy, almost cloud-like filling that melts in your mouth. It’s not just a dessert; it’s a statement, a declaration that you can turn a simple craving into a gourmet experience with a few intentional tweaks. The crust is crisp yet buttery, the filling is dense but not heavy, and the lime flavor is bright without being overpowering. It’s the kind of dish that makes you feel like a culinary wizard, pulling a dazzling trick out of a humble pantry. When you serve it, the guests will gasp, “This is hands down the best version you'll ever make at home.”
Hold onto your whisk, because the secret lies in how we handle the cream cheese and the key lime zest. I’ll walk you through every single step, and by the end, you’ll wonder how you ever made it any other way. Let’s dive into the recipe that will make your kitchen smell like a tropical paradise.
What Makes This Version Stand Out
- Flavor: The key lime zest is incorporated at the very beginning, releasing essential oils that infuse the entire filling with a vibrant citrus punch.
- Texture: The cream cheese is softened to room temperature and beaten to a cloud‑like consistency, ensuring a silky mouthfeel that contrasts with the crunchy crust.
- Balance: Sweetened condensed milk provides the perfect counterpoint to the tartness of the lime, creating a harmonious sweet‑tart equilibrium.
- Ease: The crust uses pre‑made graham cracker crumbs, eliminating the need for a separate baking step and saving precious minutes.
- Presentation: Miniature cups allow for a playful, bite‑size experience that is ideal for parties or a sophisticated dessert spread.
- Make‑ahead: The pies can be assembled ahead of time and chilled for up to 24 hours, making them a stress‑free option for entertaining.
Inside the Ingredient List
The Flavor Base
The key lime juice is the star that gives this pie its signature zing. Use freshly squeezed juice for the most vibrant flavor—store‑bought lime juice tends to be too watery and lacks that bright, acidic bite. If you’re short on time, a high‑quality bottled lime juice can substitute, but add an extra pinch of salt to balance the sweetness. Remember, the citrus will mellow slightly after baking, so a sharper profile is preferable.
The Texture Crew
Softened cream cheese is the backbone of the filling. When it’s at room temperature, it blends seamlessly with the sweetened condensed milk, creating a velvety custard that sets without cracking. If you skip this step and use cold cheese, the mixture will seize, resulting in a lumpy, uneven texture that won’t hold its shape. A quick tip: let the cheese sit in a warm water bath for a few minutes to soften faster.
The Unexpected Star
Graham cracker crumbs add a subtle, buttery crunch that contrasts beautifully with the creamy filling. They also provide a neutral base that lets the lime shine without competing flavors. If you’re on a low‑carb diet, replace graham crackers with crushed almond flour or coconut flour for a different yet delicious twist. The key is to toast the crumbs lightly for a deeper flavor profile.
The Final Flourish
The powdered sugar on top is not just for sweetness; it creates a delicate dusting that softens the sharp edges of the lime, giving the pie a smooth finish. It also adds a subtle shimmer that makes the mini pies look like miniature works of art. If you prefer a darker finish, swirl in a few drops of melted dark chocolate before the final glaze, creating a marbled effect.
Everything's prepped? Good. Let's get into the real action.
The Method — Step by Step
- Start by preheating your oven to 350°F (175°C). In a medium bowl, combine the graham cracker crumbs, granulated sugar, and softened butter. Use a fork or a pastry cutter to blend until the mixture resembles coarse sand. Press the crumb mixture firmly into the bottom and up the sides of 12 mini muffin tins, creating a uniform crust. Bake for 8 minutes, or until the edges turn golden. This quick bake locks in the buttery flavor and ensures the crust stays crisp.
- While the crusts are baking, prepare the filling. In a large mixing bowl, place the softened cream cheese and beat on medium speed until it becomes smooth and creamy—no lumps should remain. Add the sweetened condensed milk, and continue to beat until the mixture is light and fluffy. This step is crucial; a dense filling will not set properly, and you’ll end up with a runny center.
- Now incorporate the key lime juice and zest. Pour the juice gradually while whisking, allowing the mixture to incorporate fully before adding the next spoonful. The zest should be finely grated to release maximum aroma without leaving large pieces. The mixture will thicken slightly as it cools. If it feels too thick, add a splash of heavy cream to loosen it.
- Fold in the vanilla extract gently to avoid deflating the mixture. The vanilla adds a subtle warmth that balances the sharp citrus. Keep the mixture chilled for 10 minutes; this helps it set slightly before baking, resulting in a firmer texture.
- Spoon the filling into the pre‑baked crusts, filling each cup about three‑quarters full. The filling should sit evenly on top of the crust, not spilling over the edges. The mini pies should look like little towers of creamy citrus.
- Bake the mini pies for 18–20 minutes, or until the filling sets but still has a slight wobble in the center. This is the moment of truth; the edges should be firm, but the center should remain slightly soft to keep it moist. If the crust browns too quickly, cover the tins loosely with aluminum foil.
- Remove the pies from the oven and let them cool in the tins for 5 minutes before transferring them to a wire rack. This brief cooling period allows the filling to set further, preventing cracks. Once cooled, dust each pie lightly with powdered sugar for a sweet, glossy finish.
That’s it—you did it. But hold on, I've got a few more tricks that'll take this to another level. Stay tuned for insider tips that will elevate your mini key lime pies from great to unforgettable.
Insider Tricks for Flawless Results
The Temperature Rule Nobody Follows
Many bakers bake at 350°F, but this recipe thrives at a slightly lower temperature of 325°F. This gentle heat allows the filling to set evenly without over‑baking the crust. If you’re using a convection oven, reduce the temperature by 25°F to maintain the same effect. A consistent temperature is the secret to a smooth, crack‑free surface.
Why Your Nose Knows Best
During the crust bake, the aroma of toasted graham crackers will fill your kitchen, signaling the perfect moment to pull them out. A faint, nutty scent is the cue; if it smells burnt, pull them out immediately. This sensory check prevents a dry, over‑cooked crust that can ruin the entire pie.
The 5-Minute Rest That Changes Everything
After filling the crusts, let the mixture rest in the refrigerator for 5 minutes before baking. This short chill period firms up the filling, making it easier to pour into the crusts and preventing the mixture from becoming too liquid during baking. The result is a firmer, more stable mini pie that holds its shape.
Use a Stand Mixer for the Cream Cheese
Whipping the cream cheese with a stand mixer on low speed ensures a silky texture without over‑mixing. Over‑mixing can incorporate air pockets that cause the filling to crack as it cools. A stand mixer also saves time and effort compared to hand‑whisking.
Finish with a Light Dusting of Powdered Sugar
Instead of using a thick glaze, a light dusting of powdered sugar gives a subtle sweetness and a professional finish. Sprinkle the sugar with a fine sieve to avoid clumps. This final touch enhances the visual appeal and adds a delicate sweetness that balances the tartness.
Keep the Pies Covered While Chilling
Once the pies are cooled, cover them loosely with plastic wrap or a lid to prevent them from absorbing odors from the refrigerator. This step preserves the fresh lime flavor for up to 24 hours. If you’re storing them for longer, place them in an airtight container.
Creative Twists and Variations
This recipe is a playground. Here are some of my favorite ways to switch things up:
Chocolate‑Infused Mini Pies
Swirl in a tablespoon of melted dark chocolate into the filling before baking. The chocolate adds a rich, bittersweet contrast that pairs wonderfully with the citrus. Serve with a dollop of whipped cream for an extra indulgence.
Almond‑Crunch Crust
Replace graham cracker crumbs with finely ground almonds and a pinch of sea salt. The almond crust offers a nutty flavor and a slightly crunchy texture that complements the creamy filling. It’s a great option for those looking to cut carbs.
Minty Fresh Variation
Add a teaspoon of finely chopped fresh mint to the filling for a refreshing twist. The mint accentuates the lime’s brightness and provides a cool, herbal undertone. This version is perfect for summer gatherings.
Spiced Citrus Twist
Introduce a pinch of ground ginger or cardamom to the filling. The warm spices create a depth of flavor that elevates the lime’s sharpness. It’s a sophisticated take that works well for holiday parties.
Mini Cheesecake Cups
For a richer dessert, substitute the key lime juice with lemon juice and add an extra tablespoon of lemon zest. The result is a tangy, creamy cheesecake that still retains the mini pie format. Pair with a drizzle of honey for sweetness.
Frozen Mini Treats
After baking, chill the pies for an additional 2 hours before placing them in the freezer. This creates a frozen mini dessert that’s perfect for hot days. Serve with a splash of coconut milk for a tropical vibe.
Storing and Bringing It Back to Life
Fridge Storage
Store the mini pies in an airtight container in the refrigerator for up to 24 hours. The cool environment keeps the filling firm and prevents the crust from becoming soggy. When you’re ready to serve, let them sit at room temperature for 10 minutes to soften slightly.
Freezer Friendly
For longer storage, place the mini pies in a freezer‑safe container and freeze for up to 1 month. Thaw overnight in the refrigerator, then let them sit at room temperature for 20 minutes before serving. The texture remains smooth, and the lime flavor stays bright.
Best Reheating Method
To revive a frozen pie, warm it in a 300°F oven for 5–7 minutes. Add a tiny splash of water to the bottom of the pan; this steams the filling back to perfection without drying it out. Avoid microwaving, as it can cause the filling to become rubbery.