Picture this: I’m standing in my kitchen, a bowl of ripe pears in one hand, a half‑filled glass of lemon juice in the other, and a recipe book open to a page that promised “simple dessert.” I was desperate for something comforting after a week of burnt lasagna and over‑seasoned soup. I tossed the pears into the oven, hoping the sugar would caramelize, and the whole kitchen filled with a sweet, buttery aroma that made my stomach growl with anticipation. That moment, that almost‑disaster turned triumph, is the spark that ignited this recipe.
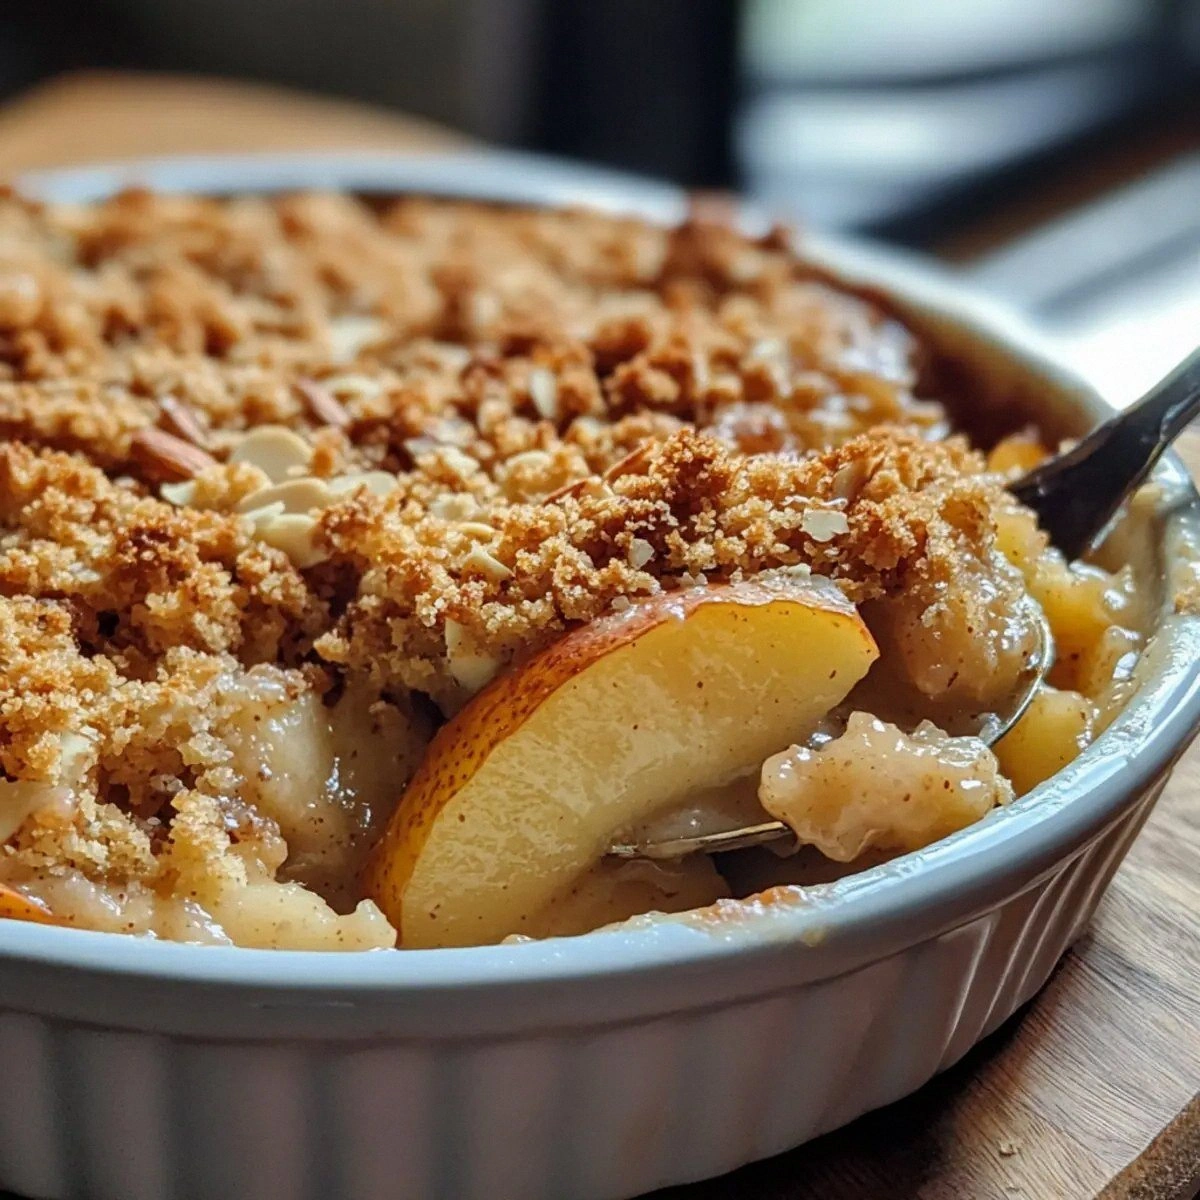
The first thing you notice is the way the pears soften, turning from crisp to a tender, syrupy texture that clings to your spoon. The scent is a delicate mix of vanilla‑infused sugar, toasted almonds, and a faint citrus zing that wafts up from the baking dish like a warm hug. When you bite into a slice, you hear that satisfying crack of the oat‑almond crust, followed by a gentle, almost velvety melt of pear flesh that drips onto your palate. The sound of the butter sizzling as it melts into the crumbs is music to any home cook’s ears. The whole experience is a sensory symphony that makes you forget any previous kitchen catastrophes.
What sets this version apart is its balance between simplicity and depth. The pears are the star, but the almond topping isn’t just a garnish; it’s a textural and flavor counterpoint that elevates the dish. The lemon juice isn’t just acidity; it brightens the sweetness and prevents the pears from becoming too syrupy. The crust’s butter and sugar combination creates a buttery caramel that’s crisp on top and tender underneath. It’s the kind of dessert that feels indulgent yet wholesome, and it’s so straightforward you could whip it up on a weekday night.
But here’s the kicker: the secret to that perfect crust is a tiny tweak that most recipes skip—adding a splash of warm milk to the oat mixture before baking. This small step keeps the crumbs from drying out, giving them a chewy, slightly gooey center that’s just as delightful as the crunchy edges. I dare you to taste this and not go back for seconds. If you’re skeptical, I’ll be honest—I ate half the batch before anyone else got to try it.
Let me walk you through every single step—by the end, you’ll wonder how you ever made it any other way.
What Makes This Version Stand Out
- Flavor: The pears are sweet but balanced by a bright citrus note from the lemon, creating a fresh, layered taste that feels both comforting and sophisticated.
- Texture: The oat‑almond topping delivers a spectrum of sensations—from crunchy, caramelized edges to a soft, chewy center that melts in your mouth.
- Ease: Every step takes less than 10 minutes of prep, and the baking time is only 30 minutes, making it a perfect weekend treat or a last‑minute dinner dessert.
- Versatility: Swap pears for apples, add a splash of bourbon, or sprinkle chili flakes to create a spicy version that still feels homey.
- Crowd‑pleaser: Guests will rave about the caramelized pears and the buttery crunch, and you’ll be the hero who served the most memorable dessert.
- Ingredient Quality: Using ripe pears and high‑quality almonds elevates the dish beyond a generic crumble; it feels like a gourmet experience.
- Make‑Ahead: The crumble can be assembled a day in advance and baked when needed, saving you time during busy evenings.
- Presentation: The golden crust and glossy pear slices look as good as they taste, making it Instagram‑ready without the need for fancy plating.
Alright, let's break down exactly what goes into this masterpiece...
Inside the Ingredient List
The Flavor Base
Pears are the heart of this dessert. They bring natural sweetness, a juicy texture, and a subtle earthiness that pairs beautifully with the almond topping. If you skip pears, you lose that core flavor; the dish becomes just a crumble without a star. When selecting pears, look for ones that are fragrant, slightly soft to the touch, and have a bright green or yellow skin—these are the most flavorful.
The lemon juice is the unsung hero that keeps the pears from turning brown and adds a bright, tangy lift that cuts through the sweetness. A tablespoon of lemon juice for every 4 pears is enough to brighten the dish without making it tart. If you’re out of lemon juice, a splash of white wine vinegar or a squeeze of lime can serve as a substitute, but the citrus profile will shift slightly.
The Sweetness Layer
Granulated sugar caramelizes the pears, creating a silky glaze that clings to each slice. It also helps the almond topping set into a golden crust. If you prefer a darker, richer sweetness, try swapping half the granulated sugar for brown sugar, which will add a molasses undertone.
Ground cinnamon is the spice that rounds out the flavor profile, providing warmth and a hint of spice that’s reminiscent of fall. A teaspoon is sufficient for four servings, but if you’re a cinnamon lover, feel free to add a pinch more. If you’re avoiding spices, a dash of nutmeg or a touch of cardamom can replace the cinnamon for a different aromatic twist.
The Texture Crew
Rolled oats are the backbone of the topping, giving it structure and a pleasant chew. They absorb the butter and sugar, forming a cohesive crust that doesn’t crumble apart when you scoop it. If you’re on a low‑carb diet, you can substitute oat flour or use a mixture of oat flour and almond flour for a lighter texture.
Sliced almonds add a nutty flavor, a satisfying crunch, and a subtle buttery note that complements the pears. The almonds also provide healthy fats, making the dessert a bit more satiating. If you’re allergic to nuts or prefer a different crunch, toasted coconut flakes or pumpkin seeds are excellent alternatives.
The Final Flourish
Brown sugar is the sweetener that gives the crust its caramelized edge. It’s the final touch that turns the simple oat mixture into a decadent crumble. If you want a deeper caramel flavor, use dark brown sugar or even a splash of maple syrup.
Unsalted butter is the secret sauce that binds everything together, creating a rich, buttery crust that melts in your mouth. Butter also contributes to the golden color and the savory undertone that balances the sweetness. For a dairy‑free version, use coconut oil or a vegan butter substitute, but be aware that the flavor will shift slightly.
All‑purpose flour ties the topping together, preventing it from becoming too crumbly. It also helps the butter distribute evenly across the surface. If you’re gluten‑free, swap the flour for a gluten‑free blend that contains xanthan gum to maintain the structure.
Everything's prepped? Good. Let's get into the real action...
The Method — Step by Step
- Preheat your oven to 375°F (190°C). Line a 9-inch square baking dish with parchment paper to keep the crumble from sticking. This step is crucial; a well‑lined dish ensures the crust stays intact and easy to serve.
- Slice the pears into wedges or thick rounds, depending on your preference. Place them in the prepared dish, skin side down, and drizzle with lemon juice. The citrus not only brightens the flavor but also prevents the pears from oxidizing and turning brown.
- Sprinkle the granulated sugar and ground cinnamon evenly over the pears. The sugar will caramelize during baking, creating a glossy glaze that clings to each slice. If you like a deeper caramel flavor, add a pinch of sea salt to the sugar mix.
- In a separate bowl, combine the rolled oats, sliced almonds, brown sugar, and all‑purpose flour. Stir in the softened butter until the mixture resembles coarse crumbs. This crumbly mixture forms the foundation of the topping.
- Drop the crumb mixture over the pears, covering them completely. The oats and almonds will spread and create a golden crust as they bake. If you prefer a more uniform crust, press the crumbs lightly into the fruit.
- Place the dish in the oven and bake for 30 minutes, or until the topping is golden brown and the pears are tender. The aroma of toasted almonds and caramelized sugar will fill your kitchen, signaling that the dessert is almost ready.
- Remove the crumble from the oven and let it rest for 5 minutes. This short rest allows the juices to redistribute, preventing a soggy crust and ensuring each bite is perfectly balanced.
- Serve warm, optionally with a scoop of vanilla ice cream or a dollop of whipped cream. The contrast between the warm crumble and the cold dairy creates a delightful temperature play that elevates the entire experience.
That's it — you did it. But hold on, I've got a few more tricks that'll take this to another level...
Insider Tricks for Flawless Results
The Temperature Rule Nobody Follows
Most bakers bake at 350°F, but raising the temperature to 375°F gives the crust a golden crisp while keeping the pears tender. The higher heat caramelizes the sugars faster, creating a richer glaze. If you lower the temperature, the topping will take longer to brown and the pears might become too soft.
Why Your Nose Knows Best
Smell the pears as they bake. When you notice a sweet, buttery aroma, you’re in the zone. The scent is a reliable indicator that the caramelization is at its peak and the pears are perfectly tender.
The 5-Minute Rest That Changes Everything
After removing the crumble from the oven, let it sit for exactly five minutes. This brief pause allows the juices to settle, preventing a soggy bottom and ensuring the crust stays crisp. If you skip this step, the crumble can feel heavy and clumpy.
Preheat Your Dish
Place the baking dish in the oven while it preheats. A hot dish helps the crust set faster and prevents the crumbs from sticking to the bottom, which can ruin the presentation.
Use a Silicone Mat
Line the dish with a silicone baking mat in addition to parchment paper. The mat adds an extra layer of protection, making cleanup a breeze and ensuring the crumble stays intact when you lift it out.
Add a Splash of Milk
Before baking, whisk a tablespoon of milk into the crumb mixture. The milk hydrates the oats and almonds, giving the topping a slightly chewy center that contrasts beautifully with the crunchy edges.
Creative Twists and Variations
This recipe is a playground. Here are some of my favorite ways to switch things up:
Spicy Pear Crunch
Add a pinch of cayenne pepper to the sugar and cinnamon mixture. The heat adds a surprising kick that balances the sweetness, making it a perfect after‑dinner treat for spice lovers.
Maple‑Glazed Pears
Replace half the granulated sugar with pure maple syrup. The syrup deepens the caramel flavor and gives the crumble a subtle maple undertone that pairs wonderfully with the pears.
Almond‑Oat Crumble with Coconut
Swap the sliced almonds for toasted coconut flakes. The coconut adds a tropical flavor and a delightful chewy texture that transforms the dish into a beach‑inspired dessert.
Bourbon‑Infused Pears
Add a tablespoon of bourbon to the lemon juice before drizzling over the pears. The bourbon adds depth and a warm, woody note that elevates the entire flavor profile.
Chocolate‑Covered Pears
After baking, drizzle melted dark chocolate over the top. The chocolate creates a glossy finish and a rich contrast to the sweet pears and crunchy topping.
Gluten‑Free Version
Use a gluten‑free flour blend in place of all‑purpose flour. The crumble will still hold together, but the texture will be slightly more delicate, giving the dish a lighter feel.
Storing and Bringing It Back to Life
Fridge Storage
Cool the crumble completely before refrigerating. Store it in an airtight container for up to 3 days. When you’re ready to serve, reheat in the oven at 350°F for 5 minutes to revive the crisp crust.
Freezer Friendly
Wrap the cooled crumble tightly in plastic wrap and place it in a freezer bag. It will keep for up to 2 months. Thaw overnight in the fridge before reheating to preserve the texture.
Best Reheating Method
Add a tiny splash of water before reheating to keep the crumble moist. The water steams the topping, preventing it from drying out and restoring that buttery, caramelized flavor.