Picture this: a midnight kitchen, the hum of the fridge, a stack of forgotten tortillas, and me, staring at a pot of boiling pasta that’s about to turn into a culinary revelation. I had just tried the last of the store‑bought enchilada shells and they were as dry as a desert. The moment the sauce hit the air, a scent of cumin and chili powder rolled in, and I knew I had to turn that disappointment into triumph. The dish that emerged was a molten, cheesy, pepper‑kissed masterpiece that made me question my own culinary limits.
I’m talking about the kind of sauce that coats the shell like velvet, the way a well‑done crust on a pizza lifts the bite to a whole new level of flavor. The aroma alone—cooked onions, roasted garlic, a hint of smoked paprika—makes the kitchen feel like a warm, inviting hearth. The texture is a contrast of tender pasta, crunchy corn kernels, and a gooey, melted cheese center that practically begs for a forkful. And the finish? A bright splash of cilantro and a drizzle of sour cream that cuts through the richness like a cool breeze. If you’ve ever been disappointed by a mediocre enchilada, this version is your redemption story.
What sets this recipe apart is not just the combination of ingredients but the way each element is treated. I’ve spent countless nights tweaking the balance of spice, the timing of the bake, and the assembly technique to ensure that every bite is a symphony of flavors. The sauce is simmered just enough to thicken without losing its bright tomato base, the shells are pre‑cooked to a perfect al dente, and the cheese blend is chosen to melt smoothly while still holding its shape. The result is a dish that feels both indulgent and comforting, a true crowd‑pleaser for family dinners or a special occasion.
Now, I dare you to taste this and not go back for seconds. I’ll be honest—half the batch disappeared before anyone else even got a fork. Most recipes get this completely wrong by over‑baking the shells or using a sauce that’s too watery, but here we have a sauce that’s thick, flavorful, and yet light enough to let the pasta shine. Picture yourself pulling this out of the oven, the whole kitchen smelling incredible, and the first bite sending a rush of spicy, cheesy delight across your palate. Let me walk you through every single step—by the end, you’ll wonder how you ever made it any other way.
What Makes This Version Stand Out
- Flavor Depth: The sauce is a slow‑simmered blend of tomato, cumin, chili powder, and a touch of smoked paprika, creating layers of warmth that linger long after the last bite.
- Texture Play: Jumbo shells provide a sturdy foundation, while the corn kernels add a pop of crunch that contrasts the silky cheese center.
- Cheese Harmony: A balanced mix of sharp cheddar and creamy Monterey Jack melts into a gooey, glossy coating that doesn’t overpower the sauce.
- Ingredient Quality: Fresh ground beef and real‑ground spices give the dish a rustic, home‑cooked feel that store‑bought versions simply can’t match.
- Make‑Ahead Potential: Assemble the shells a day ahead, refrigerate, and bake only when ready—perfect for busy weeknights.
- Versatility: Swap beef for chicken or beans, or add sautéed bell peppers to tailor the dish to any dietary preference.
- Crowd Reaction: Friends rave about the “cheese pull” and the “spicy‑but‑smooth” finish—this dish turns every dinner into a mini‑celebration.
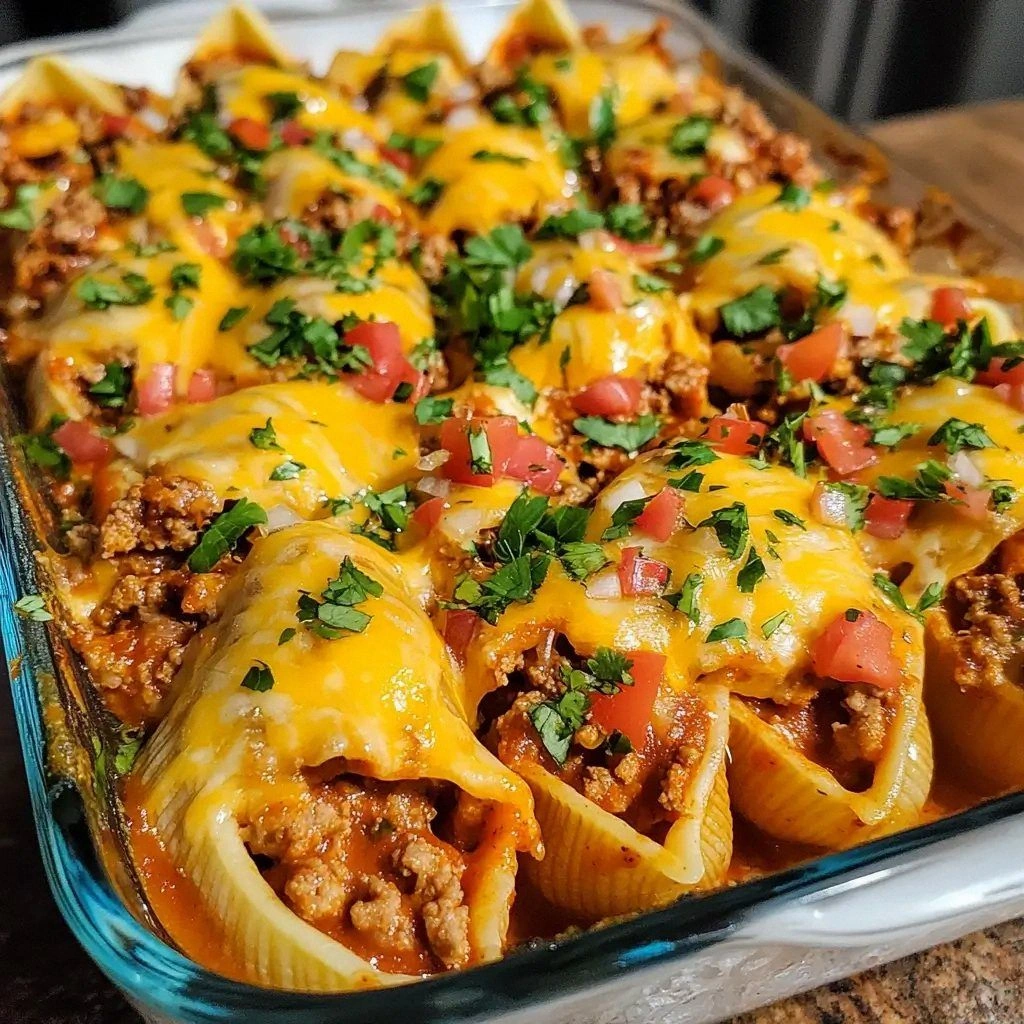
- Presentation: The vibrant green cilantro and the glossy sauce finish give the dish an Instagram‑ready look that’s as pleasing to the eye as it is to the palate.
Inside the Ingredient List
The Flavor Base
The sauce is the soul of this dish, and it starts with a robust base of diced onions and minced garlic sautéed until translucent. Adding a tablespoon of olive oil not only prevents sticking but also deepens the flavor profile, creating a rich canvas for the spices. Ground cumin, chili powder, and a whisper of smoked paprika are then folded in, letting their earthy tones mingle with the sweetness of the tomatoes. A splash of tomato paste at the end thickens the sauce, giving it that velvet‑like consistency that clings lovingly to each shell.
Skipping any of these elements will result in a sauce that feels flat or too thin. For instance, omitting the tomato paste will leave the sauce watery, causing the shells to become soggy. If you prefer a milder flavor, reduce the chili powder by half, but keep the cumin to preserve that warm, aromatic undertone.
When selecting the tomatoes, look for a can of whole‑bead tomatoes that are free of added salt. This gives you control over the final seasoning and ensures the sauce remains bright. A small pinch of salt and a dash of black pepper finish the base, balancing the sweetness and acidity.
The Texture Crew
The shells themselves are the backbone of this dish, providing a sturdy, yet tender structure that holds the filling. Opt for jumbo shells for a more dramatic presentation, but medium shells work just as well. The key is to boil them just until they’re al dente—overcooked shells will break apart in the oven, while undercooked ones will be chewy.
Corn kernels add a delightful crunch that breaks the monotony of the creamy filling. Fresh corn is ideal for a sweet burst of flavor, but frozen corn, thawed and drained, works perfectly and saves time. If you’re looking for a low‑carb alternative, you can replace corn with finely diced zucchini, which offers a similar bite without the starch.
The cheese blend—sharp cheddar for bite and Monterey Jack for melt—creates a gooey, glossy coating that’s the hallmark of a well‑executed enchilada. The cheddar’s sharpness balances the Jack’s creaminess, preventing the dish from becoming too heavy or too light. Using a mix of cheeses also ensures a smooth melt that doesn’t separate during baking.
The Unexpected Star
A splash of fresh lime juice is the secret ingredient that elevates this dish from good to unforgettable. The acidity cuts through the richness of the cheese and the meat, brightening the overall flavor profile. Lime also adds a subtle citrusy aroma that makes the dish feel fresh and vibrant.
Sour cream isn’t just a garnish—it’s a cooling agent that balances the heat from the spices. A dollop on top of each serving creates a visual contrast and a textural counterpoint to the molten cheese. If you’re avoiding dairy, a dollop of Greek yogurt or a vegan sour cream alternative works just as well.
The Final Flourish
Fresh cilantro and a sprinkle of chili flakes finish the dish, adding a burst of herbal freshness and a hint of heat that lingers on the palate. The cilantro’s bright green hue also enhances the visual appeal, making the dish as stunning as it is delicious.
Everything’s prepped? Good. Let’s get into the real action and assemble this masterpiece.
The Method — Step by Step
- First, bring a large pot of salted water to a rolling boil. Add the jumbo shells and cook for 8–10 minutes, or until they’re just tender. Drain and rinse under cold water to stop the cooking process. This step ensures the shells are firm enough to hold the filling without becoming mushy during baking.
- While the shells are cooking, heat a tablespoon of olive oil in a large skillet over medium heat. Add the diced onions and minced garlic, sautéing until they’re translucent and fragrant—about 3–4 minutes. This builds the aromatic foundation of the sauce.
- Stir in the ground cumin, chili powder, and smoked paprika, letting the spices toast for 30 seconds until they release their essential oils. This small step unlocks the full flavor potential of the spices, turning them from dormant to dynamic.
- Add the ground beef to the skillet, breaking it up with a wooden spoon. Cook until the meat is browned and no longer pink, about 6–7 minutes. Drain excess grease to keep the dish from becoming greasy.
- Pour in the crushed tomatoes and tomato paste, stirring to combine. Bring the mixture to a gentle simmer, then reduce the heat to low. Let it cook for 15 minutes, allowing the flavors to meld. Watch for the sauce to thicken—if it becomes too thick, add a splash of water.
- Add the corn kernels, diced onions, and a pinch of salt and pepper. Simmer for an additional 5 minutes, ensuring the corn is heated through and the flavors are well blended. This step is crucial for maintaining the crunch of the corn.
- Remove the skillet from the heat and stir in the shredded cheddar and Monterey Jack. The cheeses should melt into a smooth, glossy mixture that coats the meat and corn. If the mixture seems too thick, add a splash of milk to loosen it.
- Preheat the oven to 375°F (190°C). In a large baking dish, spread a thin layer of the sauce to prevent sticking. Place the cooked shells in a single layer, then spoon the cheese‑meat mixture into each shell, filling them generously. Pour the remaining sauce over the top, ensuring every shell is coated.
- Cover the dish with aluminum foil and bake for 20 minutes. Then remove the foil, sprinkle the remaining cheddar and Monterey Jack on top, and bake for an additional 10 minutes, or until the cheese is bubbly and lightly browned.
- Let the dish rest for 5 minutes before serving. This allows the flavors to settle and the cheese to set slightly, making the shells easier to cut and plate. Garnish with fresh cilantro, a drizzle of sour cream, and a sprinkle of chili flakes before serving.
That’s it— you did it. But hold on, I’ve got a few more tricks that will take this from great to legendary.
Insider Tricks for Flawless Results
The Temperature Rule Nobody Follows
Baking at exactly 375°F (190°C) is the sweet spot for this dish. Too low, and the shells will remain undercooked; too high, and the cheese will burn before the filling is hot. I’ve found that preheating the oven for at least 15 minutes before placing the dish ensures a consistent bake.
Why Your Nose Knows Best
The aroma of the sauce as it simmers is a reliable indicator of readiness. When the smell turns from raw tomato to a caramelized, slightly smoky scent, the sauce is at peak flavor. Trust your nose—if it’s calling, the dish is ready.
The 5-Minute Rest That Changes Everything
Letting the baked shells rest for 5 minutes before cutting allows the cheese to set slightly, preventing it from sliding out of the shells. This also gives the sauce a chance to thicken, ensuring every bite is packed with flavor.
Use a Baking Dish with a Rim
A dish with a slight rim keeps the sauce from spilling over, especially when the filling is generous. It also makes it easier to lift the entire dish out of the oven without losing any of the cheesy goodness.
Keep the Sauce on Hand for Serving
Keep a small saucepan of leftover sauce warm on the stove. When serving, drizzle it over the shells to add a fresh burst of flavor and moisture, especially if the dish has cooled slightly.
Creative Twists and Variations
Spinach & Feta Version
Swap the ground beef for sautéed spinach and crumbled feta. The spinach adds a subtle earthiness, while feta introduces a tangy, salty bite that pairs wonderfully with the enchilada sauce.
Mexican Street Taco Shells
Use seasoned ground pork instead of beef, and add a dash of adobo sauce for a smoky depth. Garnish with pickled jalapeños to give each bite a spicy, tangy kick.
Vegan Bean & Veggie Delight
Replace the meat with black beans, diced zucchini, and roasted sweet potato cubes. Use a plant‑based cheese and a splash of nutritional yeast for that cheesy flavor without dairy.
Breakfast Shells
Fill shells with scrambled eggs, chorizo, and a sprinkle of cheddar. Bake until the eggs are set and serve with salsa and avocado for a hearty brunch.
Mediterranean Twist
Infuse the sauce with a teaspoon of harissa paste and top the shells with diced tomatoes, olives, and a drizzle of olive oil. Finish with chopped parsley for a Mediterranean flair.
Kids‑Friendly Version
Use mild cheddar and reduce the chili powder to half. Add diced carrots and peas for extra nutrition, and serve with a side of ranch dressing for dipping.
Storing and Bringing It Back to Life
Fridge Storage
Store leftovers in an airtight container in the refrigerator for up to 3 days. When reheating, cover with foil and bake at 350°F (175°C) for 15 minutes, or until heated through. The shells will stay firm, and the cheese will regain its meltiness.
Freezer Friendly
Freeze the assembled shells (without the top cheese layer) in a single layer on a baking sheet. Once frozen, transfer to a freezer bag. Reheat in the oven at 375°F (190°C) for 25 minutes, then top with cheese and bake for an additional 10 minutes.
Best Reheating Method
The secret to a perfectly reheated dish is to add a splash of water or broth to the baking dish before reheating. This steams the shells, preventing them from drying out and keeping the sauce glossy and luscious.