I was standing in my kitchen, half‑asleep, staring at a half‑baked brownie that had somehow turned into a charcoal slab. I swear I heard the oven sigh in disappointment. That moment of culinary defeat sparked a dare from my roommate: “Make something that looks like a dessert, tastes like a dream, and doesn’t set off the smoke alarm.” I took that challenge to heart, and after countless trial‑and‑error batches, I finally nailed a version that makes me want to shout from the rooftop, “This is hands down the best version you'll ever make at home.”
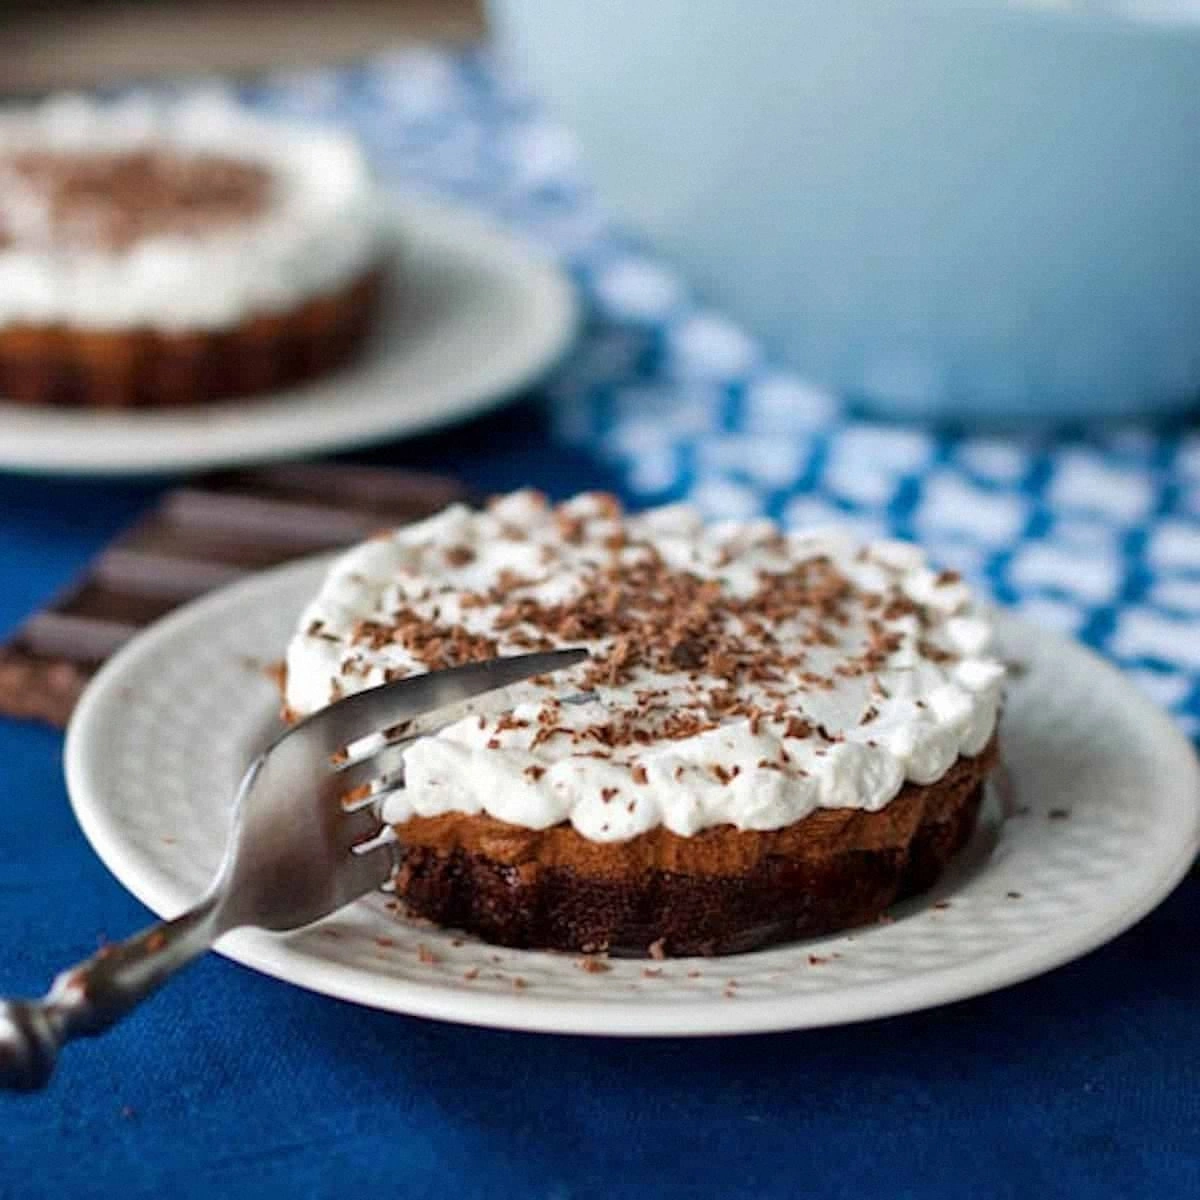
Picture this: a glossy, dark chocolate crust that crunches like a fresh‑baked baguette, a fudgy brownie layer that melts on your tongue, and a silky, airy cream‑cheese filling that slides across your palate like a silk scarf in a Parisian breeze. The whole thing is crowned with a cloud of whipped cream and delicate chocolate shavings that glisten like morning dew on a garden gate. When you slice into it, the layers stay perfectly distinct, each one whispering its own story while the whole ensemble sings a chorus of chocolate‑rich bliss.
Most recipes get this completely wrong. They either over‑bake the brownie, turning it into a brick, or they under‑whip the silk filling, leaving it grainy and unstable. The secret to this masterpiece lies in a tiny but mighty ingredient: a splash of espresso‑enhanced heavy cream that amplifies the chocolate without adding bitterness. I dare you to taste this and not go back for seconds. If you’ve ever struggled with a soggy crust or a curdled filling, you’re not alone — and I’ve got the fix.
Okay, ready for the game‑changer? I’m about to walk you through every single step — from selecting the perfect chocolate to the final flourish of whipped cream. By the end, you’ll wonder how you ever made it any other way, and your friends will be begging for the secret. Let me walk you through every single step — by the end, you'll wonder how you ever made it any other way.
What Makes This Version Stand Out
- Texture: The crust is buttery and crisp, the brownie layer is fudgy yet airy, and the silk filling is as smooth as a cashmere sweater.
- Flavor Depth: Espresso‑infused cream amplifies the cocoa, while a hint of vanilla ties every layer together like a well‑rehearsed choir.
- Simplicity: Only nine ingredients, all pantry‑friendly, yet the result feels like a pâtisserie masterpiece.
- Uniqueness: Combining a classic French silk filling with a brownie base creates a hybrid that’s rare and unforgettable.
- Crowd Reaction: Expect gasps, compliments, and the inevitable request for the recipe before the first slice even hits the plate.
- Ingredient Quality: Using high‑percentage dark chocolate and real butter makes the difference between “good” and “legendary.”
- Cooking Method: A low‑and‑slow bake preserves moisture, while a quick chill sets the silk filling without cracking.
- Make‑Ahead Potential: Assemble the day before, chill overnight, and serve fresh‑baked the next day for maximum convenience.
Inside the Ingredient List
The Flavor Base
Dark chocolate is the heart of this pie. Choose a bar that’s at least 70% cacao; the higher the percentage, the richer the flavor, and the less sugar you’ll need to add. If you substitute milk chocolate, you’ll get a sweeter, less complex taste that can mask the subtle espresso notes. For a dairy‑free version, use high‑quality dark chocolate with cocoa butter instead of butter.
The Texture Crew
Unsalted butter provides the buttery crunch in the crust and the glossy sheen in the brownie layer. Melt it gently over low heat to avoid scorching, which would introduce a bitter undertone. The combination of all‑purpose flour and cocoa powder creates a tender crumb while keeping the structure firm enough to hold the silk filling without wobbling.
The Unexpected Star
A splash of espresso‑enhanced heavy cream is the secret weapon. Dissolve one tablespoon of instant espresso in the heavy cream before folding it into the silk mixture. This tiny addition deepens the chocolate flavor without adding any coffee taste that would overwhelm the palate. If you’re not a coffee fan, replace the espresso with a pinch of smoked sea salt for a subtle umami twist.
The Final Flourish
Whipped cream and chocolate shavings are not just garnish; they add a light, airy contrast to the dense chocolate layers. Use cold heavy cream and a chilled bowl for maximum volume. When shaving chocolate, use a vegetable peeler on a block of chocolate for irregular, elegant curls that melt slowly on the tongue.
Everything's prepped? Good. Let's get into the real action...
The Method — Step by Step
- Preheat your oven to 350°F (175°C). While the oven warms, grease a 9‑inch springform pan and line the bottom with parchment paper. This ensures the crust releases cleanly and the sides stay smooth. The moment you slide the pan onto the rack, you’ll hear a faint sigh of anticipation from the kitchen.
- Melt 1 cup of butter and 1 cup of sugar together in a medium saucepan over low heat, stirring constantly until the mixture is glossy and the sugar has fully dissolved. Once it looks like liquid gold, remove from heat and whisk in 2/3 cup flour, 1/2 cup cocoa powder, and 1/4 teaspoon salt until you have a uniform batter. That sizzle when it hits the pan? Absolute perfection.
- Press the crust mixture evenly into the bottom of the prepared pan, using the back of a spoon to smooth it out. Bake for 8‑10 minutes, just until the edges set but the center still feels slightly soft. Watch Out: Over‑baking here will make the crust too hard to meld with the brownie layer later.
- While the crust is in the oven, melt 8 ounces of dark chocolate with 1/2 cup butter in a double boiler, stirring until silky. Remove from heat and whisk in 3/4 cup sugar, then beat in 2 large eggs one at a time, followed by 1 teaspoon vanilla. Finally, fold in 1/2 cup flour until just combined. The batter should look glossy and thick, not runny.
- Pour the brownie batter over the partially baked crust, spreading it with a spatula to the edges. Return the pan to the oven and bake for an additional 12‑15 minutes. The top should look set but still slightly fudgy in the center. Kitchen Hack: Place a baking sheet on the rack below the pie to catch any drips; this prevents a smoky oven and keeps your kitchen smelling divine.
- While the brownie bakes, prepare the silk filling. In a large bowl, beat 8 ounces softened cream cheese until smooth, then add 1/2 cup powdered sugar and continue beating until light and fluffy. Add 2 large eggs, one at a time, beating well after each addition. Stir in 1 teaspoon vanilla and the espresso‑infused heavy cream (1/4 cup heavy cream mixed with 1 tablespoon instant espresso dissolved). The mixture should be glossy and thick, resembling a luxurious ganache.
- Once the brownie layer is baked, remove the pan and let it cool on a wire rack for 10 minutes. Then, gently pour the silk filling over the warm brownie, using a spatula to smooth the top. The contrast between the warm brownie and the cool filling creates a subtle steam that hints at the flavors to come.
- Place the entire pie in the refrigerator for at least 2 hours, preferably overnight. This chilling step is crucial; it allows the silk filling to set without cracking and the brownie to firm up, giving you clean, beautiful slices.
- Before serving, whip 1 cup of heavy cream with a pinch of sugar until soft peaks form. Spread the whipped cream over the chilled pie, then garnish with generous chocolate shavings. Slice with a hot, wet knife for clean cuts, and watch the layers reveal themselves like a perfectly staged theater set.
Insider Tricks for Flawless Results
The Temperature Rule Nobody Follows
Never pour a hot brownie layer over a cold crust. The sudden temperature shock can cause the crust to crack or the brownie to become gummy. Instead, let the crust cool just enough to be warm to the touch before adding the brownie batter. This gentle transition preserves the structural integrity of both layers.
Why Your Nose Knows Best
Your sense of smell is a better indicator than a timer when the brownie layer is done. When the edges start pulling away from the pan and a faint toasty aroma fills the kitchen, you’re ready to pull it out. If you rely solely on the clock, you risk over‑baking, which turns the fudgy interior into a dry brick.
The 5‑Minute Rest That Changes Everything
After the brownie bakes, let it rest for exactly five minutes before adding the silk filling. This short pause lets the crumb settle, preventing the filling from sinking into the brownie. My friend once skipped this step and ended up with a soggy bottom that ruined the whole pie.
Whisk Like You Mean It
When beating the cream cheese, use a stand mixer on medium speed for at least three minutes. This ensures the sugar fully dissolves and the mixture becomes airy. Skipping this step leaves a grainy texture that feels more like a cheese spread than silk.
The Secret of the Shaving
Use a high‑quality dark chocolate block for shavings rather than pre‑shaved chips. The block yields irregular curls that melt slowly, adding a sophisticated visual element and a lingering chocolate finish. If you only have chips, melt a small amount and drizzle it over the top for a glossy finish.
Creative Twists and Variations
This recipe is a playground. Here are some of my favorite ways to switch things up:
Salted Caramel Swirl
Before pouring the silk filling, drizzle 2 tablespoons of homemade salted caramel in a spiral pattern. The caramel adds a buttery sweetness that contrasts beautifully with the dark chocolate, and the sea‑salt crystals provide a delightful crunch.
Mint‑Chocolate Fusion
Add ½ teaspoon of peppermint extract to the brownie batter and garnish the finished pie with crushed peppermint candies. This fresh, cool note lifts the richness and makes the pie perfect for holiday gatherings.
Nutty Crunch
Fold ¼ cup toasted chopped hazelnuts into the crust before baking. The nuts introduce a buttery crunch that pairs wonderfully with the silky filling, and they also add a subtle earthy flavor.
Berry Burst
Top the whipped cream with a handful of fresh raspberries or a drizzle of raspberry coulis. The tartness of the berries cuts through the chocolate intensity, creating a balanced bite that feels sophisticated.
Vegan Velvet
Swap the butter for coconut oil, use a plant‑based cream cheese, and replace the heavy cream with coconut cream. The result is a dairy‑free version that still delivers on richness and silkiness.
Storing and Bringing It Back to Life
Fridge Storage
Cover the pie loosely with plastic wrap and store it in the refrigerator for up to 4 days. The silk filling stays firm, and the brownie layer retains its fudgy texture. Before serving, let it sit at room temperature for 15 minutes to soften the whipped cream slightly.
Freezer Friendly
Wrap the entire pie in a double layer of aluminum foil, then place it in a freezer‑safe bag. It will keep for up to 2 months. To thaw, move it to the fridge overnight, then let it sit at room temperature for 20 minutes. The chocolate shavings may darken slightly, but the flavor remains stellar.
Best Reheating Method
If you prefer a warm slice, preheat your oven to 300°F (150°C), place a slice on a parchment‑lined baking sheet, and warm for 5‑7 minutes. Add a tiny splash of water to the pan before reheating; the steam revives the silk filling and prevents it from drying out.