When I was a teenager, my family’s weekend gatherings always featured a humble plate of fried chicken that somehow felt magical. The crackle of the batter, the steam of garlic, and the bright sparkle of parmesan made every bite a celebration. One summer, I discovered an air fryer in my aunt’s kitchen, and the moment I tried those classic tenders inside it, the world changed. The same comforting flavors, but with a fraction of the oil, a crispier texture, and a fraction of the guilt.
This dish traces its roots to American comfort food, where chicken tenders are a staple of casual dining. By marrying the classic garlic‑parmesan coating with the efficiency of modern air‑frying technology, we achieve a perfect balance of taste, texture, and healthfulness. It’s a recipe that honors tradition while embracing innovation.
In this guide, I’ll walk you through every step—from selecting the freshest chicken breast to mastering the perfect coating and achieving that golden crunch. You’ll learn why each ingredient matters, how to adjust the recipe for any number of guests, and the science behind that irresistible crust.
So roll up your sleeves, preheat the air fryer, and let’s create a dish that will become a family favorite for years to come.
🌟 Why This Recipe Will Captivate You
Garlic Parmesan Chicken Tenders are more than just a snack; they’re a versatile centerpiece that delivers flavor, nutrition, and convenience all in one bite.
- ✨ Effortless Air Frying: The air fryer cooks evenly, giving you that classic fried crunch without the deep‑fat bath, saving you time and calories.
- ✨ Bold Garlic‑Parmesan Flavor: Fresh minced garlic and aged Parmesan create a savory, aromatic coating that sticks to the chicken for every bite.
- ✨ Perfectly Juicy Interior: The quick high‑heat sear locks in moisture, ensuring the meat stays tender while the exterior turns golden.
- ✨ Customizable Portion Control: Our built‑in portion adjuster lets you scale the recipe from a solo snack to a party platter without guessing.
- ✨ Health‑Conscious Choice: Using a light coating of panko and a spray of olive oil reduces fat by up to 70% compared to traditional deep‑frying.
- ✨ Kid‑Approved & Adult‑Loved: The familiar taste appeals to children, while the sophisticated garlic‑parmesan notes satisfy adult palates.
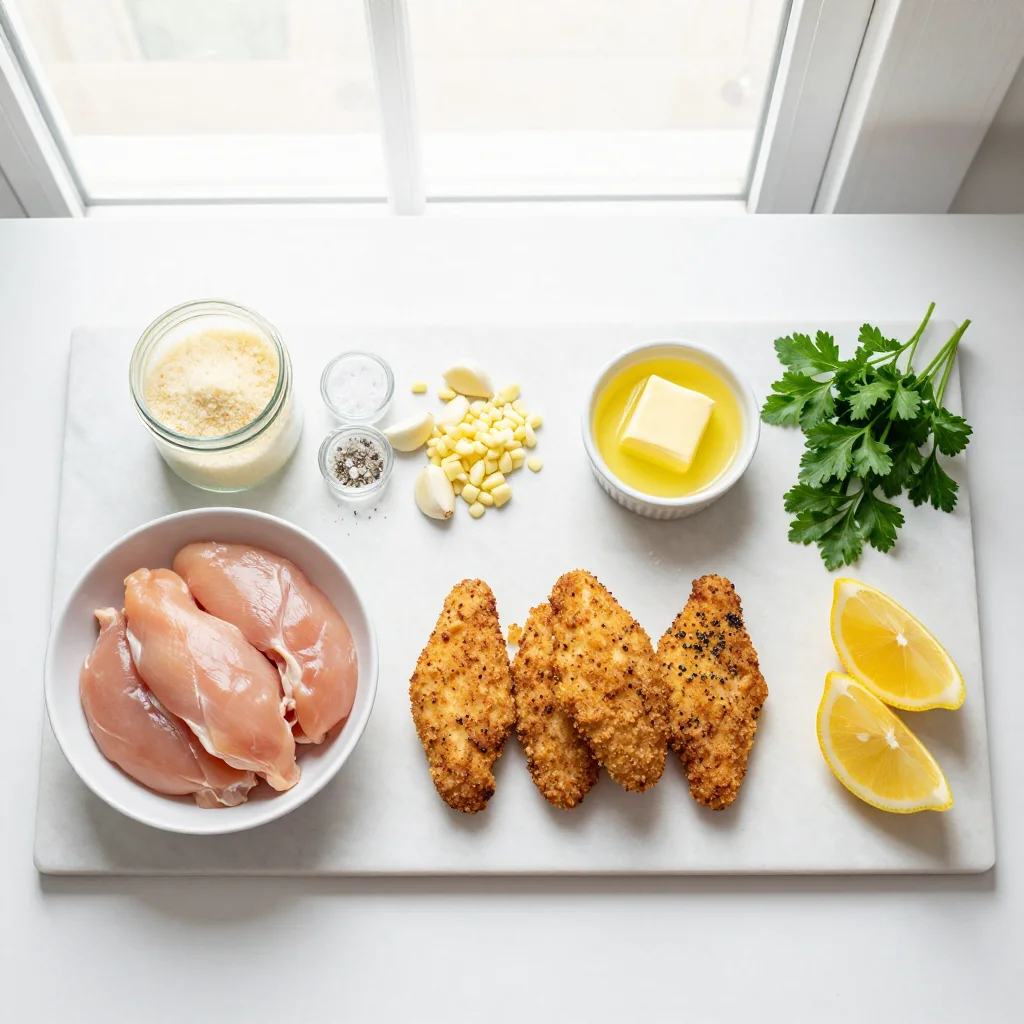
🥗 Ingredients
📝 Complete Ingredient List
For the Chicken Tenders:
For the Garlic‑Parmesan Coating:
For the Dipping Sauce (Optional):
🔍 Focus on Key Ingredients
Chicken Breast
Chicken breast provides a lean source of high‑quality protein, essential for muscle repair and satiety. Choose breasts that are uniform in thickness to ensure even cooking. If the pieces are too thick, consider pounding them gently to a consistent 1‑centimeter thickness, which promotes a crisp exterior while keeping the interior juicy.
Parmesan Cheese
Parmesan adds a nutty, umami‑rich depth that pairs beautifully with garlic. Freshly grated cheese releases more aroma than pre‑grated varieties. Look for a cheese with a granular texture and a deep golden color; this indicates a longer aging period, which translates to stronger flavor.
Garlic
Garlic is the aromatic backbone of this dish. Mince it finely so it distributes evenly throughout the coating. When exposed to heat, garlic develops a sweet, caramelized nuance that complements the salty Parmesan, creating a balanced taste profile.
🔄 Quick Substitutions
| If you don’t have… | Use instead… |
|---|---|
| Panko breadcrumbs | Regular breadcrumbs or crushed cornflakes |
| Parmesan cheese | Grated Pecorino Romano or aged Asiago |
| Greek yogurt | Sour cream mixed with a splash of lemon juice |
👨🍳 Step‑by‑Step Instructions
Follow these detailed steps to achieve perfectly crisp garlic‑parmesan chicken tenders that look and taste restaurant‑quality.
📋 Phase 1: Preparation & Mise en Place
Gather all ingredients, pre‑heat the air fryer, and prep the chicken.
Trim and Slice the Chicken
Pat the chicken breasts dry with paper towels. Slice each breast into uniform strips about 1 inch wide and 3 inches long. Uniform size ensures even cooking and consistent coating adherence. If you notice any fat or connective tissue, trim it away now.
Season the Chicken
Place the chicken strips in a large bowl. Drizzle with olive oil, then sprinkle salt and black pepper. Toss gently until each piece is lightly coated. The oil helps the coating stick and adds a subtle richness.
🔥 Phase 2: Coating & Cooking
Create the flavorful coating, apply it, and air‑fry to perfection.
Prepare the Garlic‑Parmesan Coating
In a shallow dish, combine panko breadcrumbs, grated Parmesan, minced garlic, Italian seasoning, and red pepper flakes if you like a mild heat. Mix thoroughly so the garlic is evenly distributed. The breadcrumbs provide crunch, while the cheese and garlic create a savory crust.
Coat the Chicken Strips
One by one, roll each seasoned chicken strip in the breadcrumb mixture, pressing gently to ensure the coating adheres. Place coated strips on a parchment‑lined tray. For an extra‑crisp finish, lightly spray the coated strips with a fine mist of olive oil.
Air Fry the Tenders
Pre‑heat the air fryer to 200 °C (390 °F) for 3 minutes. Arrange the coated strips in a single layer inside the basket, ensuring they don’t touch. Cook for 10 minutes, then flip each piece and cook an additional 2 minutes until the coating is golden‑brown and the internal temperature reaches 74 °C (165 °F).
✨ Phase 3: Finishing & Plating
Check doneness, prepare the sauce, and serve.
Verify Doneness
Insert a meat thermometer into the thickest part of a tender. It should read at least 74 °C (165 °F). If not, return the piece to the air fryer for another minute.
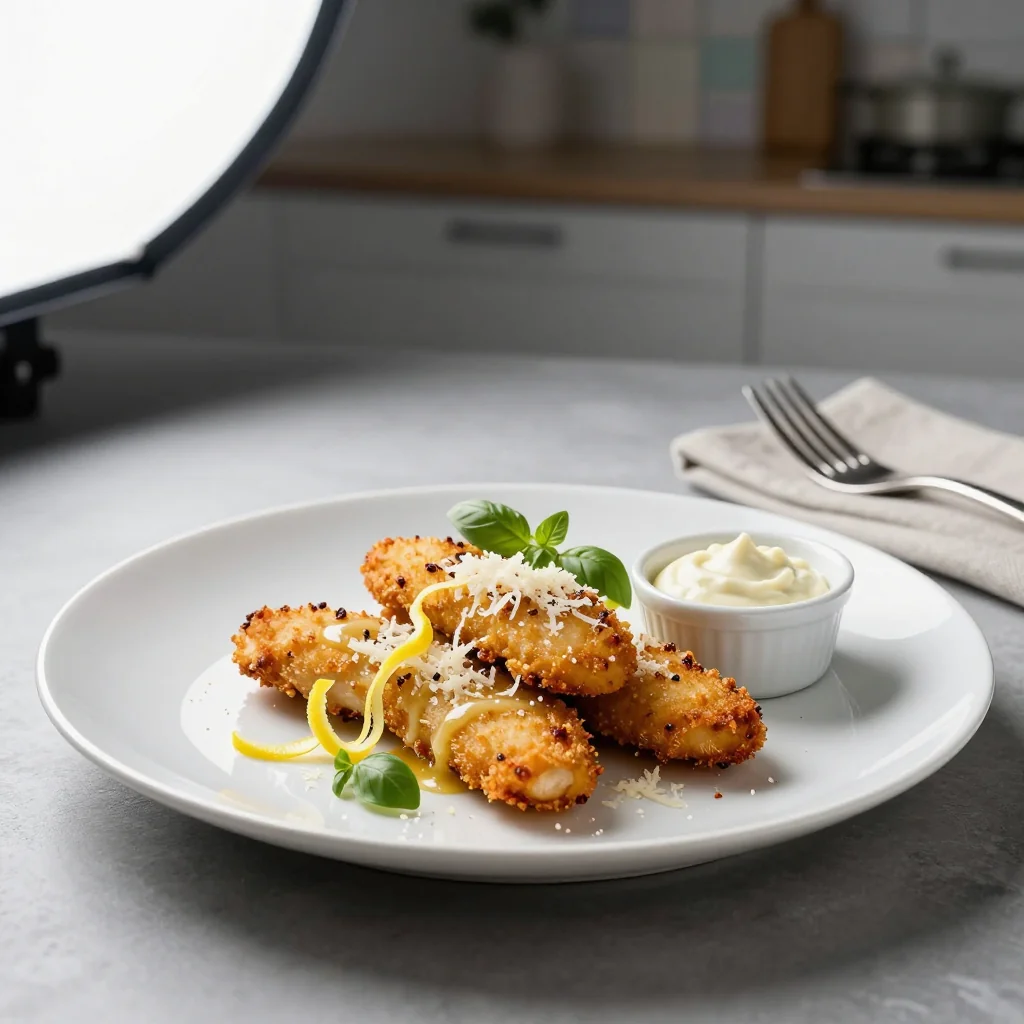
Prepare the Dipping Sauce (Optional)
In a small bowl, whisk together Greek yogurt, lemon juice, honey, and Dijon mustard until smooth. The sauce adds a tangy, creamy contrast that brightens the rich chicken.
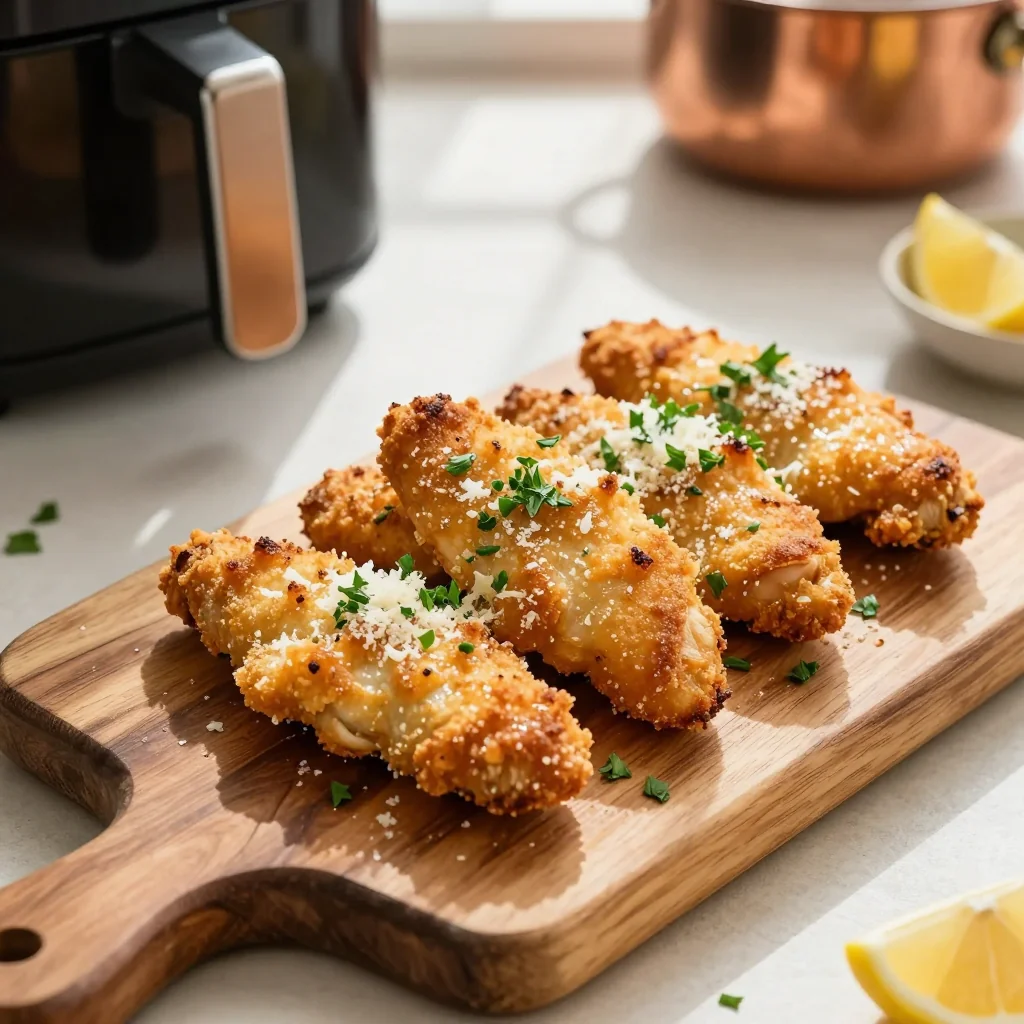
Plate the Tenders
Arrange the golden tenders on a serving platter. Sprinkle a final pinch of grated Parmesan and a drizzle of olive oil for extra shine. Serve with the optional yogurt dip on the side, and garnish with fresh parsley if desired.
💡 Expert Tips & Tricks
🛒 Choosing the Best Ingredients
Look for chicken breasts that are firm, pink, and free of any gray spots. Fresh garlic should feel heavy for its size and have tight, unblemished skins. When selecting Parmesan, choose a block rather than pre‑grated; it retains more flavor and melts better. For panko, opt for the Japanese style that’s light and airy, which yields a superior crunch.
🔪 Preparation Techniques
Dry the chicken thoroughly; excess moisture creates steam that prevents the coating from adhering. After seasoning, let the strips rest for 5 minutes so the salt can begin to penetrate, enhancing flavor. When coating, press the breadcrumb mix onto each strip rather than just shaking—this creates a tighter crust.
🌡️ Mastering the Cooking Process
Pre‑heat the air fryer to guarantee an immediate sizzle. Avoid overcrowding the basket; a single layer allows hot air to circulate fully. If you notice the coating browning too quickly, lower the temperature by 10 °C and add an extra minute to the cooking time.
🍽️ Presentation & Service
Serve the tenders on a rustic wooden board for a casual feel, or on a sleek white platter for a more formal presentation. A sprinkle of fresh parsley, a wedge of lemon, and a side of the yogurt dip elevate the visual appeal and add brightness to each bite.
🏆 Pro Tips
Elevate your kitchen game with these professional insights.
- 🎯 Use a Double‑Coating Method: After the first coating, dip the tenders briefly in beaten egg, then roll again in the breadcrumb mix. This creates an ultra‑crisp shell that stays crunchy even after cooling.
- 🎯 Freeze the Coated Strips Before Cooking: Place the coated chicken on a tray and freeze for 15 minutes. This firms the coating, reduces splatter, and yields an even more stable crust.
- 🎯 Add a Touch of Smoked Paprika: Incorporating ½ tsp smoked paprika into the breadcrumb mix introduces a subtle smoky depth that pairs beautifully with the garlic and cheese.
- 🎯 Finish with a Light Butter Glaze: Melt 1 tbsp butter, add a dash of lemon zest, and brush over the hot tenders just before serving. The glaze adds sheen and a buttery richness without overpowering the primary flavors.
- 🎯 Use a Meat Thermometer for Consistency: Even experienced cooks can miss the exact moment the internal temperature hits 74 °C. A quick check guarantees safety and juiciness.
- 🎯 Pair with a Simple Arugula Salad: Toss arugula with olive oil, lemon juice, and shaved Parmesan. The peppery greens cut through the richness and provide a refreshing contrast.
"The secret to great fried chicken is never to rush the coating; let each layer breathe and set." — Chef Thomas Keller
🔄 Variations & Adaptations
This recipe is a flexible canvas that welcomes creative twists, dietary tweaks, and cultural inspirations.
🥬 Vegetarian/Vegan Version
Swap chicken for thick-cut cauliflower florets or firm tofu cubes. Marinate tofu in soy sauce, garlic, and a splash of olive oil before coating. For a vegan crust, replace Parmesan with nutritional yeast and use plant‑based panko.
- Cauliflower florets (500 g) – treat like chicken strips.
- Vegan Parmesan (30 g) – blend cashews, nutritional yeast, and garlic powder.
🌶️ Flavor Variations
Experiment with global spice blends to tailor the dish to your palate.
Spicy Sriracha Version:
Mix 1 tbsp sriracha into the olive oil before coating, and add ½ tsp cayenne to the breadcrumb mix.
Mediterranean Version:
Add 1 tbsp chopped sun‑dried tomatoes and 1 tsp oregano to the coating. Serve with tzatziki.
Asian Fusion Version:
Replace Italian seasoning with 1 tsp five‑spice powder, and finish with a drizzle of soy‑ginger glaze.
⚠️ Dietary Adaptations
Gluten‑Free:
Use gluten‑free panko or crushed rice crackers in place of regular breadcrumbs.
Lactose‑Free:
Swap Parmesan for lactose‑free hard cheese or a blend of nutritional yeast and almond‑based parmesan.
Low‑Calorie:
Reduce olive oil spray to a mist, use a lighter coating of almond flour, and serve with a low‑fat yogurt dip.
👶 Family/Kids Version
For picky eaters, omit the red pepper flakes and serve with a honey‑mustard dip. Cut the tenders into bite‑size pieces and let kids help press the coating onto each piece—making cooking a fun activity.
📦 Storage & Reheating
🧊 Conservation
Refrigerator:
- Duration: 3 days
- Recommended container: airtight glass or BPA‑free plastic
- Tip: Place a paper towel on top to absorb excess moisture.
Freezer:
- Duration: 2 months
- Method: Flash‑freeze on a tray, then transfer to a zip‑lock bag.
- Defrosting: Overnight in the refrigerator or 30 minutes in the microwave on defrost.
💡 For best texture, reheat from frozen using the air fryer rather than the microwave.
♨️ Reheating
🔥 Oven (Recommended):
- Preheat to 180 °C (350 °F).
- Place tenders on a baking sheet lined with parchment.
- Cover loosely with foil and heat for 8 minutes.
- Remove foil and continue for 4 minutes to restore crispness.
⚡ Microwave (Quick):
- Cover with a microwave‑safe lid.
- Heat on medium power for 1 minute.
- Flip and heat another 30 seconds if needed.
🍳 Skillet:
Heat a non‑stick skillet over medium‑high heat, add a drizzle of oil, and sauté for 3‑4 minutes, turning once, until the crust revives.
🍷 Perfect Pairings
🥗 Side Dishes
- Fresh Mixed Green Salad: A light vinaigrette balances the richness of the tenders.
- Roasted Sweet Potato Wedges: Their natural sweetness complements the salty cheese.
- Garlic Parmesan Corn on the Cob: Echoes the main flavor while adding a sweet crunch.
🍷 Wine & Beverage Pairings
- Chardonnay (oaked): The buttery notes mirror the Parmesan, while acidity cuts through the fat.
- Sauvignon Blanc: Crisp acidity highlights the garlic and brightens the palate.
- Non‑Alcoholic: Sparkling water with a splash of lemon or a light iced tea.
🍰 To Complete the Meal
Start with a seasonal soup—like a chilled cucumber gazpacho—and finish with a lemon‑ricotta cheesecake. The citrus notes tie the entire menu together, creating a harmonious dining experience.
❓ Frequently Asked Questions
Q: Can I use bone‑in chicken thighs instead of breast strips?
A: Yes, but remove the bones and skin first. Thigh meat is richer and more forgiving if slightly overcooked. Adjust cooking time by adding 2‑3 minutes to ensure the coating reaches the same golden level.
Q: How do I prevent the coating from falling off during cooking?
A: Pat the chicken dry, use a thin layer of olive oil before coating, and press the breadcrumb mixture firmly onto each strip. A light spray of oil right before air‑frying also helps the crust set.
Q: Is it necessary to pre‑heat the air fryer?
A: Pre‑heating ensures immediate high heat, which creates the initial crunch. Skipping this step may result in a softer coating and longer cooking time.
Q: What if I don’t have an air fryer?
A: You can bake the tenders on a pre‑heated convection oven at 200 °C (390 °F) for 15‑18 minutes, flipping halfway. For a truly fried texture, shallow‑fry in a skillet with a thin layer of oil, but be mindful of oil temperature to avoid sogginess.
Q: Can I make the coating gluten‑free?
A: Absolutely. Substitute the panko with gluten‑free breadcrumbs or crushed rice crackers. Ensure any added spices are also gluten‑free.
Q: How far in advance can I prepare the coating mixture?
A: Mix the coating up to 24 hours ahead and store it in an airtight container. This allows the flavors to meld, and the mixture stays fresh for the next day’s cooking.
🎉 Let’s Get Cooking!
Garlic Parmesan Chicken Tenders in the air fryer combine the comfort of a classic favorite with modern convenience. The recipe delivers a satisfying crunch, a burst of aromatic garlic, and a rich cheesy depth—all while keeping the dish lighter than traditional deep‑fried versions. Whether you’re feeding a family, entertaining guests, or simply craving a quick snack, this versatile dish scales effortlessly and adapts to many dietary preferences.
Give it a try, experiment with the suggested variations, and don’t forget to share your results. Your feedback helps us refine the recipe and inspires other home cooks to explore new flavors.
Have you tried this recipe?
Leave a comment and rating below! Share your photos on Instagram with #GarlicParmesanTenders for a chance to be featured.
Garlic Parmesan Chicken Tenders Air Fryer
Crispy, garlicky tenders with a cheesy crust, ready in under 30 minutes.
📝 Ingredients
Chicken Tenders
Garlic‑Parmesan Coating
Dipping Sauce (Optional)
👨🍳 Instructions
- 1 Pat chicken strips dry, season with olive oil, salt, and pepper.
- 2 Mix panko, Parmesan, minced garlic, Italian seasoning, and red pepper flakes in a shallow dish.
- 3 Coat each strip in the breadcrumb mixture, pressing gently.
- 4 Pre‑heat air fryer to 200 °C (390 °F) for 3 minutes.
- 5 Arrange coated strips in a single layer; spray lightly with oil.
- 6 Cook for 10 minutes, flip, then cook 2 more minutes until golden.
- 7 While cooking, whisk together yogurt, lemon juice, honey, and mustard for the dip.
- 8 Verify internal temperature reaches 74 °C (165 °F).
- 9 Transfer tenders to a plate, garnish with extra Parmesan and parsley.
- 10 Serve hot with dipping sauce and your favorite sides.
🥗 Nutritional Information (per serving)
*Values are estimates based on standard ingredients.
📚 You Might Also Like
Crispy Air Fryer Fish Fillets
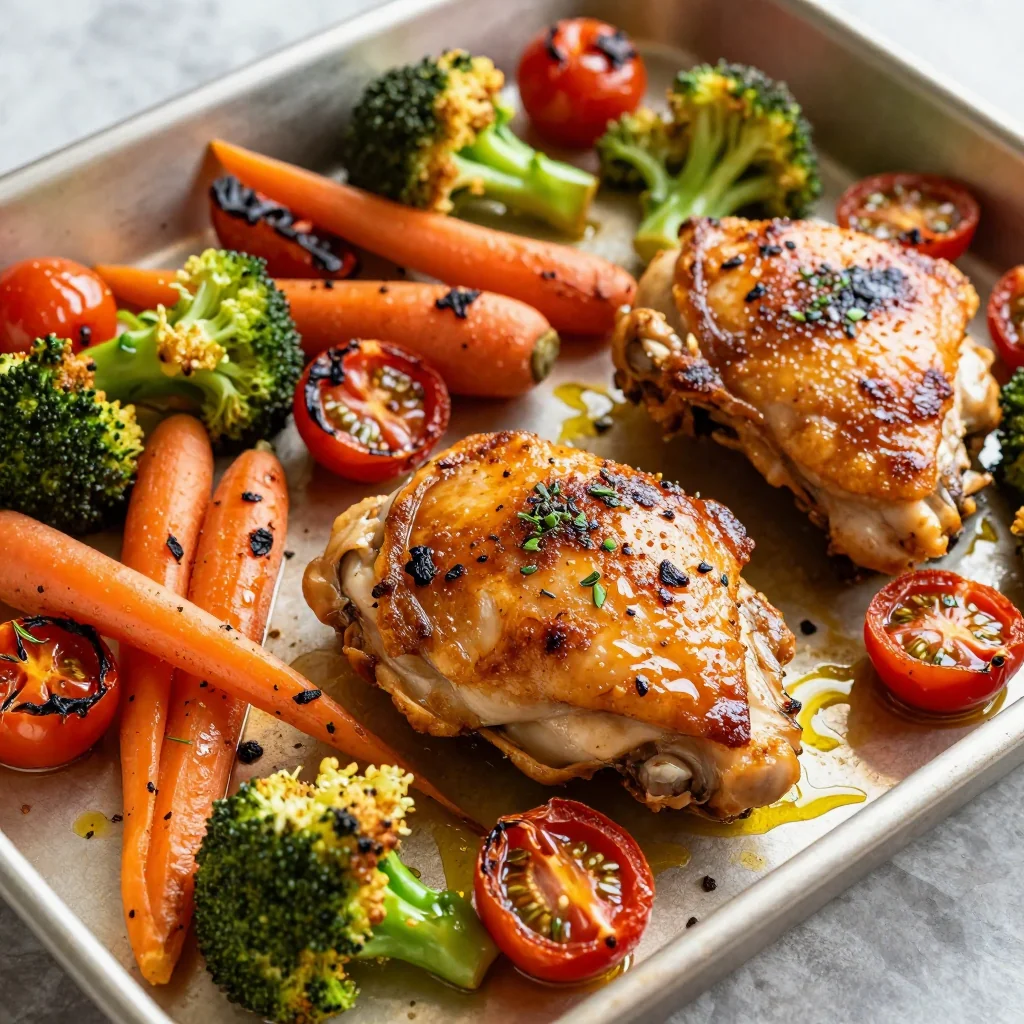
Herb‑Lemon Roasted Chicken Thighs
Parmesan‑Crusted Zucchini Sticks


💬 Comments & Reviews
Leave a Comment
Comments will appear here once readers share their thoughts.