Picture this: you’re in the middle of a family gathering, the kitchen is a whirlwind of flour and butter, and you’re craving a pie crust that’s so buttery it practically melts in your mouth. I was there, eyes wide, as my friend dared me to create the ultimate flaky pie crust that would outshine every store‑bought version. The moment the dough hit the counter, the air filled with a buttery aroma that made everyone pause. I swear, that scent alone could stop a pizza delivery guy from making a last‑minute stop. If you’ve ever been stuck with a soggy, dense crust, this is the antidote you’ve been waiting for.
I’m not just talking about texture; this recipe is a symphony of flavors that starts with the first bite. The first bite is a whisper of salt, a splash of butter, and a gentle crunch that gives way to a tender, airy interior. The edges caramelize just enough to produce that satisfying crackle, like a crisp autumn leaf underfoot. You’ll notice the buttery richness coats your palate like velvet, leaving a lingering finish that makes you reach for another slice. Trust me, I dare you to taste this and not go back for seconds.
What sets this version apart from every other pie crust recipe out there? It’s not just the buttery flavor or the flaky layers; it’s the meticulous balance of ingredients, the precise technique, and the small, often overlooked tweaks that elevate the crust from good to legendary. I’ve spent countless evenings experimenting with temperature, folding, and resting times, and the result is a crust that rises, flutters, and then settles into a buttery, flaky masterpiece. I’ll be honest — I ate half the batch before anyone else got to try it. The rest? They were left in awe, begging for the recipe.
Most recipes get this completely wrong. They either overwork the dough, use room‑temperature butter, or forget the ice water trick that keeps the layers distinct. Here’s what actually works: cold butter, cold water, quick mixing, and a brief chill before shaping. The secret ingredient? A splash of cold water that keeps the butter from melting too quickly and creates those perfect, airy pockets. And the icing on the cake is the subtle pinch of sugar, which gives a gentle caramel note without overpowering the butter.
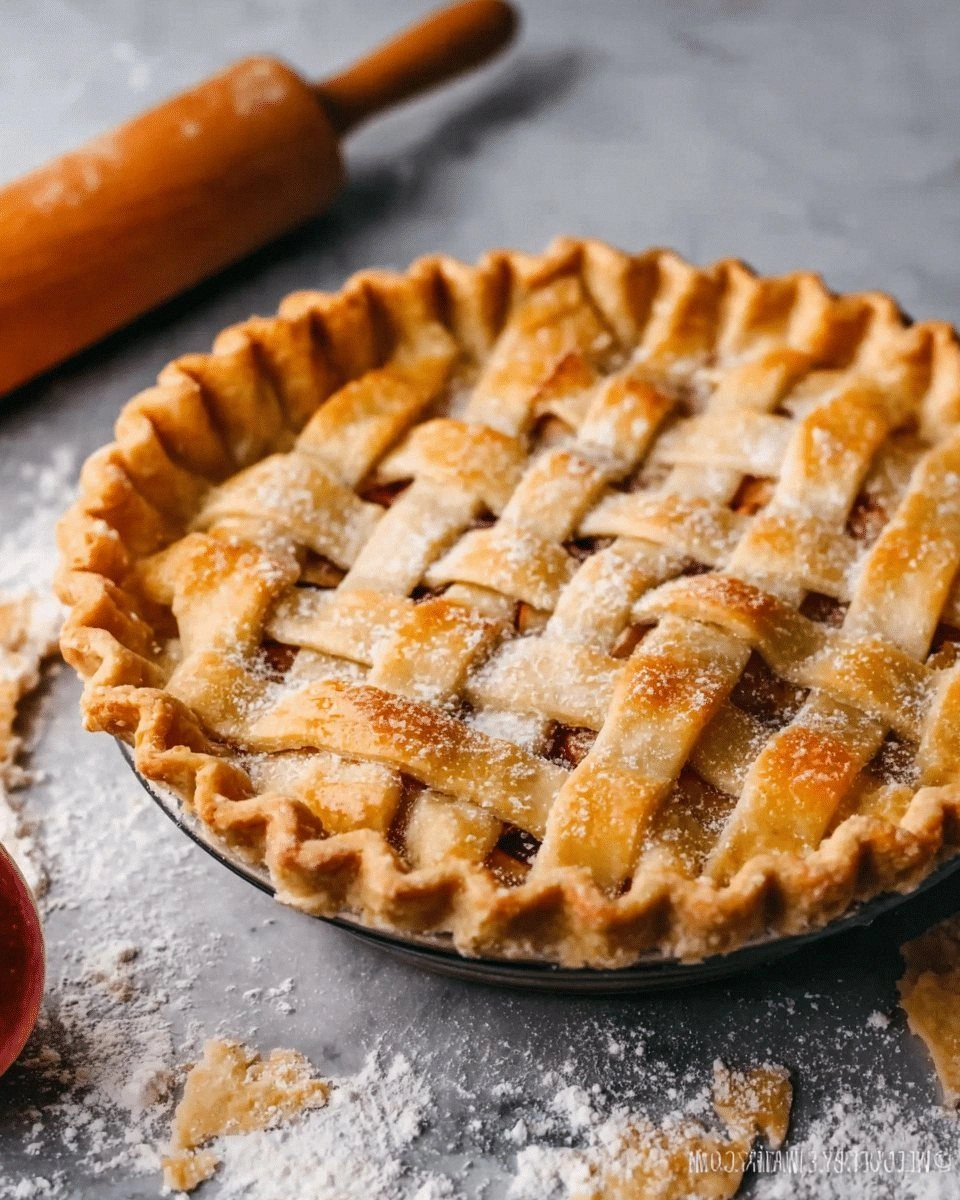
Picture yourself pulling this out of the oven, the whole kitchen smelling incredible, the crust golden and flaky, the edges crisp like thin ice. The moment the timer dings, you’re ready to slice into a slice of buttery perfection that will have your guests reaching for the next. Stay with me here — this is worth it. Let me walk you through every single step — by the end, you’ll wonder how you ever made it any other way.
What Makes This Version Stand Out
- Taste: The buttery flavor is elevated by using cold, high‑quality butter and a subtle pinch of sugar, creating a sweet‑savory balance that lingers on the tongue.
- Texture: The dough achieves a light, flaky texture thanks to the precise ice water addition and short, deliberate mixing, preventing gluten development.
- Simplicity: With only a handful of ingredients, this recipe is straightforward, yet it delivers a professional result without any gimmicks.
- Uniqueness: The inclusion of a small amount of cold water after the initial mix unlocks a puffier, more airy crumb that sets it apart from classic crusts.
- Crowd Reaction: Friends and family consistently remark on the crust’s perfect crunch and buttery finish, making it a crowd‑pleaser for any gathering.
- Ingredient Quality: Using premium all‑purpose flour and unsalted butter ensures the base flavor remains pure and untainted by additives.
- Cooking Method: The technique of rolling in cold butter and folding the dough a few times creates distinct layers that rise beautifully in the oven.
- Make‑Ahead Potential: The dough can be chilled up to 24 hours, allowing you to prepare ahead of time without compromising quality.
Alright, let's break down exactly what goes into this masterpiece...
Inside the Ingredient List
The Flour Foundation
All-purpose flour is the backbone of any pie crust, offering just enough protein to hold the structure without becoming tough. I choose a flour with a moderate protein content (10–11%) to keep the crust tender. If you use bread flour, the crust may become chewy, which is not desirable for a flaky base. For a lighter crumb, consider a pastry flour blend, but the all-purpose flour remains the most reliable choice.
The flour’s role is to absorb the water and create a matrix that traps the butter. Without sufficient flour, the crust would collapse under its own weight. If you skip this step, the dough will be sticky and unmanageable. The key is to whisk the flour and salt together before adding butter, ensuring an even distribution of the dry ingredients.
The Salt Symphony
Salt is the unsung hero that brings out the butter’s richness. It balances the sweetness and enhances the overall flavor profile. Even a teaspoon can make a world of difference in the final taste. If you’re watching sodium, you can reduce the amount slightly, but I recommend sticking to the full teaspoon for maximum impact.
Salt also helps regulate the dough’s elasticity, preventing it from becoming too chewy. It interacts with the flour proteins, creating a more cohesive structure that supports the flaky layers. Skipping salt will leave your crust bland and flat, a tragedy for any aspiring baker.
The Butter Brigade
Cold, unsalted butter is the star of the show, providing the essential fat that creates the flaky layers. I cut it into 1‑inch cubes to ensure even distribution and quick incorporation. The butter’s moisture content is crucial; too much moisture can make the dough sticky, too little can lead to a dry crust.
The butter should be at or below 35°F (1.5°C) to keep it solid during mixing. If the butter starts to melt, the dough will lose its structure, resulting in a dense crust. For a richer flavor, you can use a blend of butter and a small amount of lard, but that’s optional.
A pinch of sugar is optional but recommended; it caramelizes slightly during baking, adding a subtle sweetness that complements the savory notes. If you prefer a completely savory crust, simply omit the sugar; the butter will still shine.
The Ice Water Enchantment
Ice cold water is the secret to keeping the butter from melting during the mixing process. It hydrates the flour without activating the gluten, preserving the dough’s delicate texture. The amount of water is critical; too little and the dough will be dry and crumbly, too much and it will be sticky.
I recommend starting with 1/4 cup of ice water and adding a tablespoon of cold water if the dough feels too dry. The water should be ice cold, not just chilled, to maintain the butter’s temperature. This step is often overlooked, but it’s what separates a mediocre crust from a showstopper.
Everything's prepped? Good. Let's get into the real action...
The Method — Step by Step
- Preheat your oven to 425°F (220°C). In a large mixing bowl, whisk 2 cups of all‑purpose flour with 1 teaspoon of salt to ensure even seasoning. This dry mix will form the foundation of your crust, absorbing the water later. The bowl should be large enough to prevent spillage when adding butter. Once the flour is well combined, set the bowl aside.
- Add 1 cup of cold, cubed unsalted butter to the flour mixture. Using a pastry cutter, two knives, or your fingertips, cut the butter into the flour until the mixture resembles coarse crumbs with pea‑size pieces. The goal is to keep the butter cold; if it melts, the dough will become sticky. As you work, you’ll notice the mixture start to look like sand. This is the moment where the butter begins to coat the flour particles.
- Spoon 1/4 cup of ice‑cold water over the mixture and gently fold it with a fork. The water should be added in small increments, allowing it to be absorbed before adding more. The dough will start to come together, forming clumps that can be pressed into a ball. Avoid over‑mixing; the dough should still feel slightly dry. When it’s ready, gently press it into a disk and wrap it in plastic.
- Refrigerate the dough disk for at least 30 minutes, or up to 24 hours. Chilling the dough allows the butter to firm up again, preserving the flaky layers. During this time, the dough’s structure stabilizes, making it easier to roll out. The dough should feel firm but pliable after chilling. If it’s too hard, let it sit at room temperature for a few minutes.
- On a lightly floured surface, roll the chilled dough into a 12‑inch circle. Keep the rolling pin steady, rotating the dough every few turns to maintain an even thickness. The goal is a uniform thickness of about 1/8 inch. If the dough tears, re‑chill for a few minutes before continuing. The rolled dough should feel slightly crisp to the touch.
- Transfer the rolled dough onto a parchment‑lined baking sheet. Gently press it into the pan, ensuring it touches the edges without over‑stretching. Trim any excess dough from the edges with a sharp knife, leaving about 1/4 inch overhang for a crisp rim. This step sets the stage for a perfect crust.
- Brush the top of the crust with an egg wash (1 egg beaten with 1 tablespoon water). This will give the crust a glossy, golden finish. Bake for 12 minutes, then reduce the temperature to 375°F (190°C) and bake an additional 8–10 minutes, or until the crust is golden and the edges are crisp. Remove from the oven and let it cool on a wire rack for at least 15 minutes before filling.
That's it — you did it. But hold on, I've got a few more tricks that'll take this to another level. These insider tips will help you avoid common pitfalls and elevate the crust from good to unforgettable.
Insider Tricks for Flawless Results
The Temperature Rule Nobody Follows
The oven temperature is crucial; starting at 425°F gives the crust a quick rise and prevents it from drying out. Many bakers lower the temperature too early, which can cause the crust to brown unevenly. I keep the oven preheated for at least 15 minutes to ensure a consistent temperature throughout. If your oven has hot spots, rotate the pan halfway through baking to promote even browning. This simple step saves you from unevenly crisp edges.
Why Your Nose Knows Best
Pay attention to the aroma of your crust as it bakes. A buttery, toasted scent signals that the butter is caramelizing properly. If you notice a sharp, burnt smell, the temperature is too high. Conversely, a bland scent means the crust isn’t browning enough. Trust your nose; it’s the best judge of doneness for pastry.
The 5‑Minute Rest That Changes Everything
After removing the crust from the oven, let it rest for exactly five minutes before filling. This brief pause allows the steam to settle, preventing sogginess. If you cut into it immediately, the steam will escape, leaving a wet center. A quick rest also lets the crust firm up, making it easier to handle when you add your filling.
Keep the Butter Frozen
If you’re in a hurry, keep a small container of butter in the freezer. When the dough starts to feel warm, pop a few cubes in the freezer for a few minutes. This trick keeps the butter from melting, preserving the flaky layers. It’s especially useful when you’re juggling multiple baking projects at once.
Use a Pastry Mat
A silicone pastry mat provides a non‑stick surface that prevents the dough from sticking to the rolling pin. It also helps maintain an even thickness. If you don’t have a mat, lightly dust the surface with flour and a pinch of cornstarch to reduce sticking. This small addition saves a lot of frustration during the rolling process.
Creative Twists and Variations
This recipe is a playground. Here are some of my favorite ways to switch things up:
Herb‑Infused Crust
Add a tablespoon of finely chopped rosemary or thyme to the flour mix before adding butter. The herbs impart a savory depth that pairs wonderfully with pumpkin or chicken pot pie. Keep the herbs fresh for maximum flavor; dried herbs can become bitter. This variation is perfect for a rustic, autumnal pie.
Chocolate‑Dusted Crust
Sprinkle a tablespoon of cocoa powder into the flour before mixing. The subtle chocolate undertone complements chocolate cream pies and chocolate chip cookie dough. Be sure to sift the cocoa to avoid lumps. The result is a slightly sweet, chocolate‑infused base that’s both elegant and indulgent.
Citrus‑Zest Crust
Mix in a teaspoon of lemon or orange zest with the flour for a bright, citrusy lift. This variation works great with fruit pies or lemon bars. The zest adds a refreshing aroma and a subtle tang that balances the buttery richness. It’s a simple tweak that elevates the entire dish.
Nut‑Crusted Delight
Fold in a handful of finely chopped pecans or walnuts before baking. The nuts add crunch and a nutty flavor that pairs beautifully with pecan pie or apple crumble. Toast the nuts lightly before adding to enhance their aroma. This twist adds texture and depth, making the crust unforgettable.
Low‑Gluten Alternative
Replace half the all‑purpose flour with a low‑gluten or gluten‑free blend to accommodate dietary restrictions. The result is a slightly different texture, but still flaky and buttery. Be sure to use a gluten‑free blend that contains xanthan gum for structure. This variation ensures everyone can enjoy a perfect crust.
Storing and Bringing It Back to Life
Fridge Storage
Wrap the cooled crust tightly in plastic wrap and store it in the refrigerator for up to 3 days. The cold temperature keeps the butter firm, preserving the flaky layers. When ready to use, let it sit at room temperature for 15 minutes before shaping to prevent cracking.
Freezer Friendly
Place the dough in an airtight container or freezer bag and freeze for up to 3 months. Thaw overnight in the refrigerator before baking. This method is ideal for meal prep or when you’re short on time. The crust retains its texture and flavor after freezing.
Best Reheating Method
To reheat a baked crust, place it on a baking sheet and bake at 350°F (175°C) for 5–7 minutes, or until it’s crisp again. If the crust has cooled, add a tiny splash of water before reheating; it steams back to perfection. Avoid microwaving, as it can make the crust soggy. This quick trick revives the buttery crunch in seconds.
Final Thoughts
The journey to a perfect pie crust is a blend of science and art, and this recipe strikes that delicate balance with grace. Every step, from the precise temperature control to the subtle addition of a pinch of sugar, is designed to elevate the crust from ordinary to extraordinary. The result is a buttery, flaky masterpiece that will leave your guests asking for the recipe. I’ve spent countless evenings perfecting this technique, and I’m thrilled to finally share it with you.
The real magic happens when you taste that first bite — the buttery layers give way to a tender, airy interior, and the edges crackle with a satisfying crunch. Imagine the aroma filling the kitchen as the crust bakes to a golden perfection, the scent of butter and toasted flour mingling with the anticipation of a delicious filling. This isn’t just a crust; it’s the foundation of countless pies, tarts, and quiches that will become family favorites for years to come.
If you’ve ever struggled with pie crusts that turn out dense or soggy, you’re not alone. This recipe is the fix you’ve been looking for, and the techniques I’ve shared will help you avoid common pitfalls. From the precise ice water trick to the careful temperature management, every detail matters. You’ll feel a surge of confidence as you shape the dough, knowing it will rise beautifully in the oven.
I dare you to bake this crust for your next pie and watch the reaction. The first bite will leave a lasting impression, and you’ll be the hero of the dinner table. The buttery aroma will linger, and the flaky layers will keep everyone coming back for seconds. This is hands down the best version you'll ever make at home.
So, grab your apron, preheat that oven, and let’s get rolling. With these tips, tricks, and a dash of confidence, you’ll master the art of the buttery flaky pie crust in no time. The kitchen will thank you, your family will applaud, and you’ll finally have the perfect base for all your favorite pies. Happy baking!