Picture this: you’re in a cramped kitchen, the fridge is a graveyard of overripe bananas, and your air fryer is begging for a task. I was staring at those yellow lumps, thinking, “What can I do with these before they turn into banana mush?” That moment sparked a culinary rebellion, and I set out to create something that would make every banana lover swoon. I dared myself to turn a simple fruit into a glossy, caramelized masterpiece that would have you shouting, “I dare you to taste this and not go back for seconds!” The result is a buttery, sweet, slightly salty bite that feels like a dessert and a snack rolled into one glorious bite.
From the first glance, the aroma is a sweet siren song. Imagine the scent of fresh bananas mingling with the warm, buttery smell of melted butter and brown sugar, with a whisper of cinnamon that hints at something exotic. When the first bite hits your tongue, the texture is a perfect paradox: the banana is soft and juicy, the caramel coating is crisp on the outside, and the pecans add a satisfying crunch. The flavor is an orchestra—sweet, buttery, slightly nutty, with a dash of salt that elevates everything. If you’ve ever tried caramelized bananas that taste flat or soggy, you’re not alone—this version is hands down the best you’ll ever make at home. Picture yourself pulling this out of the air fryer, the whole kitchen smelling incredible, and watching the glossy glaze melt into a sweet, sticky river.
What makes this version a game-changer is the way it balances simplicity with depth. I kept the ingredient list to just a handful, yet each component plays a crucial role. The bananas are the star, but the butter and brown sugar create a caramelized glaze that coats each slice like velvet. The cinnamon adds warmth without overpowering, while the vanilla brings a subtle floral note that rounds out the flavor. The sea salt is a secret weapon, pulling the sweetness into a savory balance that keeps the tastebuds dancing. The toasted pecans add a nutty crunch that breaks the monotony of smooth banana and caramel. And the best part? Every element can be swapped or tweaked, making this recipe a playground for culinary experimentation.
I’ll be honest—after tasting the first batch, I ate half the pan before anyone else even got a bite. The caramelized edges were so crisp that they shivered like thin ice when you pressed them, and the banana center was still soft and melty. The combination of textures was a revelation, and I was already planning my next batch. If you’ve ever struggled with caramelizing fruit or have a fear of burning your kitchen, you’re not alone—and I've got the fix. This is not just another banana recipe; it’s a passport to a sweet, savory adventure that will have you asking, “Why didn’t I think of this before?” Let me walk you through every single step—by the end, you’ll wonder how you ever made it any other way.
What Makes This Version Stand Out
- Texture: The caramelized glaze forms a crisp shell that cracks with a satisfying crunch, while the banana stays soft and juicy inside—an unexpected harmony of textures.
- Flavor: The subtle interplay of buttery sweetness, caramel depth, and a pinch of salt creates a flavor profile that is both comforting and exciting.
- Ingredient Simplicity: With just seven ingredients, this recipe is a masterclass in how less can truly be more.
- Air Fryer Efficiency: The air fryer delivers even heat, ensuring caramelization without the mess of stovetop pans.
- Time Economy: Prep takes five minutes, cooking ten, and you’re done in fifteen—perfect for a quick dessert or snack.
- Versatility: Swap in different nuts or add a drizzle of chocolate for a personalized twist.
- Make‑Ahead Potential: Freeze the banana slices before caramelizing for a quick, on-demand treat.
- Crowd Appeal: Whether you’re serving a crowd or a solo craving, the caramelized banana bites are a guaranteed crowd-pleaser.
Alright, let’s break down exactly what goes into this masterpiece. The combination of butter, sugar, and spices is a classic caramelization formula, but the air fryer’s rapid airflow gives it a unique edge. Each ingredient is chosen for its role in flavor, texture, and visual appeal. The bananas provide natural sweetness and moisture, the butter adds richness, the sugar caramelizes for that golden hue, and the cinnamon and vanilla bring warmth and depth. The sea salt is a subtle but essential counterbalance, preventing the caramel from feeling cloying. Finally, toasted pecans add crunch and a nutty finish that keeps the mouth moving. Now that you know the science, let’s dive into the details.
Inside the Ingredient List
The Flavor Base
The foundation of this caramelized banana experience is the sweet, buttery glaze. Butter is the secret to that silky mouthfeel; it carries the sugar and helps the glaze set into a glossy coating. Brown sugar is preferred over white because of its molasses content, which adds depth and a slightly caramel-like flavor. The cinnamon brings a warm, spicy undertone that balances the sweetness, while vanilla adds a subtle floral note that lifts the entire dish. If you’re feeling adventurous, a pinch of smoked paprika can give a surprising smoky twist.
The Texture Crew
Bananas are the star of the show, but they’re more than just fruit—they’re the canvas. Choosing ripe bananas ensures natural sweetness, but don’t go overripe; you want a firm yet yielding bite. The pecans are toasted to bring out their oils and add a crunchy counterpoint to the smooth caramel. If you’re allergic or simply don’t have pecans, walnuts or almonds work well, though they will alter the flavor slightly. The salt is a subtle hero; it pulls the sweetness into a savory balance that keeps the caramel from feeling flat.
The Unexpected Star
The sea salt is a surprisingly powerful ingredient in this recipe. A tiny amount—just 0.25 teaspoon—has a dramatic effect, enhancing the caramel’s depth and preventing it from tasting cloyingly sweet. Sea salt’s crystalline structure also adds a subtle crunch when it’s sprinkled on top, giving the dish a final textural flourish. If you prefer a sweeter finish, you can skip the salt, but be prepared for a more one-dimensional taste. Some chefs even recommend using a pinch of smoked sea salt for a subtle umami edge.
The Final Flourish
The toasted pecans are the final flourish that ties everything together. Toasting them before adding them to the caramelized bananas brings out their nutty oils and adds a delightful crunch that contrasts with the silky glaze. The nuts also add a subtle earthy undertone that balances the sweetness. If you’re looking for a different flavor profile, consider adding a sprinkle of chili flakes for a sweet‑spicy kick. The final flourish is where you can let your creativity shine—think toasted coconut, a drizzle of honey, or a dusting of powdered sugar.
Everything's prepped? Good. Let's get into the real action. The next step is where the magic happens—turning those bananas into caramelized jewels that will have your tastebuds dancing. You’ll be amazed at how quickly the flavors meld together, and the end result is a dish that looks like it belongs in a Michelin‑star kitchen. The air fryer will give you a crisp exterior while keeping the inside soft. Trust me, the first bite will leave you craving more. This is where the science of caramelization meets culinary art, and the result is a dish that’s as beautiful to look at as it is delicious to eat. Remember, the key to success is patience—don’t rush the caramelization process or you’ll end up with a burnt, bitter mess.
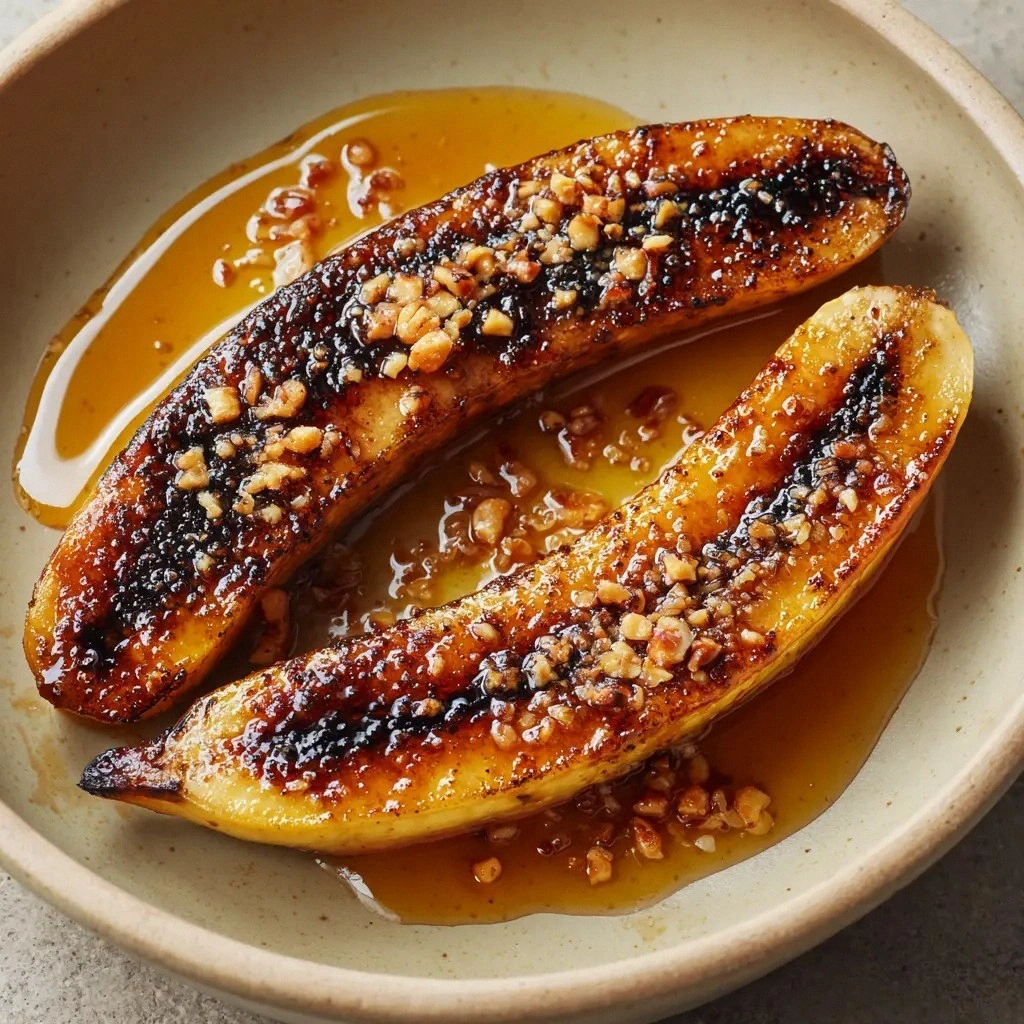
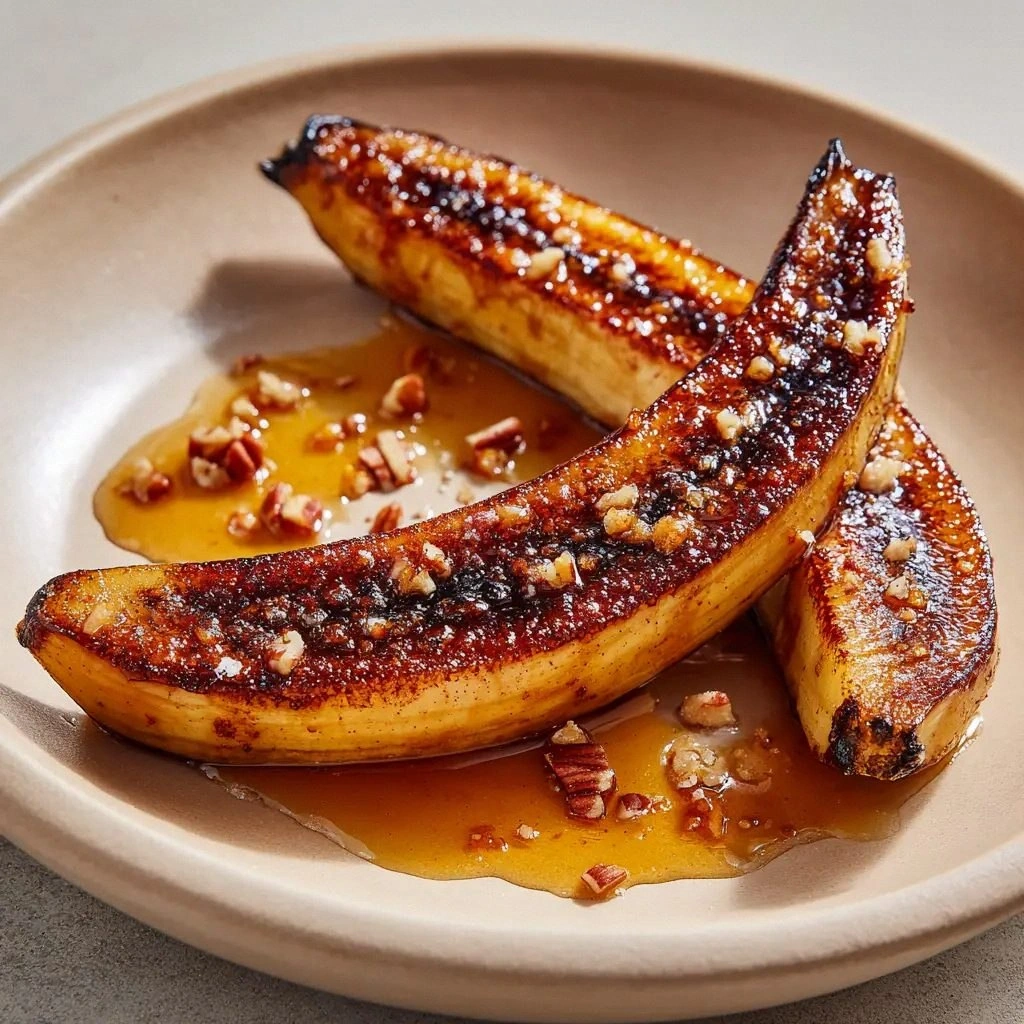
That image? It’s not just a pretty picture; it’s a promise of the glossy caramel coating that will coat each banana slice like a fine, golden coat of armor. The contrast between the dark caramel and the bright yellow banana is eye‑catching, and the toasted pecans add a splash of color that makes the dish pop. As you stare at it, you’ll notice the subtle sheen that hints at the buttery sweetness inside. The aroma of caramelized sugar is almost tangible, even in the stillness of the kitchen. When you finally take a bite, the crispness of the glaze will give way to a soft, sweet banana center that melts in your mouth. The whole experience is a sensory explosion that will leave you wanting more.
The Method — Step by Step
- Preheat your air fryer to 200°C (400°F) for 3 minutes; this ensures even heat distribution and prevents the bananas from sticking. The preheat cycle also activates the caramelization process from the start. While the air fryer warms up, you can prepare the banana slices, which saves time and keeps the kitchen organized. This step is crucial—if you skip it, the bananas may not crisp up as expected. The air fryer’s rapid airflow will give you a golden crust in no time. Trust me, preheating is a small step that pays off big.
- Peel the bananas and slice them in half lengthwise; this creates two thick, rectangular pieces that hold the caramel coating without breaking. The thickness ensures that the caramel can set around the banana without leaking. Keep the slices uniform for even cooking; a ruler or a kitchen knife can help with precision. The banana halves should be about 1–1.5 cm thick. A uniform thickness guarantees that each bite has the same flavor profile. This is the foundation of a perfect caramelized banana.
- Melt the butter in a small saucepan over low heat or in a microwave for 20–30 seconds; stir until fully liquid. This step is essential for a smooth glaze that coats each banana evenly. Once melted, set the butter aside so it’s ready to combine with the sugar. A melted butter base ensures the sugar dissolves quickly, preventing clumps. The butter also adds a rich, creamy flavor that enhances the caramel. This is where the butter’s magic begins.
- Add the brown sugar, cinnamon, vanilla, and sea salt to the melted butter, stirring until the sugar dissolves completely. The mixture should be glossy and free of lumps. This is where the caramel base comes together. The cinnamon adds warmth, the vanilla brings floral sweetness, and the sea salt balances the overall flavor. Stir gently to avoid over‑heating the mixture. Once the sugar has dissolved, you’re ready to coat the bananas.
- Gently toss the banana halves in the glaze, ensuring each slice is fully coated. The glaze should cling to the banana like a velvety coat. Use a spoon or a small brush to spread the glaze evenly if needed. The coated bananas should look shiny and golden. This step ensures that every bite has the perfect caramelized flavor. The glaze also helps the bananas hold their shape during cooking.
- Place the glazed banana halves in the air fryer basket in a single layer, making sure they don’t overlap. The air fryer’s circulating heat will caramelize the glaze evenly. Cook for 8–10 minutes, shaking the basket halfway through to ensure uniform browning. The bananas should develop a golden crust with a slightly crisp exterior. Watch the glaze as it thickens and caramelizes; it should look glossy and slightly amber. This is the moment of truth—watch the transformation.
- Remove the bananas from the air fryer and immediately sprinkle the toasted pecans over each slice. The nuts will add a crunchy texture that contrasts beautifully with the smooth caramel. The pecans also provide a nutty flavor that complements the banana’s natural sweetness. If you prefer a different nut, walnuts or almonds work just as well. The key is to toast the nuts beforehand so they’re fragrant and crunchy.
- Let the bananas cool for 2 minutes; the glaze will set into a glossy, slightly firm coating that’s perfect for serving. The cooling period allows the caramel to thicken and the flavors to meld. After cooling, the bananas are ready to be plated and served. The final presentation should look like a sweet, golden, caramelized treat. You can serve them on a simple plate or arrange them in a decorative pattern. This final touch will impress any guest.
- Serve immediately, optionally with a scoop of vanilla ice cream or a dollop of whipped cream for a decadent finish. The contrast of warm caramelized banana with cold, creamy dessert is a flavor explosion. If you prefer a lighter version, skip the ice cream and enjoy the bananas on their own. The caramelized banana bites are already indulgent enough to satisfy any sweet tooth. The finishing touch is optional but highly recommended for the ultimate experience.
That’s it— you did it. But hold on, I’ve got a few more tricks that will take this to another level. The first trick is to use a small amount of lemon juice or zest before coating; it adds a subtle brightness that cuts through the sweetness. The second trick is to sprinkle a pinch of cayenne pepper for a sweet‑spicy kick that will wow your guests. The third trick is to drizzle a little honey or maple syrup over the finished bananas for an extra layer of sweetness. The fourth trick is to serve the bananas on a bed of toasted coconut flakes for a tropical twist. And the final trick is to add a splash of rum or bourbon for an adult version that’s perfect for a cozy evening. Try one or all of these variations to keep the dish fresh and exciting.
Insider Tricks for Flawless Results
The Temperature Rule Nobody Follows
Many people think any temperature works for caramelizing bananas, but the air fryer’s 200°C (400°F) setting is the sweet spot that gives you a crisp exterior without burning the interior. The key is to keep the heat steady; avoid sudden spikes that can cause uneven browning. If your air fryer has a temperature dial, set it to 200°C and let it stabilize before adding the bananas. A quick preheat helps the glaze set faster, giving you that perfect golden crust. Remember, the temperature is the foundation of a successful caramelization. A well‑regulated temperature means a consistent, delicious result every time.
Why Your Nose Knows Best
Your nose is the ultimate judge of caramelization. When the glaze starts to turn amber and you smell a sweet, buttery aroma, it’s a sign that the bananas are ready. The scent of caramelized sugar is a quick indicator that the glaze has reached the right consistency. If you’re unsure, do a quick taste test with a small piece; it should be sweet, slightly crunchy, and not bitter. Your nose will tell you when to pull the bananas from the air fryer—don’t rely solely on the timer. Trust your senses for the best results.
The 5-Minute Rest That Changes Everything
After cooking, let the bananas rest for exactly five minutes; this allows the caramel to set into a glossy, slightly firm coating that’s easier to bite into. During this rest period, the heat continues to cook the bananas slightly, ensuring they stay soft inside. The glaze will thicken and become more stable, preventing it from sliding off the banana. If you rush the rest, the glaze may be too runny, leading to a messy bite. A short rest is a small step that makes a huge difference in texture.
Use Fresh Bananas for Maximum Flavor
The quality of the banana is the most critical factor in this recipe. Fresh, ripe bananas provide the natural sweetness and moisture that caramelize beautifully. Overripe bananas can become mushy and lose their shape, while underripe bananas are too firm and won’t caramelize properly. Aim for bananas with a dark brown spot or two; they’re at the sweet spot for caramelization. Fresh bananas also have a better flavor profile, enhancing the overall taste of the dish. If you can’t find ripe bananas, consider buying them a day or two before you plan to cook.
Butter vs. Oil: The Secret Ingredient
Butter is the traditional choice for caramelization because of its rich flavor and lower smoke point, which gives the glaze a deep, buttery taste. However, if you prefer a lighter version or have a dairy allergy, you can substitute half the butter with a neutral oil like grapeseed or canola. The oil will still help the sugar dissolve and create a glossy glaze, but the flavor will be slightly different. Keep in mind that the butter’s flavor is integral to the dish’s authenticity. If you’re experimenting, try a half-butter, half-oil blend for a balanced flavor.
Serve Immediately for the Best Experience
The caramelized banana bites are best enjoyed fresh, while the glaze is still glossy and the banana is warm. If you need to store them, keep them in an airtight container at room temperature for no more than 24 hours. When you’re ready to serve again, reheat them in the air fryer for 1–2 minutes to restore the crispness. Avoid microwaving, as it can make the glaze soggy. The best experience is to serve them hot, straight from the air fryer, with a scoop of vanilla ice cream or a drizzle of honey. Freshness is the key to a memorable dessert.
These insider tricks are the secret sauce that turns a simple banana recipe into a culinary masterpiece. The next time you cook, remember that the temperature, aroma, resting time, banana quality, butter choice, and immediate serving all play crucial roles. Think of each trick as a note in a symphony—when played together, they create a harmonious, unforgettable dessert. The best part is that you can experiment with each element to suit your taste, making every batch uniquely yours. Keep these tricks in your culinary arsenal, and you’ll never look at caramelized bananas the same way again.
Creative Twists and Variations
This recipe is a playground. Here are some of my favorite ways to switch things up: The variations below will keep your taste buds excited and your guests amazed.
Chocolate Drizzle Delight
After caramelizing the bananas, drizzle melted dark chocolate over the top for a decadent, bittersweet finish. The chocolate adds a silky texture that pairs perfectly with the buttery glaze. A pinch of sea salt on top enhances the chocolate’s depth. This version is ideal for chocolate lovers and makes a great dessert for special occasions. The chocolate also adds a rich, luxurious element that elevates the dish. Serve it with a scoop of vanilla ice cream for an extra indulgence.
Coconut Crunch
Sprinkle toasted coconut flakes over the caramelized bananas for a tropical twist. The coconut adds a subtle sweetness and a crunchy texture that contrasts nicely with the smooth glaze. A splash of coconut milk in the glaze can deepen the flavor profile. This variation is perfect for a summer dessert or a beach‑inspired dinner. The coconut also brings a hint of exotic aroma that makes the dish feel like a vacation. Pair it with a chilled glass of coconut water for a refreshing finish.
Nutella Swirl
Swirl a spoonful of Nutella into the caramel glaze before coating the bananas for a hazelnut chocolate burst. The Nutella adds a creamy, chocolatey flavor that complements the banana’s sweetness. The swirl pattern creates a visually striking presentation that’s sure to impress. This version is perfect for a quick dessert that feels like a treat. The Nutella also brings a rich, buttery taste that enhances the caramel. Serve it with a drizzle of caramel sauce for an extra layer of indulgence.
Maple Syrup Glaze
Replace the brown sugar with maple syrup for a naturally sweet glaze that’s lower on the refined sugar scale. The maple syrup adds a subtle, earthy sweetness that pairs beautifully with the banana’s natural flavor. The glaze will still caramelize, but with a slightly different aroma. This variation is great for those who prefer a more natural sweetener. The maple syrup also adds a hint of vanilla, enhancing the overall taste. Serve it with toasted pecans for a classic crunch.
Spiced Rum Glaze
Add a splash of dark rum to the glaze for an adult version that’s perfect for a cozy evening. The rum brings a subtle, warm depth that pairs well with the caramelized banana. A pinch of nutmeg or allspice can enhance the spiced flavor. This variation is ideal for a holiday gathering or a romantic dinner. The rum adds a sophisticated twist that will impress your guests. Serve with a dollop of whipped cream for a decadent finish.
Berry Burst
Toss fresh berries like strawberries or blueberries into the caramel glaze before coating the bananas. The berries add a tart contrast that cuts through the sweetness. The glaze will slightly thicken around the berries, creating a beautiful marbled effect. This variation is perfect for a light, summery dessert. The berries also bring a burst of color and nutrition to the dish. Serve the banana bites with a drizzle of honey for extra sweetness.
Each variation offers a unique flavor profile that can cater to different occasions or preferences. Whether you’re craving chocolate, coconut, or a hint of spice, there’s a version that will satisfy. These twists are not only delicious but also a great way to keep the dish fresh and exciting. Experimenting with these variations will turn a simple banana dessert into a culinary adventure that you’ll want to share with friends and family. Keep these ideas handy, and you’ll always have a new way to wow your guests.
Storing and Bringing It Back to Life
Fridge Storage
Store caramelized banana bites in an airtight container in the refrigerator for up to 48 hours. The glaze will firm up slightly, so the bananas will be a bit less sticky. If you’re planning to serve them later, keep them in a single layer to avoid sticking. The banana will stay fresh, but the texture will change slightly. For the best flavor, consume them within 24 hours. When ready to serve, let them sit at room temperature for 5 minutes to soften the glaze.
Freezer Friendly
If you want to prepare ahead, freeze the banana slices before caramelizing. Place the frozen slices on a parchment-lined tray and freeze until solid, then transfer to a freezer bag. When you’re ready to serve, air fry the frozen bananas at 200°C for 8–10 minutes; the glaze will caramelize as it thaws. This method saves time on busy nights and ensures a consistent result. The bananas will retain their shape and flavor after freezing. Keep the freezer bag sealed to prevent freezer burn. This is a game-changer for meal prepping.
Best Reheating Method
The best way to reheat caramelized banana bites is in the air fryer at 180°C for 2–3 minutes; this restores the crispness without drying out the glaze. If you don’t have an air fryer, a toaster oven works well, but keep a close eye to avoid burning. Avoid microwaving, as it will make the glaze soggy and the banana mushy. For a quick warm-up, place the bananas in a preheated oven at 200°C for 5 minutes. The glaze will soften just enough to be enjoyable. Serve immediately after reheating for the best texture.
Storing and reheating are essential skills that extend the life of this delightful dish. Whether you’re a busy parent, a meal-prepping enthusiast, or a dessert aficionado, these tips will help you keep your caramelized bananas fresh and delicious. The key is to handle the bananas gently, store them properly, and reheat them with care. By following these guidelines, you’ll have a ready-to-serve dessert that always tastes like it was just made. Now you’re equipped to enjoy this treat whenever the craving hits.