Picture this: the kitchen smells like vanilla and banana, the air is thick with the promise of creaminess, and you’re standing in front of a bowl that will soon become a cloud of indulgence. The sound of the whisk is a metronome, the texture of the cream cheese is silky, and the bananas are perfectly ripe, their skins still slightly green from the morning’s light. The anticipation builds as you realize that this is not just another dessert; it’s a revelation that will rewrite your mental catalog of banana pudding.
What makes this version stand out? It’s not just the ingredients, but the way they interact. I’ve blended the richness of heavy whipping cream with the tang of cream cheese, then folded in a sweetened condensed milk base that locks in moisture. The instant banana pudding mix, normally a shortcut, is elevated by a splash of vanilla and the gentle heat of freshly whisked milk. The result? A pudding that is velvety, airy, and bursting with banana flavor that feels like a hug in every spoonful.
And here’s the kicker: I’m going to reveal a technique that most recipes skip—how to get that perfect, almost custard-like consistency without overcooking. I’ll also show you how to layer the Nilla wafers so they stay crisp yet soak up the creamy goodness. If you think this sounds too good to be true, I dare you to taste this and not go back for seconds. Trust me, this is hands down the best version you’ll ever make at home.
So let’s dive in. By the end of this guide, you’ll have a dessert that’s so creamy and luscious, you’ll wonder how you ever survived any other banana pudding. Ready? Let’s get started.
What Makes This Version Stand Out
- Texture: The combination of heavy whipping cream and softened cream cheese creates a mousse-like consistency that coats the tongue like velvet. It’s airy yet dense enough to hold the banana layers without collapsing.
- Flavor: The sweetened condensed milk provides a deep, caramelized sweetness that balances the natural tartness of the bananas. The vanilla extract adds a fragrant warmth that elevates the overall profile.
- Ease: No elaborate equipment is required; a whisk, a saucepan, and a mixing bowl do the job. The instant banana pudding mix saves time without sacrificing quality.
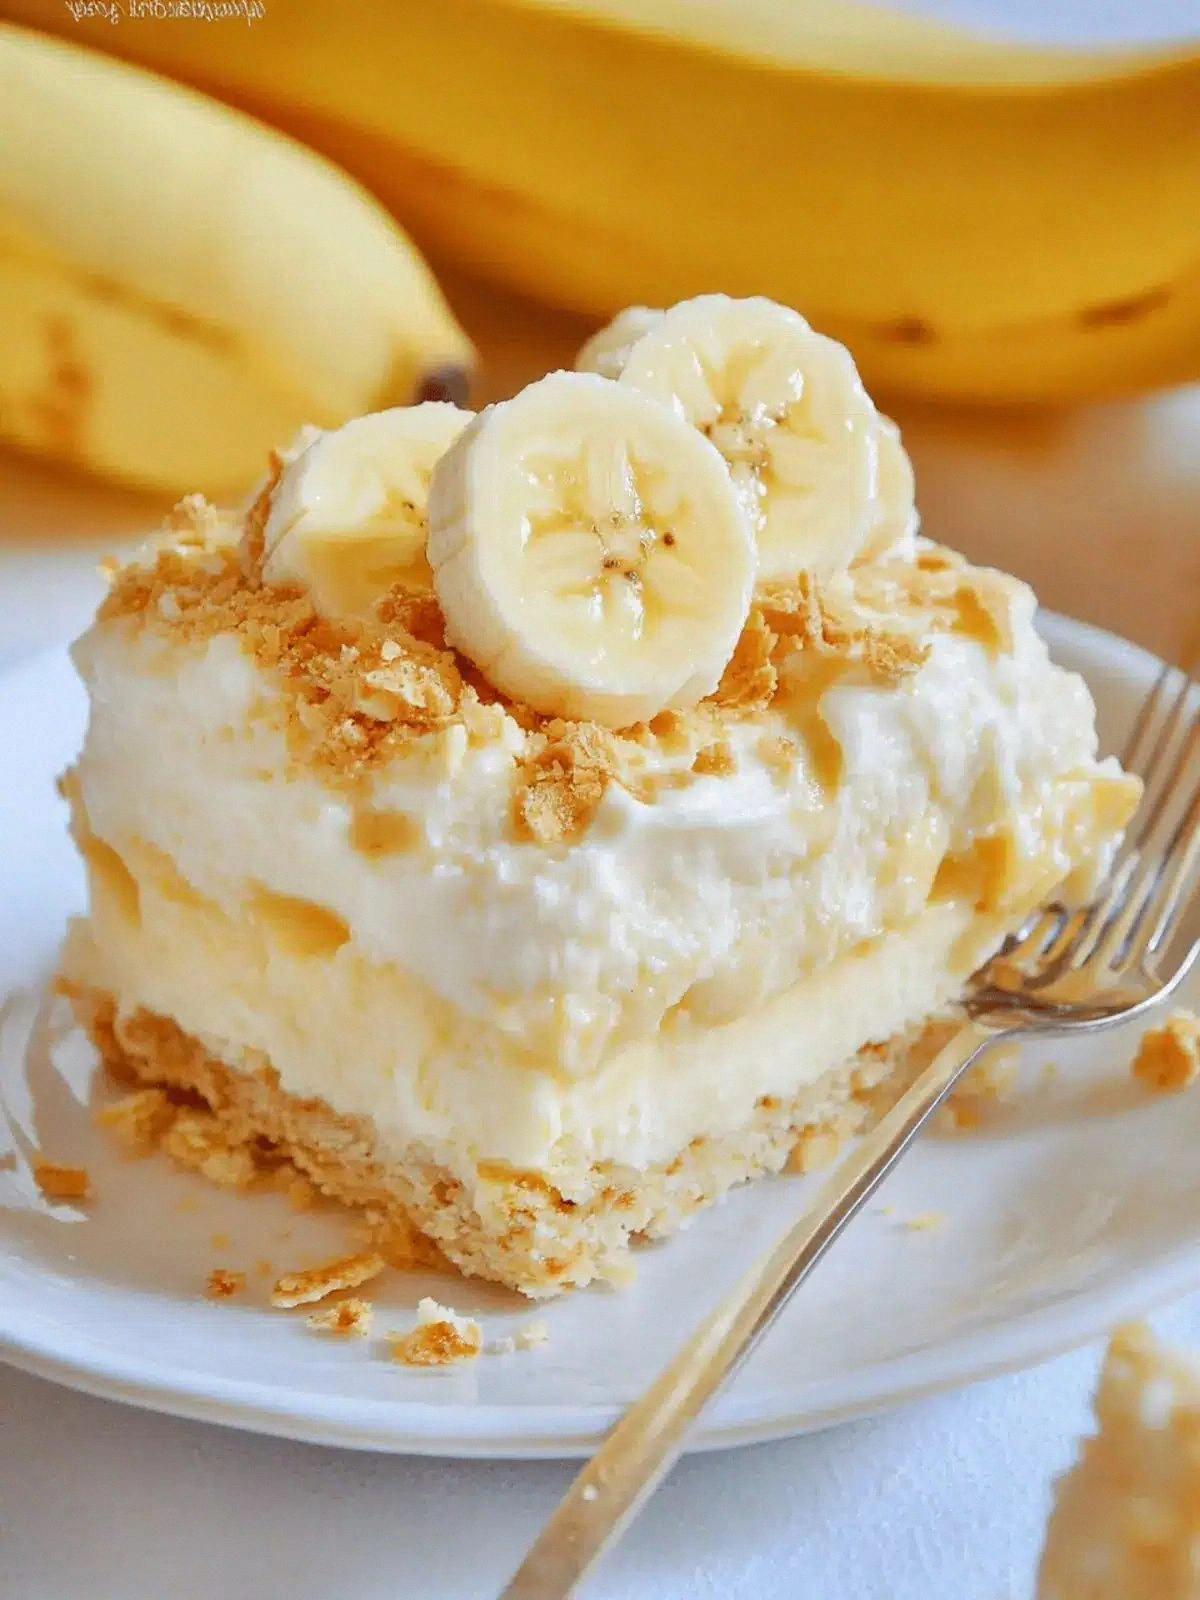
- Presentation: Layered Nilla wafers give a satisfying crunch and a classic look that makes the dish Instagram-worthy. The glossy sheen of the pudding adds visual appeal.
- Make-Ahead: This pudding can be assembled up to 24 hours in advance, letting the flavors meld and the texture set perfectly.
- Kid-Friendly: The recipe is simple enough for kids to help, and the banana flavor is a natural sweetener that kids love.
- Versatility: Swap Nilla wafers for chocolate cookies or sprinkle toasted coconut on top for a tropical twist.
- Healthier Option: Using 2% milk instead of whole milk slightly reduces fat content without compromising creaminess.
Alright, let's break down exactly what goes into this masterpiece. But before we dive into the ingredients, let me share a quick kitchen hack that will save you time and keep the pudding perfectly smooth.
Inside the Ingredient List
The Flavor Base
Heavy whipping cream and confectioners' sugar form the backbone of this pudding’s lusciousness. The cream brings richness, while the powdered sugar dissolves instantly, ensuring no gritty texture. If you’re watching calories, you can reduce the sugar slightly, but the sweetness is part of the charm. Skipping this pair will leave your pudding flat and lifeless.
The Texture Crew
Cream cheese is the secret weapon that gives the pudding its airy, mousse-like feel. When softened at room temperature, it blends seamlessly with the cream, preventing lumps. A pinch of salt can enhance the cream cheese’s flavor, but the recipe already includes a subtle hint of vanilla to keep the profile balanced. If you’re vegan, you can use a dairy-free cream cheese substitute, but be prepared for a slightly different mouthfeel.
The Unexpected Star
Sweetened condensed milk is the unsung hero that locks in moisture and adds a caramelized sweetness that no other ingredient can replicate. It’s also a great thickening agent, giving the pudding a silky body. Some people mistake it for regular milk, but its high sugar content is what makes the pudding so indulgent. If you can’t find it, a mixture of whole milk and honey can mimic the texture, though it won’t be as thick.
The Final Flourish
Nilla wafers and ripe bananas are the final layers that give the pudding its classic look and flavor. The wafers provide crunch and a buttery base that contrasts the creamy layers, while the bananas bring natural sweetness and a hint of earthiness. Slice the bananas just before assembly to keep them from browning. If you prefer a chocolate version, substitute the wafers with chocolate cookies and add a drizzle of melted chocolate on top.
Everything's prepped? Good. Let's get into the real action.
The Method — Step by Step
- First, bring a medium saucepan to a gentle simmer and pour in the 1 cup of milk. Keep the heat low; you want the milk to warm, not boil. This step ensures the instant banana pudding mix dissolves smoothly, preventing lumps. I swear, a quick whisk after adding the mix will save you from a gritty disaster.
- Add the 5 oz instant banana pudding mix to the warm milk, stirring constantly. The mix will thicken immediately; let it sit for 2–3 minutes. At this point, you’ll notice the aroma of banana and vanilla rising. The mixture should resemble a thick custard; if it’s too runny, give it another minute.
- In a separate bowl, combine the 8 oz softened cream cheese with the 0.75 cups confectioners' sugar and 1 tsp vanilla extract. Use a handheld mixer or whisk to blend until the mixture is smooth and free of lumps. The key is to avoid overmixing, which can cause the cream cheese to separate.
- Whisk the 2.5 cups heavy whipping cream in a chilled bowl until soft peaks form. Then fold this whipped cream into the cream cheese mixture. The result should be a silky, airy blend that’s ready to meet the banana base. Kitchen Hack: If you’re short on time, you can fold the whipped cream in gradually, adding just enough to keep the mixture light.
- Gently fold the banana pudding base into the cream cheese and whipped cream mixture. Use a spatula to keep the mixture light; you want to preserve the airy texture. The mixture should look like a pale, cloud-like custard. This step is crucial; overfolding will make it dense.
- Layer the first tier of Nilla wafers at the bottom of a 9x13-inch dish. The wafers should cover the entire surface, creating a buttery foundation. If you’re using a glass dish, the layers will show through, adding a decorative touch.
- Spread a thin layer of the pudding over the wafers, then arrange a layer of sliced bananas on top. The bananas should be evenly spaced to ensure every bite has that sweet, fruity burst. Watch Out: If you pile too many bananas at once, the layers will become uneven and the pudding may leak.
- Repeat the layering process—wafers, pudding, bananas—until all ingredients are used, finishing with a top layer of pudding. The final layer should be smooth and slightly glossy. Gently press the layers together to ensure they adhere.
- Cover the dish with plastic wrap and refrigerate for at least 4 hours, preferably overnight. This chilling period allows the flavors to meld and the wafers to soften just enough to create that classic banana pudding texture.
- Before serving, give the pudding a quick stir to redistribute any settled cream. Sprinkle a few extra Nilla wafers on top for a crunchy finish. If you want a decadent touch, drizzle a little caramel sauce or chocolate ganache over the top.
That's it—you did it. But hold on, I've got a few more tricks that'll take this to another level. Let’s explore some insider tips that will elevate your pudding experience.
Insider Tricks for Flawless Results
The Temperature Rule Nobody Follows
Many people heat the milk too high, which causes the pudding to scorch and develop a bitter note. Keep the temperature below 180°F (82°C). Use a thermometer or simply watch for tiny bubbles around the edges. If you’re in a hurry, let the milk cool for a minute after boiling; it’ll still dissolve the mix without burning.
Why Your Nose Knows Best
The aroma of freshly whisked cream cheese and vanilla is a subtle indicator that the mixture is ready. If it smells too strong or sharp, give it a minute to settle. The scent will mellow into a sweet, buttery perfume that signals the pudding is on point.
The 5-Minute Rest That Changes Everything
After folding the layers, let the pudding rest for 5 minutes before refrigerating. This brief pause allows the wafers to absorb the liquid evenly, preventing soggy edges. I’ve seen this trick transform a good pudding into an unforgettable dessert.
A Pinch of Salt for Depth
Adding just 1/8 tsp of salt to the cream cheese mixture can enhance the sweetness without making it taste salty. Salt acts as a flavor enhancer, making the vanilla and banana flavors pop. If you’re watching sodium, skip this step, but trust me, the difference is noticeable.
The Final Whisk
Right before serving, give the pudding a final whisk to reincorporate any settled cream. This step gives the pudding a glossy sheen and ensures each bite is smooth. It’s a small step that makes a huge difference in texture.
The Chill Trick
If you’re short on time, place the dish on a cooling rack in the fridge. The airflow around the dish prevents the top from forming a crust, keeping the pudding moist. For a longer chill, use a freezer-safe container with a lid; this will keep the pudding from absorbing fridge odors.
Creative Twists and Variations
This recipe is a playground. Here are some of my favorite ways to switch things up:
Chocolate Cookie Crunch
Swap Nilla wafers for chocolate sandwich cookies. The chocolate adds richness and pairs beautifully with the banana flavor. Top with a dusting of cocoa powder for an extra chocolatey finish.
Tropical Coconut Delight
Add toasted coconut flakes between the layers and sprinkle extra toasted coconut on top. The coconut adds a nutty crunch and a tropical aroma that complements the banana. For a vegan version, use coconut cream instead of heavy cream.
Nutty Banana Swirl
Incorporate chopped walnuts or pecans into the pudding mixture before layering. The nuts provide crunch and a buttery flavor. They also add a protein boost, making the dessert a bit more filling.
Caramel Swirl Variation
Drizzle caramel sauce into the pudding layers before adding the bananas. The caramel adds a buttery sweetness that enhances the banana flavor. A sprinkle of sea salt on top balances the richness.
Berry Banana Fusion
Add sliced strawberries or blueberries between banana layers. The berries bring tartness and a pop of color. They also add antioxidants, making the dessert a healthier option.
Coffee‑Infused Twist
Stir in a tablespoon of instant espresso powder into the pudding base. The coffee deepens the flavor profile and pairs wonderfully with banana. This version is perfect for an adult dessert or a brunch treat.
Storing and Bringing It Back to Life
Fridge Storage
Store the pudding in an airtight container for up to 3 days. Keep it in the coldest part of the fridge to maintain its creamy texture. If the wafers become too soggy, you can refresh them in a toaster for a minute.
Freezer Friendly
This pudding freezes well. Wrap the dish tightly in plastic wrap, then place it in a freezer bag. Freeze for up to 2 weeks. Thaw overnight in the fridge before serving.
Best Reheating Method
To reheat, gently warm the pudding in a microwave on low power for 30-second intervals, stirring in between. Alternatively, place the dish in a water bath at 165°F (74°C) until warmed through. Add a splash of water before reheating; it steams back to perfection, keeping the pudding moist.