I was standing in my kitchen, staring at a bowl of stale corn kernels, when my friend dared me to turn them into something extraordinary. I laughed, because the last time I tried a corn cake, it felt like a soggy pancake that never quite set and left my taste buds confused. That night, the kitchen smelled of burnt sugar and hopeful ambition, the air thick with the promise of something new. I decided to rewrite the rules and create a custard‑laden masterpiece that would make every crumb sing.
The first time I tasted that first bite, it was like a bright summer afternoon captured in a bite‑sized cup of sweet, buttery corn. The custard clung to the kernels like velvet, turning each bite into a silky, caramel‑kissed experience. I knew right then that this was the recipe that would become the talk of every gathering. I could almost hear my friends shouting, “I dare you to taste this and not go back for seconds.”
I spent hours experimenting with ratios, trying to strike the perfect balance between the corn's natural sweetness and the custard's rich, creamy texture. I discovered that a touch of vanilla and a splash of milk could lift the flavor profile to new heights. The result was a golden crust that cracked like thin ice when you pressed it, revealing a steaming interior that smelled like sunshine. I couldn't wait to share the secret with you.
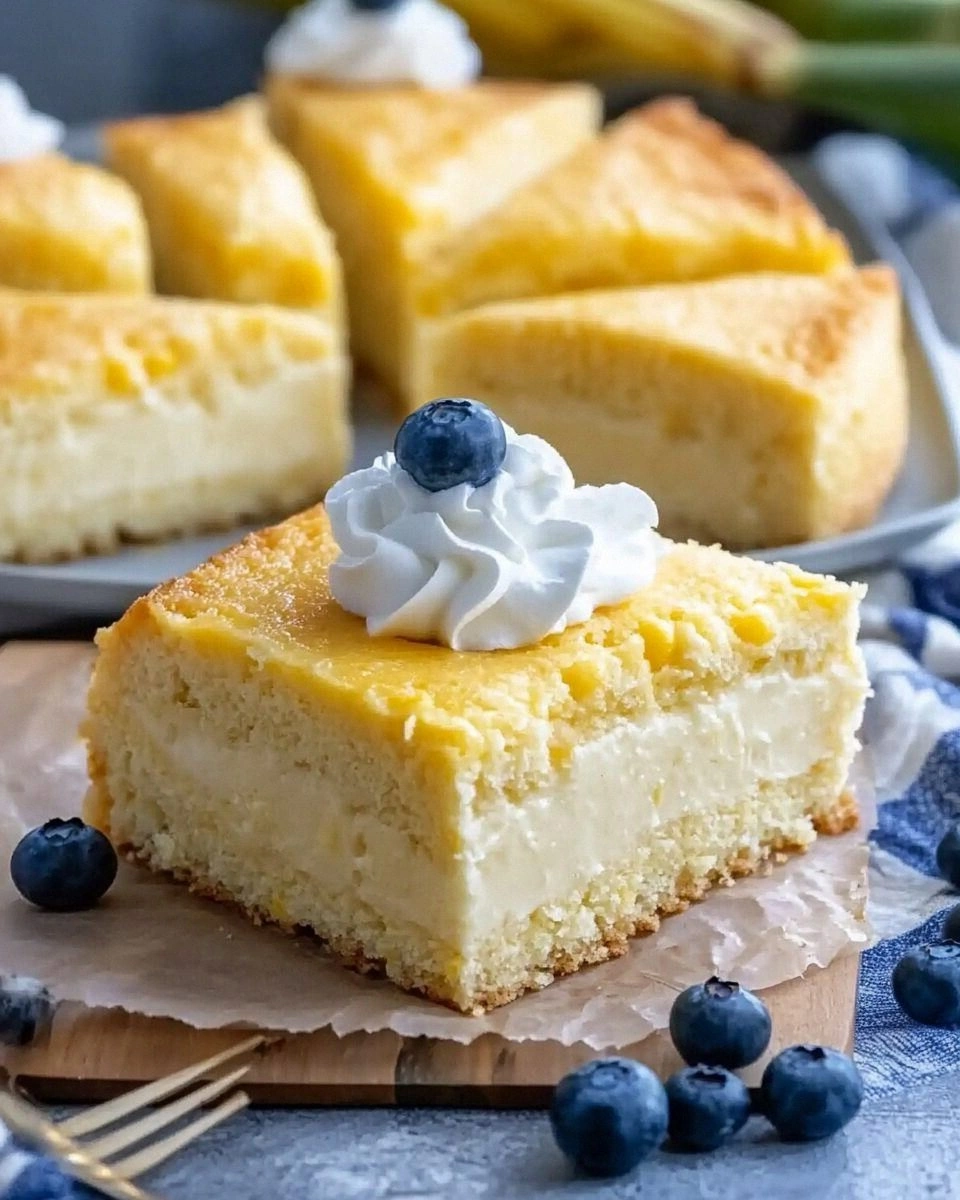
So here it is, the definitive version of Magic Custard Corn Cake, a dish that defies expectations and elevates humble corn to culinary stardom. This version stands out because it marries a fluffy custard base with a crisp, caramelized top that practically sings. The technique is simple yet elegant, and the final product is so moist and flavorful that you’ll find yourself reaching for a second slice. Let me walk you through every single step — by the end, you'll wonder how you ever made it any other way.
What Makes This Version Stand Out
- Taste: The corn’s natural sweetness is amplified by a subtle hint of vanilla and a touch of honey, creating a flavor profile that feels both familiar and unexpectedly sophisticated. The creamy custard layer coats each kernel, delivering a silky mouthfeel that lingers on the palate. This harmony of sweet and savory invites repeated bites without ever feeling heavy.
- Texture: A perfectly crisp crust forms during the final bake, while the interior remains tender and custardy. The contrast between the golden, slightly caramelized edges and the soft, buttery center is a textural dance that keeps diners intrigued. This dynamic mouthfeel sets the dish apart from other corn cakes that often end up too dense or too flat.
- Simplicity: With only ten core ingredients and a straightforward method, this cake can be whipped up even on a busy weekday. The recipe avoids obscure pantry items, making it accessible to anyone who loves comfort food without the extra fuss. That simplicity is the backbone of its repeatability and reliability.
- Uniqueness: Incorporating a splash of cornmeal into the batter gives the cake a subtle nuttiness that elevates the overall flavor. The addition of shredded cheddar cheese in the batter provides a savory depth that balances the sweetness. Together, these ingredients create a dish that feels both rustic and refined.
- Crowd Reaction: Friends and family alike are astonished when they taste this cake; the reaction is often a chorus of “Where did you get this?” and “Can I have the recipe?” The dish is so universally appealing that it works for brunch, dinner, and dessert.
- Ingredient Quality: Using fresh corn kernels and high‑quality butter ensures a flavor that is richer than most store‑bought mixes. The choice of all‑purpose flour over whole wheat keeps the texture light while still providing structure. The attention to ingredient quality translates into a final product that feels premium.
- Cooking Method: The method relies on a two‑stage bake: first a gentle rise to set the custard, then a high‑heat finish to caramelize the crust. This technique is simple but effective, and it guarantees consistent results regardless of oven variations.
- Make‑Ahead Potential: The cake can be assembled ahead of time and refrigerated, then finished in the oven just before serving. This feature makes it ideal for potlucks or holiday gatherings where you need to prep in advance without sacrificing flavor.
Inside the Ingredient List
The Flavor Base
All‑purpose flour is the backbone of this cake, providing the structure that holds the custard together. A pinch of baking powder activates the batter, giving it a gentle lift without making it airy. Salt, though small in quantity, sharpens every other flavor and prevents the sweetness from becoming cloying.
The Texture Crew
Corn kernels bring natural sweetness and a delightful pop of texture. Milk adds moisture and a subtle tang, while melted butter introduces a buttery richness that coats the crust. Eggs act as both binder and leavening agent, ensuring the batter remains cohesive as it bakes.
The Unexpected Star
Shredded cheddar cheese may seem like an odd addition, but it melts into the custard, creating pockets of savory depth that contrast beautifully with the sweet corn. The cheese also helps the crust develop a slightly golden hue, adding visual appeal. When you bite, the cheese’s subtle sharpness lifts the overall flavor profile.
The Final Flourish
A splash of vanilla extract infuses the batter with aromatic sweetness that echoes the corn’s natural flavor. A tablespoon of honey, optional but recommended, caramelizes during baking, giving the crust a glossy sheen. Cornmeal, if added, contributes a nutty undertone and a slightly gritty texture that adds a rustic charm.
Everything's prepped? Good. Let's get into the real action…
The Method — Step by Step
- Preheat your oven to 350°F (175°C) and line a 9‑inch round cake pan with parchment paper. The parchment ensures a clean release and gives the cake a professional finish. This is the moment where the air in the kitchen starts to hum with anticipation.
- In a large bowl, whisk together the flour, baking powder, salt, and sugar until the mixture is evenly distributed. The dry blend forms the foundation of the custard’s structure. I always let this step sit for a minute to allow the ingredients to mingle.
- In a separate bowl, beat the eggs and milk together until frothy. Add the melted butter, vanilla, and honey, whisking until the mixture is silky. This liquid blend will become the custard that permeates the corn.
- Fold the wet mixture into the dry ingredients, stirring until just combined. Be careful not to overmix; a few streaks of flour are acceptable. The batter should be thick but pourable, like a thick custard.
- Gently fold in the corn kernels and shredded cheddar, ensuring even distribution. The corn should be fully coated, so each bite delivers a burst of sweet and savory. The cheese will melt into the custard, creating pockets of flavor.
- If you’re using cornmeal, sprinkle it over the top of the batter before pouring it into the pan. The cornmeal will caramelize on the surface, giving the cake a rustic, nutty crust. This step is optional but highly recommended.
- Transfer the batter to the prepared pan and smooth the top with a spatula. Tap the pan gently on the counter to release any trapped air pockets. This ensures a uniform rise and a beautiful, even crust.
- Bake for 25 minutes, then increase the oven temperature to 400°F (200°C) and bake an additional 10 minutes. The higher heat caramelizes the crust, turning it a deep amber that’s almost golden. The interior should still be moist and custard‑like.
- Remove the cake from the oven and allow it to cool in the pan for 5 minutes before transferring it to a wire rack. The residual heat will finish the custard’s set, giving it a silky finish. This cooling period is critical for the cake’s final texture.
- Slice the cake while warm and serve immediately, or let it cool completely and refrigerate for up to 24 hours. The cake’s custard layer will firm up slightly, making it easier to slice. When reheated, it regains its original softness.
That's it — you did it. But hold on, I've got a few more tricks that'll take this to another level. These insider tips will help you avoid common pitfalls and elevate the flavor profile even further.
Insider Tricks for Flawless Results
The Temperature Rule Nobody Follows
Many bakers start their cake at a high temperature from the get-go, but this recipe thrives on a gradual heat increase. Begin at 350°F and finish at 400°F to allow the custard to set while the crust caramelizes. This two‑stage bake keeps the interior tender and the exterior crisp.
Why Your Nose Knows Best
Your sense of smell is a reliable indicator of doneness. When the cake starts to emit a buttery, caramel aroma, you’re in the right zone. Trust that scent, and pull the cake out before the crust darkens too much.
The 5‑Minute Rest That Changes Everything
After removing the cake from the oven, let it rest in the pan for five minutes. This brief pause allows the custard to set, preventing it from sliding off the parchment when you transfer it. It also lets the heat distribute evenly, giving you a cleaner slice.
Add a Splash of Citrus
A tablespoon of fresh lemon zest added to the batter brightens the flavor and cuts through the richness. The citrus note is subtle but noticeable, adding a fresh layer that keeps the cake from feeling heavy. I always add zest when baking for a summer brunch.
Use a Lightly Greased Pan
Even though parchment paper is used, lightly greasing the pan ensures an even release. This small step prevents the cake from sticking to the edges, which can happen if the batter is too thick. A quick pat of butter or oil on the paper surface does wonders.
Cool on a Wire Rack
Cooling the cake on a wire rack allows air to circulate around the entire surface, preventing a soggy bottom. It also keeps the crust crisp and the interior from steaming. A simple rack makes all the difference.
Creative Twists and Variations
This recipe is a playground. Here are some of my favorite ways to switch things up:
Chocolate Chip Delight
Swapping half the corn kernels for dark chocolate chips transforms the cake into a sweet‑savory dessert. The chocolate melts into the custard, creating pockets of rich flavor. This version is perfect for chocolate lovers who want a twist on the classic.
Spicy Jalapeño Kick
Add diced jalapeño to the batter for a subtle heat that complements the sweet corn. The pepper’s bite contrasts with the creamy custard, creating a balanced flavor profile. A few slices of fresh jalapeño on top finish the dish with a fiery flair.
Maple‑Infused Sweetness
Replace honey with maple syrup for a deeper, caramel‑like sweetness. The maple’s earthy undertones pair beautifully with the corn’s natural flavor. This variant works especially well during fall gatherings.
Herb‑Infused Freshness
Stir in chopped fresh thyme or rosemary to add aromatic depth. The herbs give the custard a fragrant lift, making the cake feel more sophisticated. Pair this with a drizzle of olive oil for a Mediterranean twist.
Cheese‑Only Variation
Omit the corn entirely and double the cheese for a rich, savory cake. The result is a decadent, cheese‑centric dessert that pairs well with a light salad. This version is ideal for a cheese‑lover’s dinner party.
Storing and Bringing It Back to Life
Fridge Storage
Store the cooled cake in an airtight container for up to 24 hours. Wrap it loosely in parchment to preserve the crust’s crispness. When you’re ready to serve, let it sit at room temperature for 10 minutes to soften slightly.
Freezer Friendly
Wrap the cake tightly in plastic wrap and then foil before freezing. It stays fresh for up to two weeks. When you’re ready, thaw it overnight in the fridge before reheating.
Best Reheating Method
Reheat the cake in a 300°F oven for 10 minutes, then finish at 350°F for 5 minutes. Add a tiny splash of water to the pan before covering it with foil; the steam keeps the custard from drying out. The result is a cake that tastes almost as fresh as when it first baked.
I hope you’re as excited to try this as I am to share it. The moment you take that first bite, you’ll see why this cake is the culinary equivalent of a surprise party in your mouth. Enjoy every silky, caramelized crumb, and remember: the best part is sharing it with friends who will thank you for the discovery. Happy baking!