Love this? Pin it for later! 📌
Every January, as the nation pauses to honor Dr. Martin Luther King Jr., my kitchen turns into a tiny tribute of its own. I’m not orchestrating a grand banquet—just a single cast-iron skillet, a knob of butter, and the sweetest corn I can find in the dead of winter. This fried-corn ritual started the year I moved away from home; I was craving the communal tables of my childhood in Georgia where platters of butter-bathed corn often sat next to collards, macaroni and cheese, and whatever else the aunties decided we “needed.” Dr. King’s holiday felt like the perfect excuse to recreate that warmth without the pressure of cooking an entire spread.
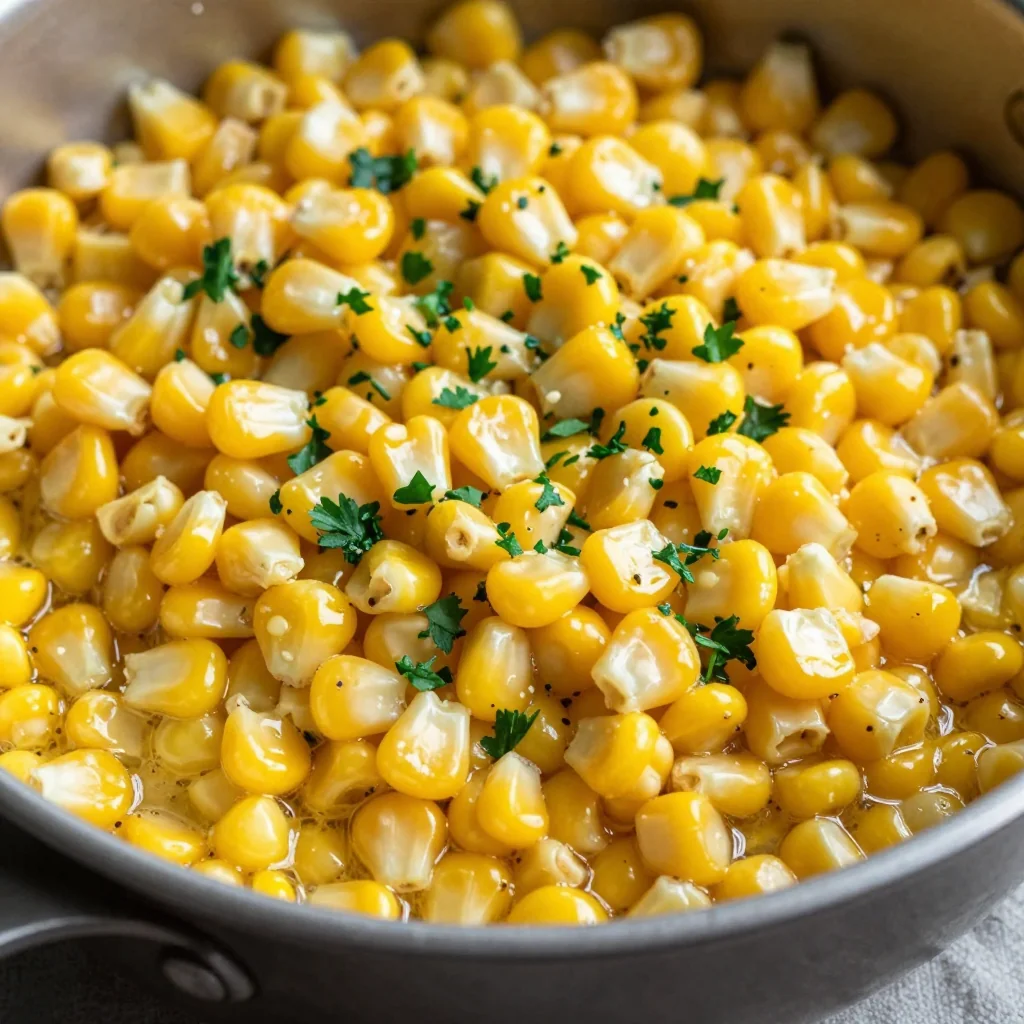
I love this recipe because it refuses to be fussy. It doesn’t ask you to track down obscure spices or hover over the stove for hours. Instead, it leans on four humble ingredients—corn, butter, salt, and a whisper of sugar—to deliver something that tastes like Sunday supper even on a Monday night. The kernels blister and caramelize in the hot fat until they’re golden at the edges and pop with sweet juice when you bite down. A shower of freshly cracked black pepper at the end gives just enough bite to remind you that simple can still be bold.
Whether you’re feeding a crowd after a day of service or curling up with a bowl of something comforting while you re-watch the “I Have a Dream” speech, this fried corn is the culinary equivalent of a well-worn quilt: modest, familiar, and stitched together with love. Make it once and you’ll find yourself reaching for the same skillet every January, too.
Why This Recipe Works
- Cast-Iron Magic: A heavy skillet retains heat so the corn sears, not steams, giving you those crave-worthy caramelized edges.
- Winter-Ready: Frozen kernels are picked and flash-frozen at peak ripeness, so you can enjoy sweet corn even in January.
- Butter Two Ways: Half the butter goes in early for browning; the rest finishes the dish for glossy, restaurant-level sheen.
- No Cream Needed: A pinch of sugar amplifies natural sweetness so you don’t have to drown the corn in heavy cream.
- Scalable: Doubles or halves effortlessly, whether you’re cooking for two or twenty after a day of volunteering.
- Make-Ahead Friendly: Reheats like a dream in the same skillet while you prep the rest of your plate.
Ingredients You'll Need
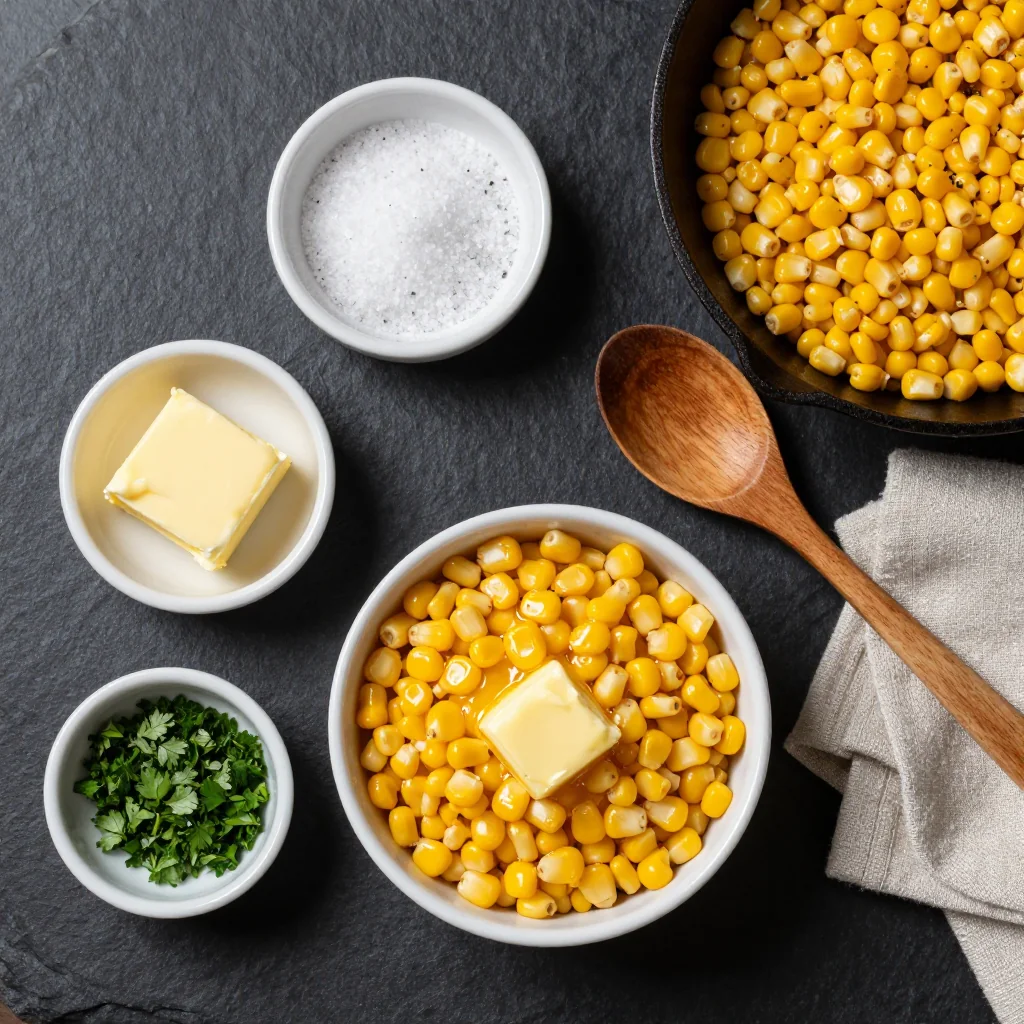
Great fried corn starts with great corn. If you’re lucky enough to have fresh ears in summer, slice the kernels off the cob and proceed. For January, though, frozen whole kernels are your best friend. Look for bags labeled “sweet white” or “super-sweet” rather than “field corn,” which is starchier and better suited for cornbread. You’ll need four full cups—about one and a half pounds.
Butter is the second star. I reach for European-style (82 % fat) because the extra butterfat browns beautifully and carries that nutty aroma that makes the dish smell like a Southern kitchen on a Sunday morning. You’ll use six tablespoons total: four for the initial sear and two to finish. Unsalted is ideal so you control the seasoning, but if all you have is salted, simply reduce the added salt later.
Granulated sugar sounds counter-intuitive for a savory side, but a modest teaspoon coaxes out the corn’s inherent sweetness and balances the browning butter. If your corn is already candy-sweet (think peak-of-summer farmers-market ears), you can skip it.
Kosher salt and freshly cracked black pepper are non-negotiable. The salt draws moisture from the kernels, helping them caramelize, while the pepper provides the gentle heat that keeps the dish from tipping into dessert territory. I keep a small ramekin of each by the stove so I can season in layers.
Optional but lovely: a pinch of smoked paprika for a whisper of campfire, or a squeeze of lemon for brightness. Neither is traditional, yet both play nicely if you’re feeling adventurous.
How to Make MLK Day Fried Corn with Butter for a Simple Side
Thaw & Dry
If using frozen corn, measure it into a colander and run cool water over it for 30 seconds to separate the kernels. Shake off excess water, then spread the corn on a clean kitchen towel and pat dry. Removing surface moisture prevents steam and promotes caramelization.
Preheat the Skillet
Place a 10- or 12-inch cast-iron skillet over medium heat for two full minutes. The rim should feel hot when you hover your hand above it. A properly heated pan seals in flavor and prevents sticking.
Brown the First Butter
Add 4 Tbsp butter and swirl until it melts, foams, and turns hazelnut brown—about 90 seconds. You’ll smell a nutty aroma; that’s your cue to move quickly so it doesn’t burn.
Add the Corn
Slide the dried corn into the skillet in an even layer. Resist the urge to stir for 90 seconds; this contact time creates those coveted toasted edges. Season with ½ tsp salt and ¼ tsp pepper.
Toss & Caramelize
Using a silicone spatula, flip and spread the corn every 30 seconds for about 6 minutes total. You’re looking for deep golden spots on most kernels and a sweet, popcorn-like aroma.
Season & Sweeten
Sprinkle in 1 tsp sugar and another pinch of salt. Stir well; the sugar will dissolve and coat the kernels, enhancing their natural sweetness without making the dish sugary.
Finish with Butter
Turn the heat to low and add the remaining 2 Tbsp butter. Stir until melted and glossy. Taste and adjust salt and pepper; the corn should sing with flavor but not taste overtly salty.
Serve Hot
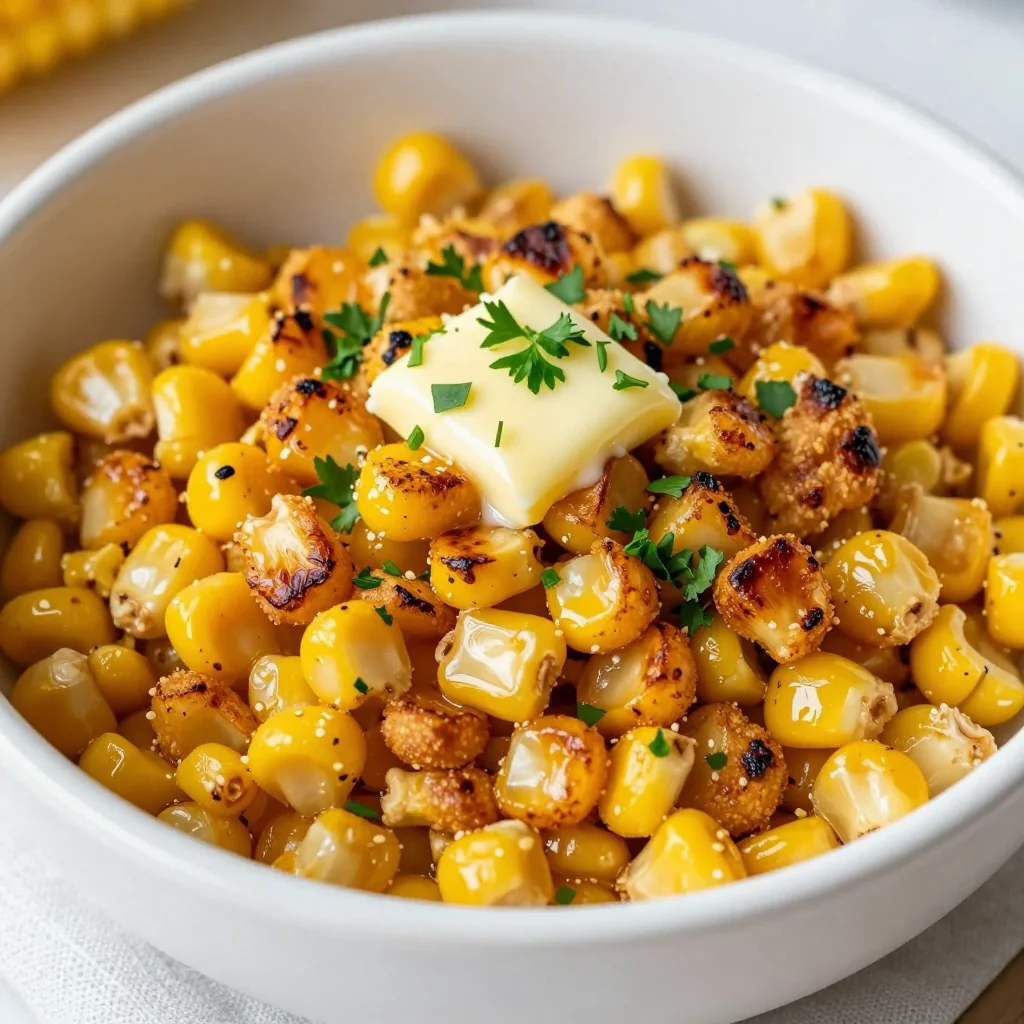
Transfer to a warm serving bowl. Add a final crack of black pepper or a pat of butter on top for tableside drama. Leftovers? Lucky you—see storage tips below.
Expert Tips
Hot Pan, Cold Corn
For maximum sear, keep the corn chilled until it hits the skillet. The temperature contrast helps kernels caramelize before they overcook.
Overnight Thaw
Planning ahead? Move frozen corn to the fridge the night before. It will shed excess ice crystals, cutting your drying step in half.
Clarified Option
Swap clarified butter or ghee for the first addition; its higher smoke point gives even deeper browning without burnt milk solids.
Double Batch Rule
Cooking for more than eight? Use two skillets instead of crowding one; too many kernels at once steam rather than sear.
Herb Finish
Add a chiffonade of fresh basil or parsley right before serving; the green flecks pop against the golden corn and add a grassy lift.
Smoky Heat
For a modern twist, stir in ⅛ tsp smoked paprika and a squeeze of lime. It nods to Mexican elote without overpowering the classic flavor.
Variations to Try
-
Fresh Summer Corn
Cut kernels from 6 medium ears; reduce sugar to ½ tsp. Cooking time remains the same.
-
Spicy Cali-Style
Add 1 minced jalapeño with the corn and finish with ¼ cup crumbled cotija cheese.
-
Vegan Adaptation
Replace butter with refined coconut oil; add 1 tsp nutritional yeast for buttery nuance.
-
Creamy Dreamy
Stir in 2 Tbsp heavy cream after step 7 for a richer, almost creamed-corn vibe.
Storage Tips
Let leftovers cool completely, then transfer to an airtight container and refrigerate up to 4 days. The corn will firm as the butter solidifies; that’s fine. To reheat, warm a skillet over medium-low, add the corn, and drizzle in 1 tsp water. Cover for 2 minutes to create gentle steam, then uncover and stir until hot and glossy again. Avoid the microwave if you can—it softens those caramelized edges you worked so hard to achieve.
For longer storage, freeze portions in zip-top bags, pressing out as much air as possible. They’ll keep 3 months. Thaw overnight in the fridge and reheat as above. The texture will be slightly softer but flavor remains stellar.
Frequently Asked Questions
MLK Day Fried Corn with Butter for a Simple Side
Ingredients
Instructions
- Thaw & Dry: Run cool water over frozen corn in a colander for 30 seconds. Spread on a towel and pat dry.
- Preheat Skillet: Heat a 10- or 12-inch cast-iron skillet over medium heat for 2 minutes.
- Brown Butter: Add 4 Tbsp butter; swirl until nut-brown and fragrant, about 90 seconds.
- Add Corn: Stir in corn, ½ tsp salt, and ¼ tsp pepper. Let sit 90 seconds, then toss every 30 seconds for 6 minutes.
- Season: Sprinkle in sugar and remaining ¼ tsp salt; stir to coat.
- Finish: Reduce heat to low; add remaining 2 Tbsp butter. Stir until glossy. Taste, adjust seasoning, and serve hot.
Recipe Notes
For fresh summer corn, cut kernels from 6 medium ears and reduce sugar to ½ tsp. Leftovers reheat beautifully in a skillet with a splash of water.