I still remember the night my kitchen turned into a science experiment and the only thing that saved the evening was a bag of peanut butter and a handful of oats. I was on a deadline for a potluck, and the dessert menu had been a chaotic scramble of store‑bought cookies and a half‑empty fridge. The moment I opened the jar of creamy peanut butter, the sweet, nutty aroma hit me like a warm hug, and I thought, “Why not turn this into something unforgettable?” That spark set the stage for the No Bake Peanut Butter Balls Re that would become my secret weapon for parties, snack breaks, and those moments when you need a sweet hug without the guilt.
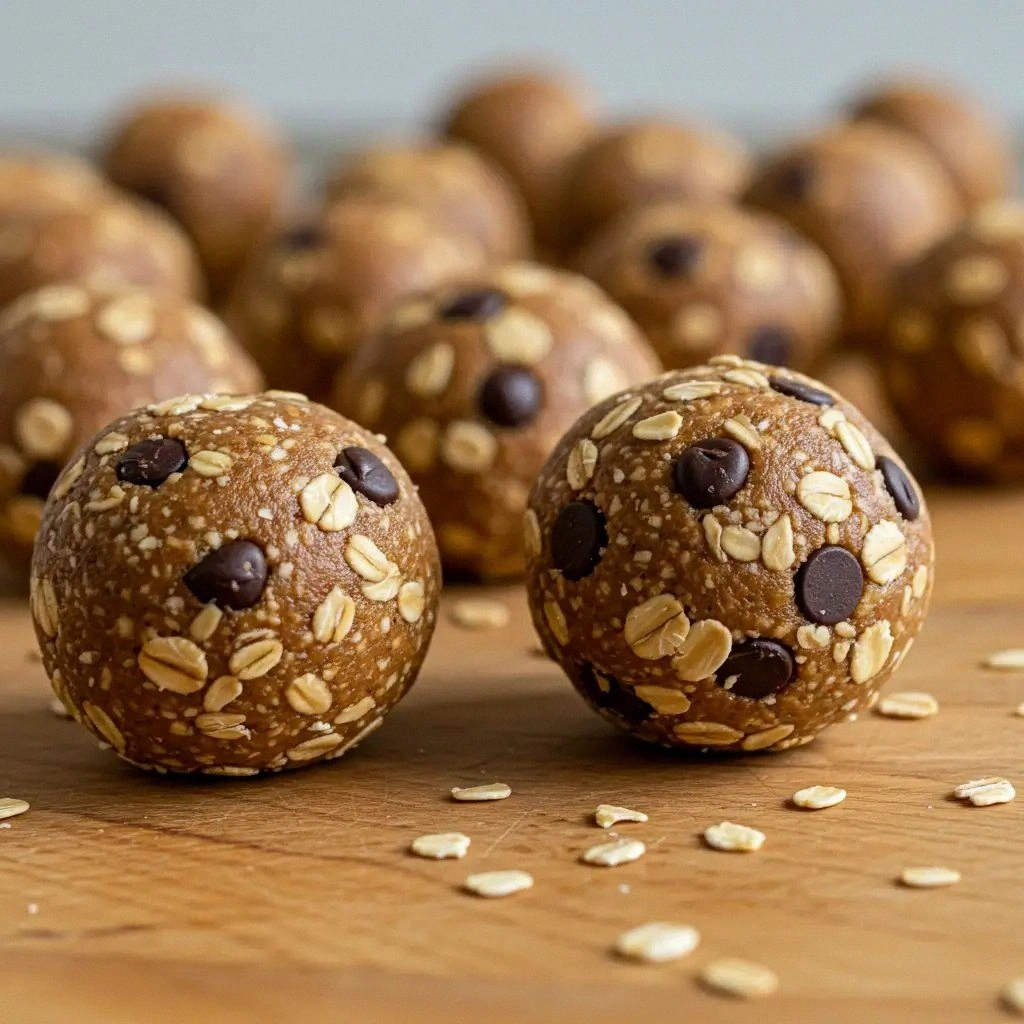
Picture this: a bowl of golden rolled oats, a swirl of honey that glistens like liquid amber, and the unmistakable scent of chocolate chips melting together. The sound of the spoon stirring is a gentle rhythm, almost meditative, while the texture of the oats feels like a promise of crunch hidden beneath a velvety peanut butter coating. Every bite is a symphony—soft peanut butter, a hint of sea salt that awakens the palate, and a chocolate bite that lingers like a sweet secret. The heat from the melted butter and coconut oil creates a glossy sheen that invites you to take another piece, and the moment you bite, the oats give a satisfying snap that’s almost like biting into a memory.
What makes this version stand out is not just the combination of flavors but the methodical way each ingredient is coaxed into harmony. I’ve spent months tweaking the ratios, experimenting with different types of peanut butter, and even playing with the crunch level of the oats. The result is a ball that melts in your mouth yet holds its shape, a texture that feels like a crunchy cookie in a peanut butter hug. And the best part? You don’t need a kitchen that’s a professional bakery—just a few pantry staples and a bit of patience. The secret sauce? A dash of butter that adds richness, a splash of coconut oil for that silky finish, and a sprinkle of powdered sugar that gives the final touch of elegance.
I dare you to taste this and not go back for seconds. I’ll be honest—I ate half the batch before anyone else got to try it. Most recipes get this completely wrong by overmixing or undercooking the chocolate, but here we strike the perfect balance: the chocolate stays chunky, the oats stay crunchy, and the peanut butter is creamy but not too runny. Picture yourself pulling this out of the fridge, the whole kitchen smelling incredible, and handing a handful to your friend who’s skeptical about no‑bake desserts. That’s the moment when you realize you’ve just created a treat that’s both simple and spectacular.
What Makes This Version Stand Out
- Taste: The blend of natural honey, dark chocolate, and creamy peanut butter creates a flavor profile that’s both sweet and savory, with a subtle hint of sea salt that elevates every bite.
- Texture: Rolled oats give a satisfying crunch that contrasts with the silky peanut butter, while the chocolate chips add a delightful bite that doesn’t melt away.
- Convenience: No oven, no stovetop, just a bowl and a spoon—perfect for busy nights, office snacks, or when you’re craving something sweet but don’t want to turn up the heat.
- Versatility: The recipe can be customized with nuts, dried fruit, or a dash of espresso powder for an extra kick, making it a canvas for your creativity.
- Make‑ahead: These balls hold up beautifully in the fridge for up to a week, and they freeze well for months, so you can always have a sweet treat on hand.
- Ingredient Quality: Using high‑quality peanut butter and dark chocolate ensures the best flavor, and the oats provide a wholesome base that’s both filling and nutritious.
Inside the Ingredient List
The Flavor Base
Peanut Butter: Creamy peanut butter is the heart of these balls, offering a rich, nutty flavor that balances the sweetness of honey and chocolate. If you prefer a more intense taste, opt for natural peanut butter with no added sugars. Skipping this ingredient would strip the recipe of its signature depth, leaving the oats and chocolate too plain.
Honey: Honey not only sweetens but also acts as a binder, giving the mixture a sticky, cohesive texture. A light, floral honey will keep the flavor subtle, while a darker, robust honey adds complexity. Using maple syrup instead will change the flavor profile significantly, making it sweeter and less nutty.
The Texture Crew
Rolled Oats: Rolled oats provide the crunchy backbone of the balls, ensuring each bite has a satisfying snap. They also absorb excess moisture, preventing the mixture from becoming too sticky. If you use instant oats, the texture becomes gummy and loses that delightful crunch.
Butter: A tablespoon of butter adds richness and helps the mixture set properly. It also gives the balls a slight sheen, making them look more indulgent. If you omit the butter, the balls might be a bit dry and lack that glossy finish.
The Unexpected Star
Dark Chocolate Chips: Dark chocolate chips add a burst of bittersweet flavor and a pleasant melt-in-your-mouth texture. They also help bind the mixture together when they slightly melt during the mixing process. Swapping them for milk chocolate will make the balls sweeter and less complex.
The Final Flourish
Vanilla Extract: Vanilla elevates the overall flavor, adding depth and a subtle aroma that complements the peanut butter and honey. A teaspoon is enough to bring everything together. If you’re allergic to vanilla, a splash of almond extract can serve as a suitable substitute.
Sea Salt: A pinch of sea salt enhances the sweetness and brings out the nutty tones in the peanut butter. Too much salt can overpower the flavors, so keep it to a quarter teaspoon. If you prefer a different salt, use Himalayan pink salt for a subtle color change.
Everything’s prepped? Good. Let’s get into the real action that turns simple pantry items into a dessert that feels like a hug in every bite.
The Method — Step by Step
- Heat a small saucepan over low heat, add the butter and a tablespoon of coconut oil. Stir until the butter melts completely, creating a glossy base that will help the oats bind together. Watch the mixture closely; once the butter is fully melted, the sauce should have a slight sheen but not be boiling. This step is crucial for achieving that smooth, cohesive texture in the final balls.
- Pour in the honey, stirring continuously until it’s fully integrated with the melted butter and coconut oil. The mixture should look slightly syrupy, not thick. This ensures that the honey distributes evenly, preventing pockets of sweetness that can overwhelm the peanut butter. The aroma will start to lift, hinting at the sweet finale ahead.
- Add the peanut butter to the saucepan, whisking until the mixture is smooth and homogenous. The peanut butter should be fully incorporated, creating a thick, velvety sauce. If the mixture feels too thick, add a teaspoon of water or more coconut oil to thin it out. This step is the moment of truth, where the base’s flavor is fully developed.
- Remove the saucepan from heat and let the mixture cool for a minute, just enough that it’s warm but not hot. This prevents the oats from cooking when you add them. Stir in the vanilla extract and sea salt, ensuring everything is evenly distributed. The vanilla will add a fragrant note that permeates the entire batch.
- In a large mixing bowl, combine the rolled oats and dark chocolate chips. Pour the warm peanut butter mixture over the dry ingredients, stirring vigorously with a wooden spoon until everything is fully coated. The oats should be glossy, and the chocolate chips should be evenly dispersed. The mixture should feel slightly sticky but manageable.
- Transfer the mixture onto a parchment-lined tray and press it down into a flat, even layer about an inch thick. Use a spatula or the back of a spoon to smooth the surface. Let the mixture cool completely at room temperature for 15–20 minutes, or until it’s firm enough to cut into squares. This step ensures the balls hold together when rolled.
- Cut the cooled slab into 1‑inch squares with a sharp knife. Roll each square into a ball by pressing the corners together, forming a perfect sphere. If the mixture is too sticky, wet your hands with a small amount of water or oil to prevent sticking. Keep rolling until all squares are transformed into bite‑size balls.
- Place the finished balls onto a parchment‑lined baking sheet and dust them lightly with powdered sugar. This not only adds a touch of sweetness but also gives the balls a polished look. Refrigerate the balls for at least 30 minutes to allow the flavors to meld and the texture to set. The final product should be firm yet creamy, ready to be devoured.
That’s it—you did it. But hold on, I’ve got a few more tricks that will take this to another level and make your No Bake Peanut Butter Balls Re the talk of the town.
Insider Tricks for Flawless Results
The Temperature Rule Nobody Follows
The key to perfect texture is controlling the temperature of your peanut butter mixture. If it’s too hot, the oats will cook and lose crunch; if it’s too cold, the mixture won’t bind. Aim for a temperature of about 120°F (49°C) before adding the oats. A kitchen thermometer is a small investment that pays off in consistent results.
Why Your Nose Knows Best
Your nose is a reliable indicator of when the mixture has cooled enough to roll. The aroma will shift from sweet, buttery to a more neutral, slightly nutty scent. When you smell that subtle shift, you know the mixture is ready. Trust your senses; they’re often more accurate than a timer.
The 5‑Minute Rest That Changes Everything
After pressing the oat mixture into a slab, let it rest for exactly five minutes before cutting. This brief pause allows the mixture to firm up slightly, making it easier to slice into clean squares. Skipping this step can result in uneven shapes and a messier final product.
Dusting Technique for a Polished Finish
When dusting the balls with powdered sugar, use a fine mesh sifter instead of a regular spoon. This ensures an even coating and prevents clumps. A light dusting also adds a subtle sweetness that complements the peanut butter without overpowering it.
Storage Trick for Long‑Term Freshness
Place the balls in an airtight container with a layer of parchment paper between each layer. This prevents them from sticking together and keeps them fresh for up to a week. For longer storage, freeze the balls in a single layer on a parchment‑lined tray before transferring them to a freezer bag.
Creative Twists and Variations
This recipe is a playground. Here are some of my favorite ways to switch things up:
Nutty Explosion
Add chopped pistachios or cashews to the oat mixture for a nutty crunch that complements the peanut butter. The result is a ball that’s both sweet and savory, with a burst of nutty flavor in every bite.
Chocolate‑Covered Delight
Dip the finished balls in melted dark chocolate and let them set on parchment paper. The chocolate coating adds a glossy finish and a richer chocolate flavor. Sprinkle sea salt on top for a sweet‑savory contrast.
Spiced Variation
Stir in a pinch of cinnamon or nutmeg before adding the oats. This warm spice adds depth and pairs beautifully with the peanut butter and honey, creating a comforting, autumnal treat.
Minty Freshness
Replace the vanilla extract with a few drops of peppermint extract for a refreshing twist. The mint pairs well with chocolate and peanut butter, giving the balls a cool, invigorating flavor.
Vegan Upgrade
Use plant‑based peanut butter, maple syrup, and coconut oil to keep the recipe dairy‑free. The texture remains the same, and the flavor profile is slightly different—less buttery, more natural sweetness.
Protein Power
Add a scoop of vanilla protein powder to the oat mixture for a post‑workout snack. The protein powder blends well with the other ingredients, turning the balls into a nutritious treat that fuels your muscles.
Storing and Bringing It Back to Life
Fridge Storage
Keep the balls in an airtight container at room temperature for up to a week. The airtight seal prevents moisture from seeping in, preserving the crunch of the oats and the richness of the peanut butter. When you’re ready to enjoy, let them sit at room temperature for a few minutes to soften slightly.
Freezer Friendly
Freeze the balls in a single layer on a parchment‑lined tray for up to three months. Once frozen, transfer them to a resealable freezer bag for longer storage. When you want a quick snack, pop a ball straight from the freezer into the microwave for 10–15 seconds to warm it up.
Best Reheating Method
If the balls feel too firm after refrigeration or freezing, gently warm them in a microwave on a low setting for 5–10 seconds. Add a splash of water or a tiny pinch of coconut oil before reheating; this steams the ball back to perfection, restoring its creamy interior without melting the chocolate.