The first time I attempted to make Samoas at home, my kitchen looked like a caramel crime scene. Sticky sauce had cemented itself to every surface, the oven was smoking, and I'd somehow managed to burn coconut while simultaneously undercooking the shortbread. My roommate walked in, took one look at the disaster, and asked if I'd been filming a cooking fail compilation. That glorious mess led to these truffles — a no-bake version that captures everything we love about the iconic Girl Scout cookie without the drama, the dishes, or the therapy-inducing cleanup.
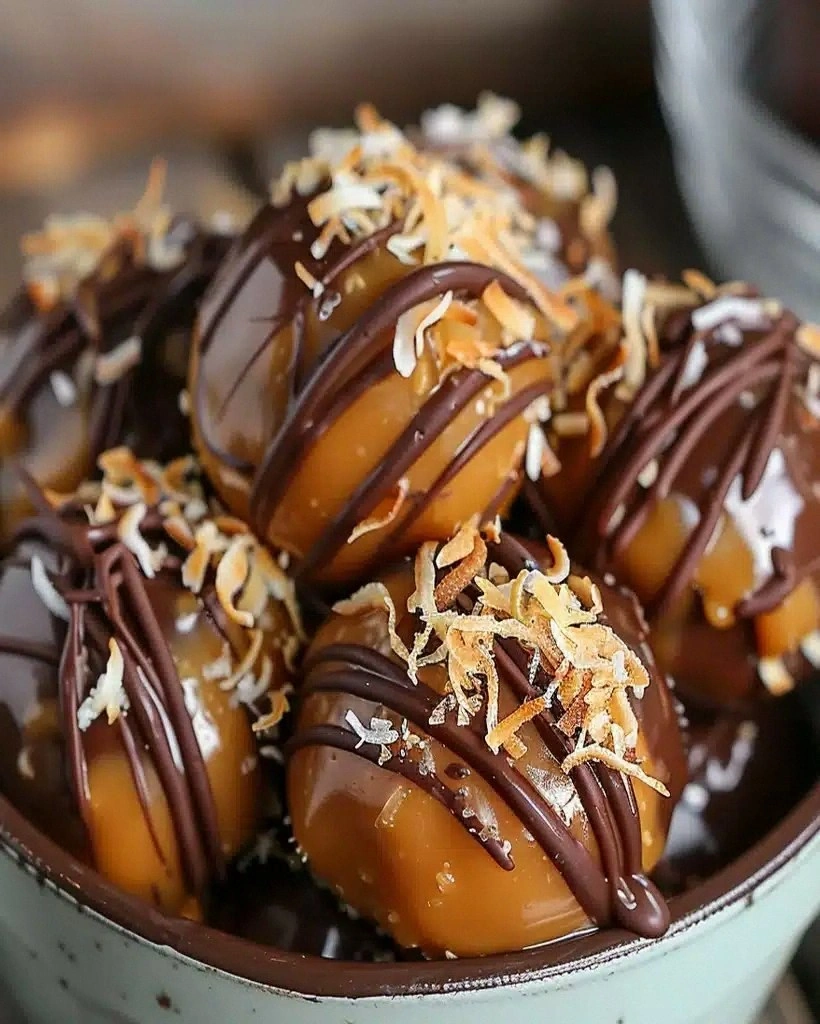
Picture this instead: You're standing in your kitchen, the afternoon light streaming through the window, and in your hands is a perfect sphere of caramel-kissed heaven. The chocolate coating snaps beneath your teeth, giving way to a center that's pure Samoa essence — toasty coconut, buttery caramel, that hint of vanilla that makes everything taste like childhood. No flour clouds, no burnt edges, no praying to the pastry gods. Just you, a bowl, and the kind of dessert that makes grown adults close their eyes and sigh.
I've been perfecting this recipe for three years now, testing it on coworkers, family, and that one friend who claims she "doesn't really like sweets" (she ate six of these in one sitting, by the way). The breakthrough came when I realized we didn't need to replicate the cookie — we needed to bottle its soul. These truffles are the distillation of every reason Samoas sell out faster than concert tickets: that perfect balance of caramel sweetness against bitter chocolate, the way coconut provides both texture and tropical aroma, how the whole thing feels indulgent but not overwhelming.
The best part? You'll look like a pastry wizard when really, you just stirred some stuff in a bowl and rolled it into balls. I dare you to taste one and not immediately start planning when you can make them again without seeming obsessed. Let me walk you through every single step — by the end, you'll wonder how you ever made it any other way.
What Makes This Version Stand Out
No Oven Required: While everyone else is sweating over a hot stove, you'll be casually rolling these beauties between your palms like you're making snowballs from paradise. The absence of baking means the coconut stays perfectly toasty, not burnt, and the caramel maintains that dreamy, chewy texture that makes your teeth stick together in the most satisfying way.
Texture That Makes People Talk: Most truffle recipes go for smooth and creamy, but these have personality. The toasted coconut provides little crispy interruptions, like finding treasure in a chocolate cave. Graham cracker crumbs give just enough structure to keep everything together while still melting on your tongue.
Weekend Project Speed: From pantry to plate in under thirty minutes, including the time you'll spend "taste-testing" the caramel. Compare that to the three-hour ordeal of making Samoa cookies from scratch, and suddenly you've got your Saturday afternoon back.
Indulgence Without the Sugar Crash: By using condensed milk instead of corn syrup-heavy caramels, these hit that sweet spot of satisfaction without the spike and crash. You can actually taste the coconut and chocolate instead of just sugar.
Crowd Psychology: Bring these to any gathering and watch what happens. People cluster around them like they're sharing state secrets. "How did you get them so perfectly round?" "Is that real caramel?" "Can I have the recipe?" You'll become that person — the one who brings the thing everyone talks about.
Make-Ahead Magic: These actually improve after a day in the fridge. The flavors meld, the chocolate develops that perfect snap, and you become the kind of person who has fancy truffles ready for unexpected guests. Future you is already thanking present you.
Alright, let's break down exactly what goes into this masterpiece...
Inside the Ingredient List
The Flavor Foundation
Graham cracker crumbs aren't just filler — they're the backbone that gives these truffles their cookie-like soul. When you mix them with the caramel, they absorb just enough moisture to become tender while maintaining enough structure to keep your truffle from collapsing into a puddle. Skip them, and you've got coconut candy, not a truffle. If you're in a pinch, vanilla wafer crumbs work, but they'll make the whole thing taste like banana pudding's fancy cousin.
The toasted coconut is where most people mess up. They either don't toast it enough (raw coconut in candy tastes like sunscreen) or they walk away and end up with bitter brown flakes. You're looking for golden edges and a nutty aroma that makes you want to eat it straight from the pan. Unsweetened shredded coconut is non-negotiable here — sweetened will make your teeth ache and throw off the entire balance.
The Sweet Science
Good caramel sauce is the difference between "these are good" and "I need to sit down." Skip the ice cream topping stuff — you want the real deal that lists cream and butter as ingredients, not high fructose corn syrup. The caramel needs to be fluid enough to mix but thick enough that your truffles don't weep sugar. If yours is too thin, simmer it for two minutes. Too thick? A tablespoon of cream thins it perfectly.
Condensed milk is your secret weapon. It adds that fudgy richness that makes people close their eyes when they taste it. Evaporated milk won't work — it's too thin and not sweet enough. Sweetened condensed milk is what you're after, the stuff that comes in a can and looks like liquid gold.
The Chocolate Situation
Melted chocolate for coating needs to be chocolate you actually want to eat. Those cheap chips will work in a pinch, but they taste like wax. Go for a decent bar — even grocery store bittersweet will elevate these from good to memorable. The key is tempering patience: melt it slowly, stir constantly, and resist the urge to rush. Chocolate waits for no one, but it rewards those who treat it right.
The Finishing Touches
Vanilla extract seems minor until you leave it out. Suddenly everything tastes flat, like a joke without a punchline. Use the real stuff — artificial vanilla has a chemical edge that competes with the caramel. Just half a teaspoon is enough to round all the sharp corners and make everything taste like it cost way more than it did.
Extra toasted coconut for garnish isn't just pretty — it's functional. Those little golden flakes tell your brain what's coming, like a movie trailer for your mouth. Plus, they add one more layer of texture that makes people pause mid-chew and say "wait, what's that?"
Everything's prepped? Good. Let's get into the real action...
The Method — Step by Step
- Start with your coconut in a dry skillet over medium heat. This is where most people rush and regret it. Stand there, wooden spoon in hand, and watch it like you're guarding treasure. In about three minutes, it'll start smelling like vacation — that's your cue to start stirring. Another minute and the edges turn golden. One more minute and you've got perfection. Dump it onto a plate immediately or it'll keep cooking and turn bitter.
- While the coconut cools, grab a large bowl and channel your inner kid making mud pies. Graham cracker crumbs go in first — don't pack them down, just let them be fluffy. Add your cooled coconut and use your fingers to mix. Yes, fingers. A spoon can't distribute the coconut evenly, and you'll miss clumps that'll throw off your texture.
- Time for the liquid gold. Pour in your caramel sauce and condensed milk together — don't try to mix them separately first. The caramel will resist the milk like they're having a turf war, but keep stirring. You're looking for a mixture that looks like wet sand at the beach, the kind that holds together when you squeeze it but doesn't ooze between your fingers.
- Vanilla goes in last, like the final brushstroke on a painting. Mix just until combined — over-mixing makes the coconut release oils and things get greasy. The mixture should smell like a candy store and feel like play-dough that's been left out for an hour.
- Now comes the meditative part. Scoop out heaping tablespoons and roll them between your palms like you're making meatballs from heaven. The mixture should feel cool and slightly tacky. If it sticks to your hands, chill it for ten minutes. You want golf-ball-sized truffles — big enough to feel substantial, small enough that people don't feel guilty eating three.
- Line them up on a parchment-lined plate like little soldiers. They need a chill session in the fridge for at least twenty minutes. This isn't optional — warm truffles will melt the chocolate coating and you'll end up with a mess that looks like abstract art. Use this time to clean up and melt your chocolate.
- Chocolate melting is where patience pays off. Chop your chocolate into almond-sized pieces for even melting. Microwave on 50% power for thirty seconds, stir, repeat. When it's mostly melted with just a few chunks, stop heating and keep stirring. The residual heat will finish the job perfectly.
- The dipping dance: Drop a chilled truffle into the chocolate, roll it around with a fork, then lift it out and tap the fork on the bowl's edge. Three taps — no more, no less. Too much tapping and the chocolate gets thick and gloppy. Place it back on the parchment and immediately sprinkle with toasted coconut before the chocolate sets.
- The final drizzle is pure theater. Warm a few tablespoons of caramel until it's pourable but not hot. Transfer to a plastic bag, snip the tiniest corner, and zigzag across your truffles like you're Jackson Pollock with a sweet tooth. Work fast — the caramel sets quickly on cold chocolate.
That's it — you did it. But hold on, I've got a few more tricks that'll take this to another level...
Insider Tricks for Flawless Results
The Temperature Rule Nobody Follows
Room temperature ingredients aren't just baking snobbery — they're the difference between truffles that hold together and ones that crumble like your willpower at midnight. Cold caramel won't mix evenly, leaving you with pockets of pure sugar and other sections that taste like coconut and disappointment. Let everything sit out for twenty minutes before you start. Your future self, the one proudly presenting perfect truffles, will thank you.
Why Your Nose Knows Best
Most people rely on timers for toasting coconut, but your nose is more accurate than any clock. When the aroma shifts from subtle to "I need to eat this now," you're thirty seconds from perfect. Walk away and you'll come back to bitter disappointment. Stay and you'll catch the sweet spot where every flake is golden and none are burnt. I've tested this theory dozens of times — your nose never lies, but your timer doesn't account for pan hot spots or coconut moisture.
The 5-Minute Rest That Changes Everything
After mixing but before rolling, let your mixture rest for exactly five minutes. During this time, the graham crackers absorb moisture and everything binds together properly. Skip this step and your truffles will crack when you dip them. A friend tried rushing this once — we spent twenty minutes patching chocolate cracks with more chocolate, ending up with lumpy meteorites instead of smooth planets. Five minutes of patience saves twenty minutes of frustration.
The Chocolate Quality Equation
Here's the truth: you can make these with cheap chocolate and they'll still disappear. But use decent chocolate and people will remember them next month, next year, they'll ask you to bring "those amazing things" to every gathering. The upgrade from chips to bar chocolate costs maybe two dollars but multiplies the perceived effort by ten. It's the culinary equivalent of wearing a tailored shirt — same you, entirely different impression.
Storage Psychology
Hide these in the back of your fridge, behind the leftovers nobody wants. Not because you're selfish, but because they'll taste better tomorrow. The flavors meld, the chocolate develops that perfect snap, and the caramel softens slightly. I always make a double batch — one for sharing, one for discovering in three days when you need a win. Future you deserves nice things.
Creative Twists and Variations
This recipe is a playground. Here are some of my favorite ways to switch things up:
The Dark Horse
Swap milk chocolate for 70% dark and add a pinch of flaky salt to the caramel drizzle. Suddenly these go from crowd-pleaser to sophisticated. The bitter chocolate makes the caramel taste more complex, like you know secrets about flavor that others don't. My wine-snob uncle, who claims to dislike "kid candy," ate eight of these at Christmas dinner.
The Tropical Vacation
Replace half the coconut with toasted macadamia nuts, finely chopped. Add a teaspoon of coconut extract to the mixture and use white chocolate for coating. You'll think you're in Hawaii until you remember you're standing in your kitchen in February. These are dangerous — they disappear faster than vacation days.
The Breakfast Rebel
Add a tablespoon of espresso powder to the graham cracker crumbs and use coffee-infused chocolate for coating. The bitterness balances the sweet, creating something that tastes like your morning coffee and your dessert had a beautiful baby. I bring these to brunch and watch people try to justify eating chocolate for breakfast.
The Holiday Spirit
Peppermint extract instead of vanilla, crushed candy canes mixed into the coating, and white chocolate drizzle for that candy-cane aesthetic. These taste like December feels — cozy and bright at the same time. I make them for holiday parties and people lose their minds over the familiar flavors in a new format.
The Peanut Butter Plot Twist
Replace two tablespoons of caramel with smooth peanut butter. The peanut butter adds richness and makes the whole thing taste like a Samoa met a peanut butter cup at a party and decided to move in together. Use semi-sweet chocolate for coating and watch them vanish from the plate like magic.
The S'mores Mashup
Mix in crushed graham crackers on top of the crumbs, add mini marshmallow pieces, and use milk chocolate with a few white chocolate streaks. It's summer camp meets Girl Scout cookies in the best possible way. These are messy in the most glorious, sticky-fingered, can't-stop-eating-them way.
Storing and Bringing It Back to Life
Fridge Storage
These keep for up to a week in an airtight container, though they've never lasted more than three days in my house. Layer them between parchment paper or they'll stick together into one giant truffle blob. Not that this is a tragedy — break off chunks and call it "rustic." The chocolate might bloom (get white spots) but it doesn't affect the taste, just the appearance. If you're gifting them, make them the day before for peak prettiness.
Freezer Friendly
Freeze them on a tray first, then transfer to a bag or container. They'll keep for two months, though honestly, if you need to freeze candy to keep from eating it, we should talk about your life choices. Thaw in the fridge overnight or eat them frozen for a crunchy treat that tastes like ice cream bon bons. The chocolate coating might crack when frozen, but that just creates more surface area for caramel drizzle.
Best Reheating Method
These don't need reheating, but if your chocolate has bloomed or you want that just-dipped shine back, here's the trick: hold them over a pot of simmering water for ten seconds, just enough to warm the surface. Not in the water, just above it. The chocolate will bloom back to glossy perfection. Add a fresh caramel drizzle and they'll look like you just made them.