A vibrant, tart‑sweet masterpiece that captures the essence of spring in every buttery bite.
I still remember the first time I tasted a slice of strawberry rhubarb pie at my grandmother’s kitchen, the way the fragrant aroma of fresh strawberries mingled with the tangy bite of rhubarb, all tucked beneath a buttery lattice that crackled under my fork. It was a summer afternoon, the garden buzzing with bees, and that simple, rustic dessert felt like a celebration of the season’s bounty. From that moment, I was determined to recreate that magic in my own home.
This pie hails from the classic American tradition of pairing sweet strawberries with the tartness of rhubarb—a marriage that dates back to the early 20th century when home cooks sought to stretch limited sugar supplies by balancing it with naturally tart vegetables. The lattice top, a hallmark of homestyle pies, not only adds visual intrigue but also allows steam to escape, ensuring a perfectly set filling.
In this guide, I’ll walk you through every step, from making a flaky, melt‑in‑your‑mouth crust to achieving a glossy, ruby‑red filling that balances sweet and sour with precision. You’ll learn the secrets behind a glossy glaze, the timing for a golden lattice, and how to adjust the recipe for any number of guests.
So preheat your oven, roll up your sleeves, and let’s bring a slice of sunshine to the table together!
🌟 Why This Recipe Will Captivate You
Whether you’re a seasoned baker or a weekend kitchen explorer, this pie offers something truly special.
- ✨ Perfect Balance of Sweet and Tart: The natural acidity of rhubarb tempers the sweetness of strawberries, creating a harmonious flavor that keeps your palate intrigued bite after bite.
- ✨ Fool‑Proof Flaky Crust: Using a chilled butter‑cutting method guarantees a tender, layered crust without the need for a pastry blender or food processor.
- ✨ Eye‑Catching Lattice Design: The interwoven strips not only look stunning on a serving platter but also allow steam to escape, preventing a soggy bottom.
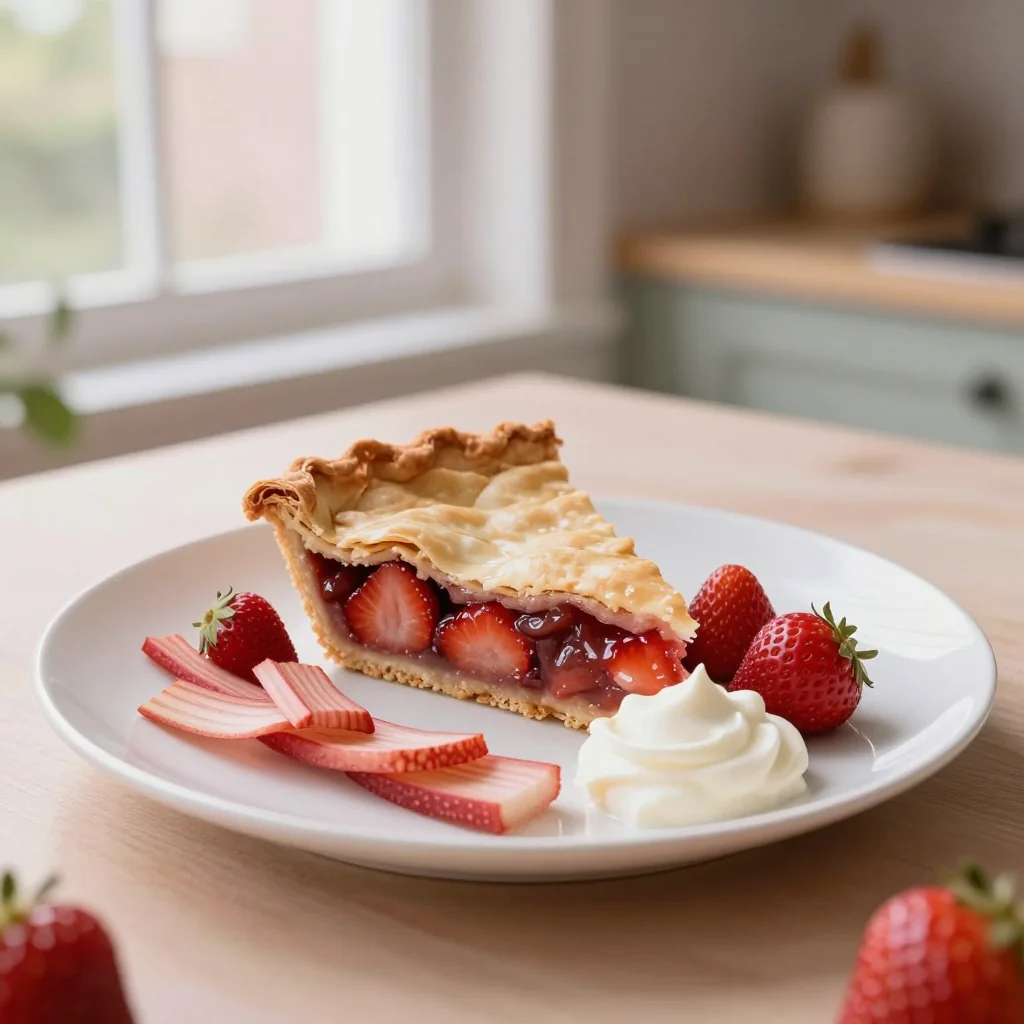
- ✨ Versatile Serving Options: Serve it warm with a scoop of vanilla ice cream, or let it cool and pair with a dollop of lightly sweetened whipped cream for a refined finish.
- ✨ Seasonal Flexibility: Though perfect for spring, the pie stores beautifully, making it a delightful treat throughout the year.
- ✨ Nutrient‑Rich Ingredients: Strawberries provide vitamin C and antioxidants, while rhubarb adds fiber and potassium, giving your dessert a subtle health boost.
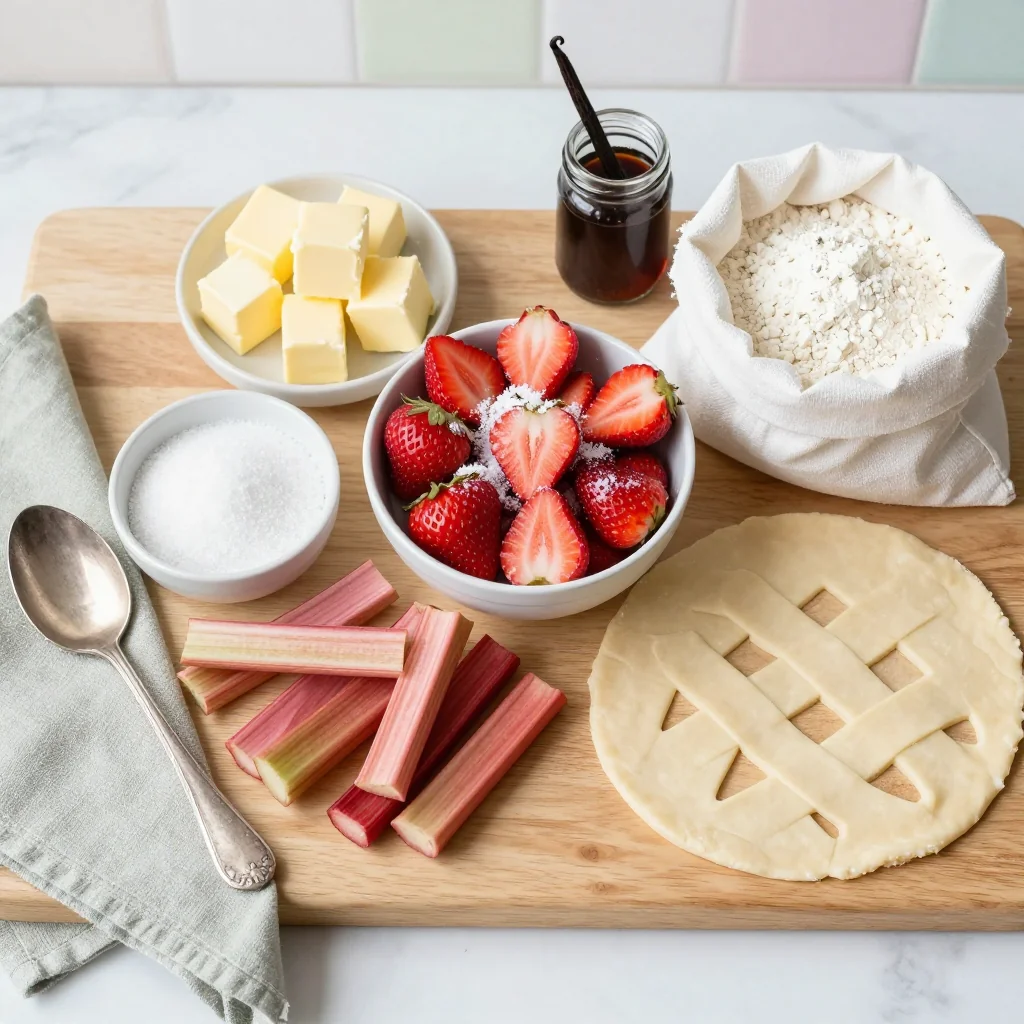
🥗 Ingredients
📝 Complete Ingredient List
For the Crust:
For the Filling:
For the Glaze:
🔍 Focus on Key Ingredients
Strawberries
Strawberries bring natural sweetness, vibrant color, and a delicate fragrance. Choose berries that are fully red, firm to the touch, and fragrant when sniffed. If you can, opt for locally grown, peak‑season strawberries; they contain more sugars and less water, resulting in a richer filling that doesn’t become watery during baking.
Rhubarb
Rhubarb’s tartness is the perfect counterpoint to the strawberries. Look for stalks that are crisp, bright pink to deep red, and free of blemishes. Trim the ends and discard any woody fibers. The natural acidity also helps the filling set without relying heavily on added thickeners.
Unsalted Butter
Butter is the soul of a flaky crust. Using unsalted butter lets you control the salt level precisely. Keep the butter cold—cut it into small cubes and chill it again before mixing. The cold fat creates steam pockets during baking, which lift the layers into a tender, airy texture.
🔄 Quick Substitutions
| If you don’t have... | Use instead... |
|---|---|
| All‑purpose flour | Pastry flour (for an even lighter crust) |
| Unsalted butter | Salted butter (reduce added salt by ½ tsp) |
| Cornstarch | All‑purpose flour (use 3 tbsp) |
👨🍳 Step‑by‑Step Instructions
Follow these detailed phases to achieve a flawless lattice‑topped pie that looks as good as it tastes.
📋 Phase 1: Preparation & Mise en Place
Gather, measure, and prep all components before the oven heats.
Prepare the Pie Crust
In a large bowl, whisk together the flour, salt, and sugar. Add the cold butter cubes and, using a pastry cutter or two forks, cut the butter into the flour until the mixture resembles coarse crumbs with pea‑size pieces of butter remaining. Drizzle in ice water, one tablespoon at a time, mixing gently with a fork until the dough just comes together. Form the dough into a disk, wrap in plastic, and refrigerate for at least 30 minutes.
Prep the Fruit Filling
Rinse strawberries, hull, and slice them into ½‑inch pieces. Trim rhubarb stalks, discard the leaves, and cut the stalks into ½‑inch chunks. In a mixing bowl, combine the fruit with granulated sugar, cornstarch, lemon juice, vanilla extract, and a pinch of salt. Toss gently to coat evenly; the cornstarch will absorb excess juices during baking, preventing a runny center.
🔥 Phase 2: Assembly & Baking
Create the lattice and bake to golden perfection.
Roll Out the Bottom Crust
On a lightly floured surface, roll the chilled dough into a 12‑inch circle, about ¼‑inch thick. Gently transfer it to a 9‑inch pie dish, easing it into place without stretching. Trim excess dough, leaving a 1‑inch overhang. Crimp the edges decoratively, then chill the crust while you preheat the oven to 200 °C (390 °F).
Fill the Crust
Spoon the fruit mixture into the chilled crust, spreading it evenly. The fruit should come up about ½‑inch below the edge of the crust to allow space for the lattice.
Make the Lattice Top
Divide the remaining dough into two equal portions. Roll each portion into a thin sheet (about ⅛‑inch thick). Using a sharp knife or pizza cutter, cut strips roughly 1‑inch wide. Lay the strips over the filling in a criss‑cross pattern, weaving them to create a decorative lattice. Trim any overhanging ends and tuck them under the edge of the bottom crust.
Apply Egg Wash
In a small bowl, whisk together the beaten egg and milk. Brush the lattice lightly with the egg wash; this will give the top a glossy, golden hue as it bakes.
Bake the Pie
Place the pie on the middle rack and bake for 20 minutes at 200 °C. Reduce the temperature to 180 °C (350 °F) and continue baking for another 25‑30 minutes, or until the lattice is deep golden brown and the filling bubbles vigorously around the edges.
✨ Phase 3: Finishing & Serving
Cool, garnish, and enjoy.
Cool the Pie
Remove the pie from the oven and allow it to cool on a wire rack for at least 45 minutes. This resting period lets the filling set, making slicing easier and preventing the crust from becoming soggy.
Garnish (Optional)
Lightly dust the top with powdered sugar or drizzle a thin ribbon of melted white chocolate for an extra visual pop. A few fresh mint leaves add a refreshing contrast to the sweet‑tart profile.
Serve
Slice with a sharp, warm knife and serve warm with a scoop of vanilla bean ice cream or a dollop of lightly sweetened whipped cream. The contrast of hot pie and cold ice cream creates a delightful temperature play.
💡 Expert Tips & Tricks
🛒 Choosing the Best Ingredients
Look for strawberries that are fully red, fragrant, and firm. Avoid any with white or green patches, as they indicate under‑ripeness. For rhubarb, select stalks that are bright pink to deep red; the color correlates with flavor intensity. Trim the ends cleanly and discard any fibrous or wilted pieces. When buying butter, choose a high‑fat European style for richer flavor and better lamination.
🔪 Preparation Techniques
Keep all your tools—mixing bowls, rolling pin, and pastry cutter—chilled. This prevents the butter from melting prematurely. When rolling the dough, use gentle, even pressure and rotate the sheet often to avoid sticking. For the lattice, a quick “over‑and‑under” method ensures even spacing without tearing the strips.
🌡️ Mastering the Baking Process
Begin baking at a high temperature (200 °C) to set the crust quickly, then lower the heat to finish cooking the filling evenly. If the lattice starts to darken too fast, loosely cover the pie with foil to prevent burning while the filling continues to bubble.
🍽️ Presentation & Service
Use a sharp, warm knife dipped in hot water to cut clean slices—this reduces crumbling. Serve each slice on a white plate to let the vibrant colors shine, and add a small scoop of ice cream on the side for a classic contrast.
🏆 Pro Tips
Elevate this humble pie to a restaurant‑quality masterpiece with these professional insights.
- 🎯 Use a “Blind‑Bake” Technique for the Bottom Crust: Line the crust with parchment and fill with pie weights or dried beans. Bake for 12‑15 minutes before adding the filling. This prevents sogginess and ensures a crisp base.
- 🎯 Incorporate a Touch of Almond Extract: Adding ½ tsp of almond extract to the filling deepens the flavor profile, complementing both strawberry sweetness and rhubarb tartness.
- 🎯 Chill the Assembled Pie Before Baking: Refrigerate the filled, unbaked pie for 20 minutes. This firms the butter in the crust, reducing shrinkage and promoting a flakier texture.
- 🎯 Use a Thermometer to Check Doneness: The internal temperature of the filling should reach 95 °C (203 °F). This ensures the cornstarch has fully gelatinized, giving a stable set.
- 🎯 Brush the Lattice with a Butter‑Sugar Glaze: Melt 1 tbsp butter with 1 tsp sugar, brush on the lattice after the first bake for added shine and a subtle caramel note.
- 🎯 Finish with a Light Dusting of Sea Salt Flakes: A pinch of flaky sea salt right before serving amplifies the sweet‑tart contrast and adds a sophisticated finish.
“A perfect pie is a balance of technique, quality ingredients, and love. When those three meet, the result is unforgettable.” — Thomas Keller
🔄 Variations & Adaptations
This pie is a canvas for creativity. Below are several ways to tailor it to dietary needs, flavor preferences, or seasonal twists.
🥬 Vegetarian / Vegan Version
Replace butter with a 1:1 mixture of cold coconut oil and vegan margarine for a flaky crust. Use maple syrup (⅓ cup) instead of granulated sugar, and substitute the egg wash with a mixture of plant‑based milk and a dash of agave syrup. The result is a fully vegan pie that retains the buttery layers and glossy top.
- Vegan butter substitute – 226 g cold coconut oil + vegan margarine
- Maple syrup – ⅓ cup (80 ml) for sweetening
🌶️ Flavor Variations
Play with spices and complementary fruits to reinvent the classic profile.
Spicy Kick:
Add ¼ tsp of ground ginger and a pinch of cayenne pepper to the filling. The warmth of ginger pairs beautifully with rhubarb’s tang, while cayenne adds a subtle heat that awakens the palate.
Mediterranean Twist:
Mix in ¼ cup of chopped fresh mint and a drizzle of orange‑flower honey into the fruit mixture. The mint brightens the flavor, and the honey adds a floral sweetness that complements the berries.
Asian Inspiration:
Incorporate 1 tbsp of toasted sesame oil and 1 tsp of toasted sesame seeds into the filling, then finish with a light drizzle of yuzu glaze after baking for a citrus‑nutty finish.
⚠️ Dietary Adaptations
Gluten‑Free:
Use a 1‑to‑1 gluten‑free flour blend (e.g., rice flour + potato starch + tapioca starch) for the crust, and add 2 tbsp of xanthan gum to mimic elasticity.
Lactose‑Free:
Substitute butter with lactose‑free margarine and use almond milk for the egg wash (mix 1 egg with 1 tbsp almond milk).
Low‑Calorie:
Reduce sugar to ⅔ of the original amount, use a low‑fat pastry crust (half butter, half Greek yogurt), and serve with a dollop of low‑fat Greek yogurt instead of ice cream.
👶 Kid‑Friendly Version
For younger palates, increase the sugar to ½ cup and omit the lemon juice to reduce tartness. Add a sprinkle of colorful sprinkles on the lattice before baking for visual fun. Serve warm with a drizzle of chocolate sauce for an extra treat.
📦 Storage & Reheating
🧊 Conservation
Refrigerator:
- Duration: 4 days
- Recommended container: airtight glass pie dish
- Tip: Cover loosely with foil to prevent the crust from absorbing odors.
Freezer:
- Duration: 2 months
- Method: Freeze the baked, cooled pie (uncovered) on a sheet, then wrap tightly in plastic wrap and foil.
- Defrosting: Transfer to the refrigerator overnight, then reheat as described below.
💡 For best texture, reheat from frozen rather than thawed to avoid sogginess.
♨️ Reheating
🔥 Oven (Recommended):
- Preheat to 175 °C (350 °F).
- Cover the pie loosely with aluminum foil.
- Heat for 15‑20 minutes.
- Remove foil and continue for 5‑7 minutes to crisp the lattice.
⚡ Microwave (Quick):
- Place a slice on a microwave‑safe plate.
- Cover with a microwave‑safe lid.
- Heat on medium power for 45‑60 seconds.
- Check and heat in 15‑second bursts if needed.
🍳 Stovetop:
Gently warm a slice in a non‑stick skillet over low heat, covered, for 3‑4 minutes. This method revives the crust’s crispness without drying the filling.
🍷 Perfect Pairings
🥗 Side Dishes
- Mixed Greens with Balsamic Vinaigrette: The acidity of the vinaigrette balances the sweet‑tart pie, creating a refreshing palate cleanser.
- Light Lemon Ricotta Toast: The creamy ricotta adds richness without overpowering the fruit flavors.
- Fresh Berry Salad: Complement the pie with a medley of blueberries, raspberries, and a drizzle of honey.
🍷 Wine & Beverage Pairings
- Riesling (Off‑dry): Its bright acidity and subtle sweetness echo the pie’s fruit profile.
- Prosecco: Bubbles cleanse the palate and highlight the tartness of rhubarb.
- Non‑Alcoholic Option – Sparkling Apple Cider: Offers a fruity fizz that pairs beautifully with the dessert.
🍰 Complementary Courses
Begin with a light citrus‑infused soup or a crisp arugula salad, then move to the pie for dessert. Finish the meal with a simple vanilla panna cotta or a small serving of almond biscotti to round out the flavors.
❓ Frequently Asked Questions
Q: Can I use frozen strawberries and rhubarb?
Yes, frozen fruit works well, but be sure to thaw and drain them thoroughly before mixing with sugar and cornstarch. Excess moisture can make the filling runny, so pat the fruit dry with paper towels.
Q: How do I prevent the lattice from shrinking?
Keep the dough cold, roll it thinly, and avoid over‑handling. After assembling the lattice, chill the assembled pie for 20 minutes before baking; this firms the butter, reducing shrinkage.
Q: What if I don’t have a pastry cutter?
You can use two forks, a food processor on pulse mode, or even your fingertips—just work quickly to keep the butter from melting. The goal is to achieve pea‑size butter pieces throughout the flour.
Q: My crust turned out soggy—what went wrong?
A soggy crust often results from a wet filling or an under‑baked bottom. Ensure you use enough cornstarch to thicken the juices, blind‑bake the crust for 12‑15 minutes, and bake the pie on the lower rack to promote even heat distribution.
Q: Can I make mini individual pies?
Absolutely! Divide the dough and filling into 4‑inch ramekins or muffin tins. Adjust baking time to 20‑25 minutes at 180 °C, watching for a golden lattice and bubbling filling.
Q: How far in advance can I prepare the pie?
The crust can be prepared and chilled up to 24 hours ahead. The assembled, unbaked pie can be refrigerated for up to 12 hours; just cover loosely with plastic wrap. Bake when ready to serve.
🎉 To Your Oven!
This Strawberry Rhubarb Pie with Lattice Top embodies the joy of seasonal baking—bright, tangy fruit nestled beneath a buttery, golden lattice that crackles with every bite. By following the detailed steps, you’ll master a classic that impresses guests, satisfies sweet cravings, and showcases the perfect harmony of sweet strawberries and tart rhubarb. The recipe’s flexibility lets you adapt it to dietary needs, flavor whims, or even mini‑pie presentations for parties.
I hope you enjoy creating this pie as much as I enjoy sharing it. Remember, the secret ingredient is always a pinch of love and patience. Feel free to leave a comment, share your photos, and let me know how you made it your own!
Have you tried this recipe?
Leave a comment and rating below! Share your photos on Instagram with #StrawberryRhubarbPie to be featured.
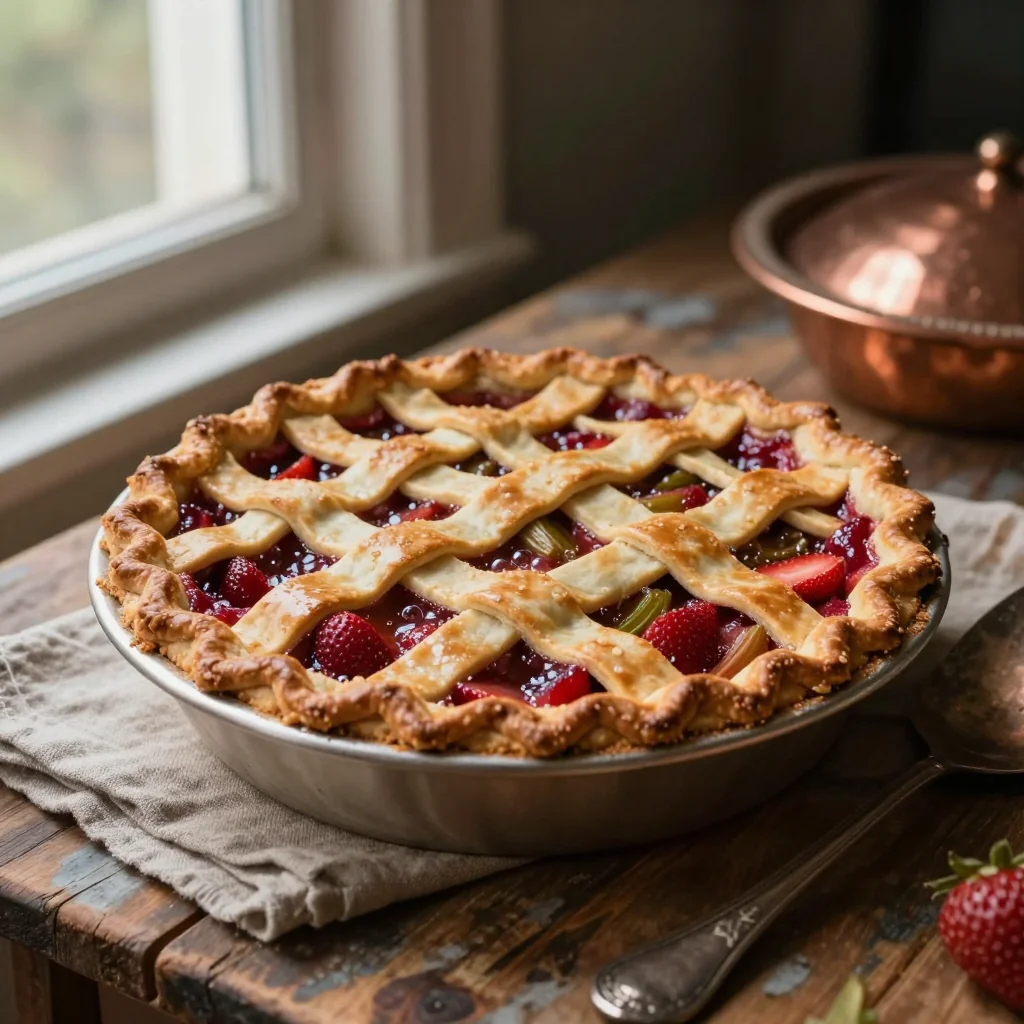
Strawberry Rhubarb Pie with Lattice Top
A buttery lattice‑topped pie bursting with sweet strawberries and tangy rhubarb.
📝 Ingredients
Crust
Filling
Glaze
👨🍳 Instructions
- 1
Prepare the crust dough and chill for 30 minutes.
- 2
Combine strawberries, rhubarb, sugar, cornstarch, lemon juice, vanilla, and salt.
- 3
Roll out the bottom crust, fit into a 9‑inch pie dish, and chill.
- 4
Fill the crust with the fruit mixture, leaving space for the lattice.
- 5
Roll out the remaining dough, cut strips, and weave a lattice over the filling.
- 6
Brush the lattice with egg‑milk wash.
- 7
Bake at 200 °C for 20 min, then reduce to 180 °C for 25‑30 min.
- 8
Cool 45 min, optionally dust with powdered sugar.
- 9
Slice with a warm knife and serve with ice cream.
- 10
Enjoy and share your creation!
🥗 Nutritional Information (per serving)
*Nutritional values are estimates based on standard ingredients.